

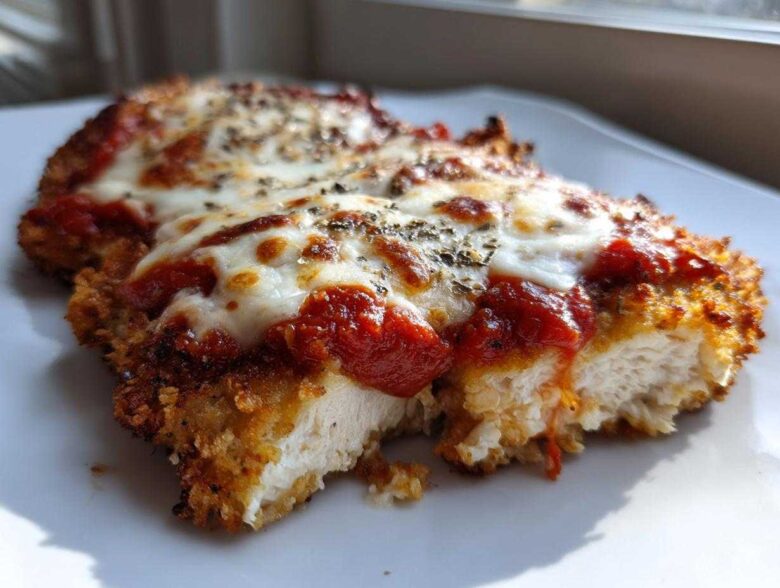
You know those nights? You’re craving that gorgeous, crispy, cheesy Italian experience—the kind that tastes straight out of a bustling restaurant—but the thought of deep frying just makes you want to order takeout instead? Been there, done that! I spent years treating my kitchen like an exam hall, stressing over every golden crust. Thank goodness for Simon, who reminded me that food is supposed to be fun! That shift in perspective gave birth to this absolute gem: the Easy Chicken Parmesan recipe you’re about to meet. It’s restaurant-quality flavor built for your busiest weeknight, proving you don’t have to sacrifice perfection for speed.
This baked version cuts out the mess and frustration but keeps that incredible crispy, cheesy satisfaction. It’s become my go-to when I need a surefire win that tastes like I spent hours fussing. If you’re ready to put down the internal critic and pick up the music for some kitchen dancing, you’re in the right place. You can check out more about our philosophy right here!
Why This Easy Chicken Parmesan Recipe Earns Kitchen Kudos
Honestly, I wouldn’t share this recipe unless it truly delivered on flavor without demanding every minute of your evening. That’s the beauty of this method! It’s designed specifically to give you major applause with minimal effort. Simon always says, “If you feel stressed, the food won’t taste as good!” So, we focus on the wins this recipe brings to the table.
- It’s a genuinely quick chicken parmesan; we’re talking about getting this fabulous Italian comfort food at home on the table fast—under 40 minutes total!
- The prep time is tiny because we skip the messy stovetop frying. Hello, easy chicken dinner idea!
- You get that gorgeous, satisfying crunch. These cheesy chicken cutlets come out perfectly golden brown every single time.
- It’s incredibly family friendly pasta night material, approved by picky eaters and celebrated by adults!
The Secret to Crispy Breaded Chicken Breast Without Frying
Now, about that crunch—you see those gorgeous, textured cutlets on Pinterest, and you think, “Oh no, gotta pan-fry!” Nope! We cheat the system gently here, and I promise it works beautifully. The key is the Panko breadcrumbs. They are naturally lighter and airier than standard breadcrumbs, creating more texture.
But the real trick? We give each cutlet a really good, light brush of olive oil *after* the breading step but *before* it hits the oven. This little bit of fat helps them crisp up and turn golden brown fast in the 400°F heat. It mimics that crispy texture so well, you won’t even miss the skillet. Go ahead, celebrate that smart, easy step!
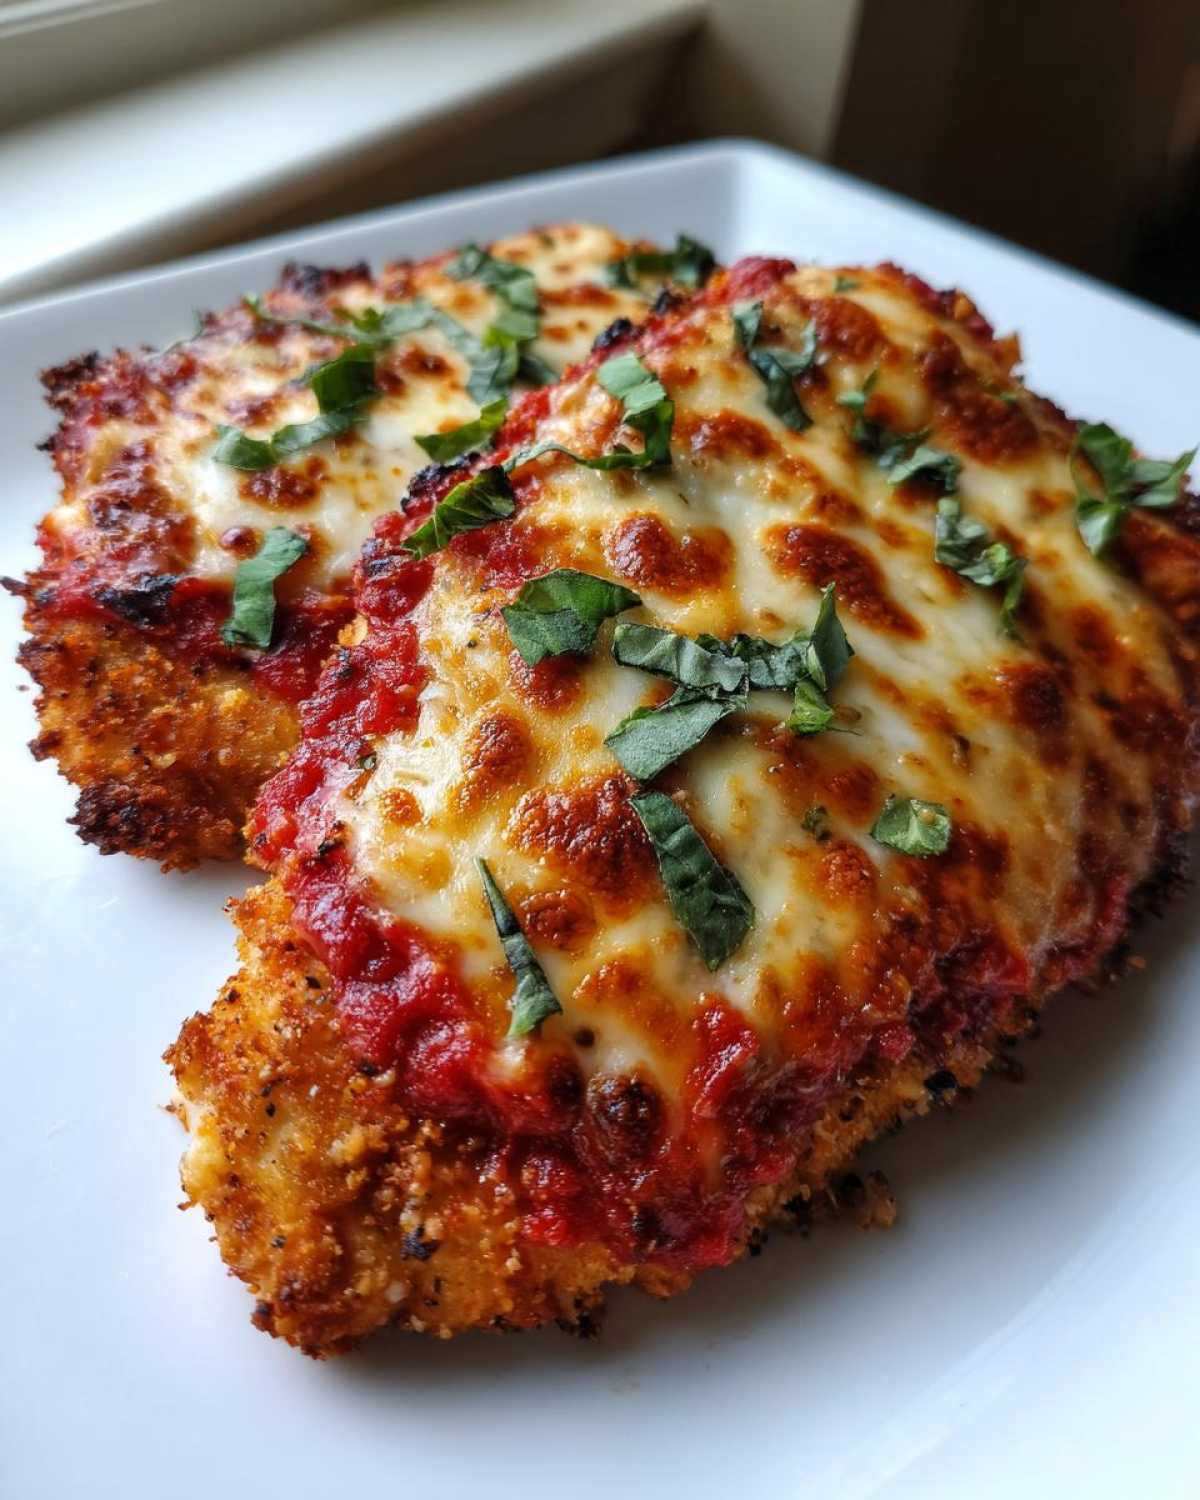
Gathering Ingredients for Your Easy Chicken Parmesan
Okay, I love a recipe that proves you don’t need a grocery cart full of obscure, specialized items to make something truly impressive. For this Easy Chicken Parmesan, we are leaning on pantry staples and using simple ingredients smart! Since we’re baking them, we need to make sure every component contributes maximum flavor. Remember, Simon always says, “Every ingredient deserves its chance to shine!”
Here’s what you need to pull together your shopping list. Pay close attention to the preparation notes—that’s where the magic that avoids soggy chicken lives!
- 4 boneless, skinless chicken breasts, pounded to 1/2-inch thickness (This is non-negotiable for even cooking and quick results!)
- 1 cup all-purpose flour
- 2 large eggs, beaten
- 1 1/2 cups panko breadcrumbs (Trust me, don’t skimp here if you want crunch!)
- 1/2 cup grated Parmesan cheese, plus more for topping (Be generous with that final sprinkle!)
- 1 teaspoon garlic powder
- 1/2 teaspoon dried oregano
- 1/4 teaspoon salt
- 1/4 teaspoon black pepper
- 2 tablespoons olive oil, divided
- 1 1/2 cups marinara sauce (your favorite jarred sauce works great)
- 8 ounces fresh mozzarella cheese, sliced
Ingredient Notes and Smart Substitutions
Because this recipe is naturally simple, the quality of what you put in really matters. You are going to see a huge difference between a bland sauce and a robust one! I highly recommend using the best jarred marinara sauce you can find. If you have a favorite local brand, use that! If you’re making it from scratch, even better, but for our quick weeknight win, a high-quality jar saved my sanity so many times.
Now, about the crunch factor: Panko breadcrumbs are essential for that light texture when baking. If, by some small domestic miracle, you don’t have them, you can substitute with regular dried breadcrumbs, but you might need to up the amount slightly, maybe to 1 3/4 cups, and be extra sure to press those crumbs on firmly. Also, make sure that Parmesan cheese for the coating is freshly grated if possible—it melts better and tastes sharper!
Step-by-Step Instructions for Quick Chicken Parmesan
This is where the magic happens, and trust me, it moves fast! Because we’re baking, this whole process becomes such a streamlined, easy chicken dinner idea. Simon cranks up the music when we hit this stage—this is the fun part!
First things first: Get that oven hot! Preheat your oven to 400 degrees Fahrenheit. I always lightly grease my baking sheet, but if you’re worried about sticking, go ahead and line it with parchment paper. Nobody wants to struggle getting that beautiful cutlet off the pan, right? So, it’s preheated, it’s lined—we’re ready for the breading station!
Setting Up Your Breading Station for Perfect Easy Chicken Parmesan Coating
This step is crucial for that incredible, even crust. Set up three shallow dishes in a row, just like a little assembly line. Dish one holds your flour. Dish two holds your two beaten eggs. And dish three—this is the flavor powerhouse—is where you mix those panko breadcrumbs, your 1/2 cup of Parmesan, garlic powder, oregano, salt, and pepper.
Now, we dredge! Take one chicken cutlet that you’ve already pounded thin. Dip it completely in the flour first, shaking off any powdery excess—we don’t want thick clumps! Then, dunk it right into the egg, letting the extra drip back. Finally, press that piece *firmly* into the panko mixture. Seriously, press it in! I always pat it down with my palm to make sure those panko flakes adhere like glue. Repeat for all four pieces. This firm hand ensures that beautiful coating stays put while baking.
Baking and Melting the Cheese for Cheesy Chicken Cutlets
Once they are fully coated, we give them a light brush of olive oil on both sides—remember, this is what helps them turn golden! Lay them nicely spaced out on your prepared sheet. Pop them into that 400°F oven for 15 minutes. This crucial first bake gets the chicken cooked through.
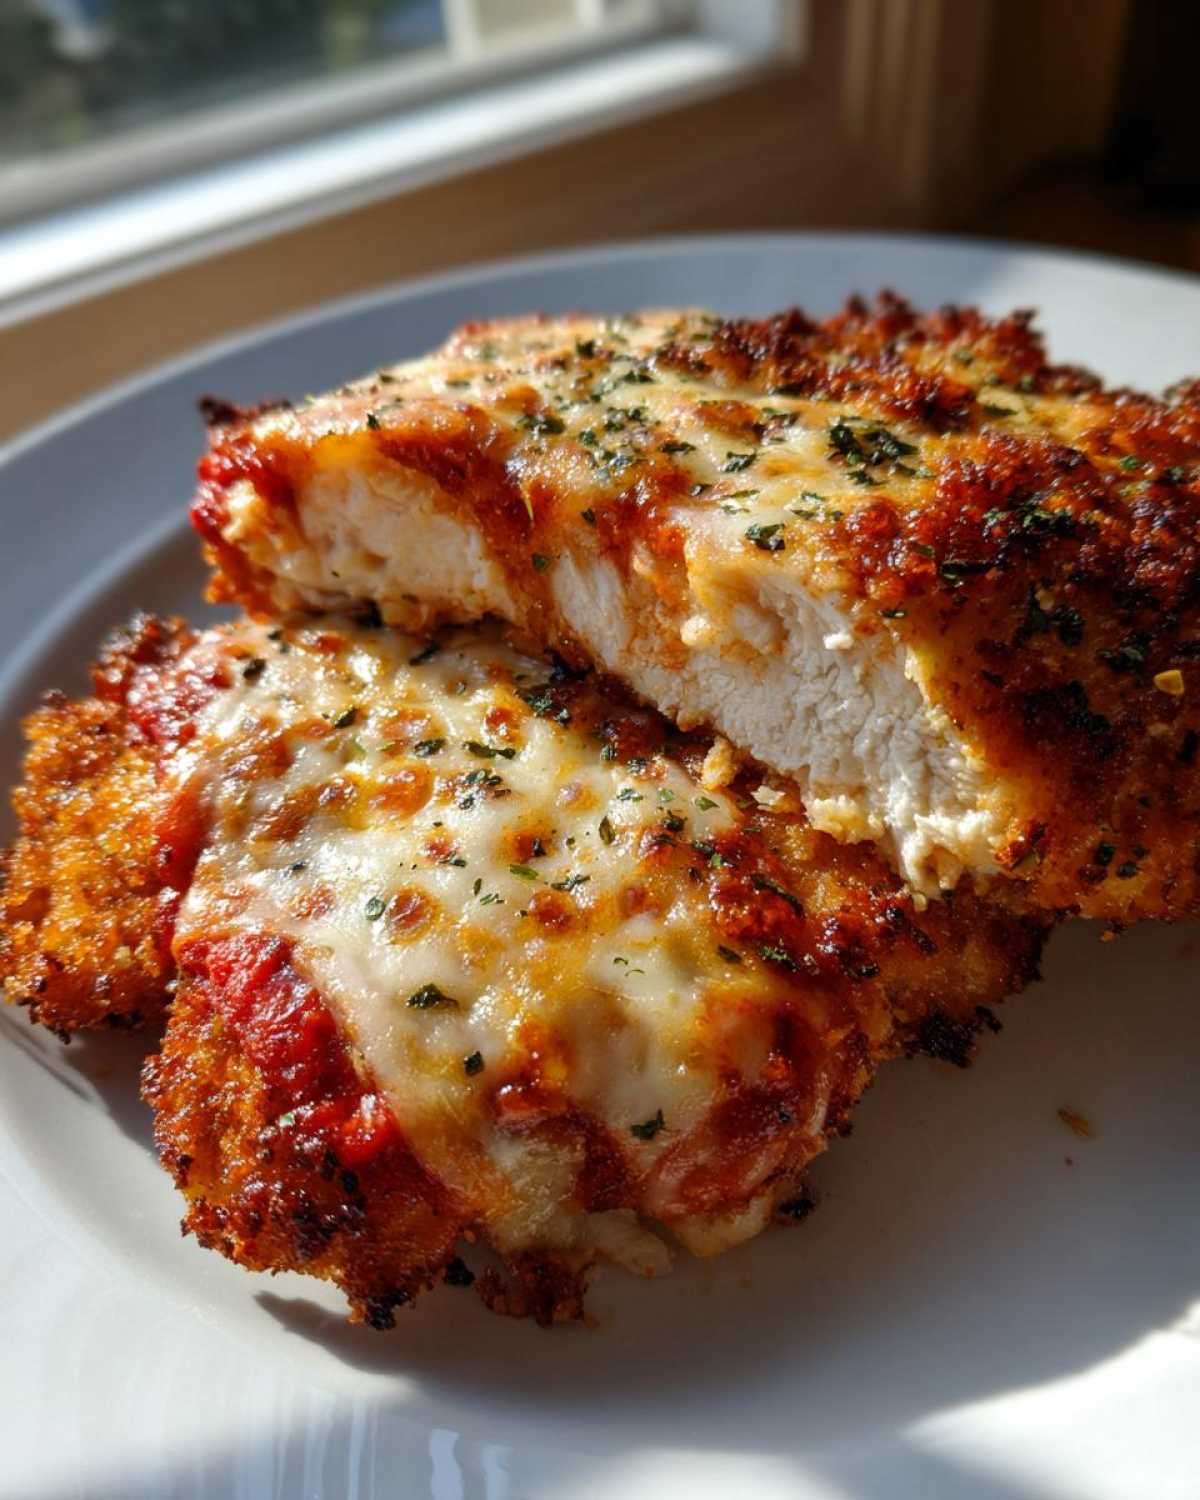
After 15 minutes, pull the pan out—careful, it’s hot! Spoon about three tablespoons of your lovely marinara sauce over each cutlet, then nestle those slices of fresh mozzarella on top, finishing with a final dusting of Parmesan. Back into the oven they go for just 5 to 8 more minutes, until the cheese is gooey, bubbly, and just barely kissed with brown. That’s when you know your cheesy chicken cutlets are perfect. We are aiming for internal temps of 165°F, but seriously, when the cheese looks like that, you can trust your eyes too. Go pour yourself a glass of wine; you earned it!
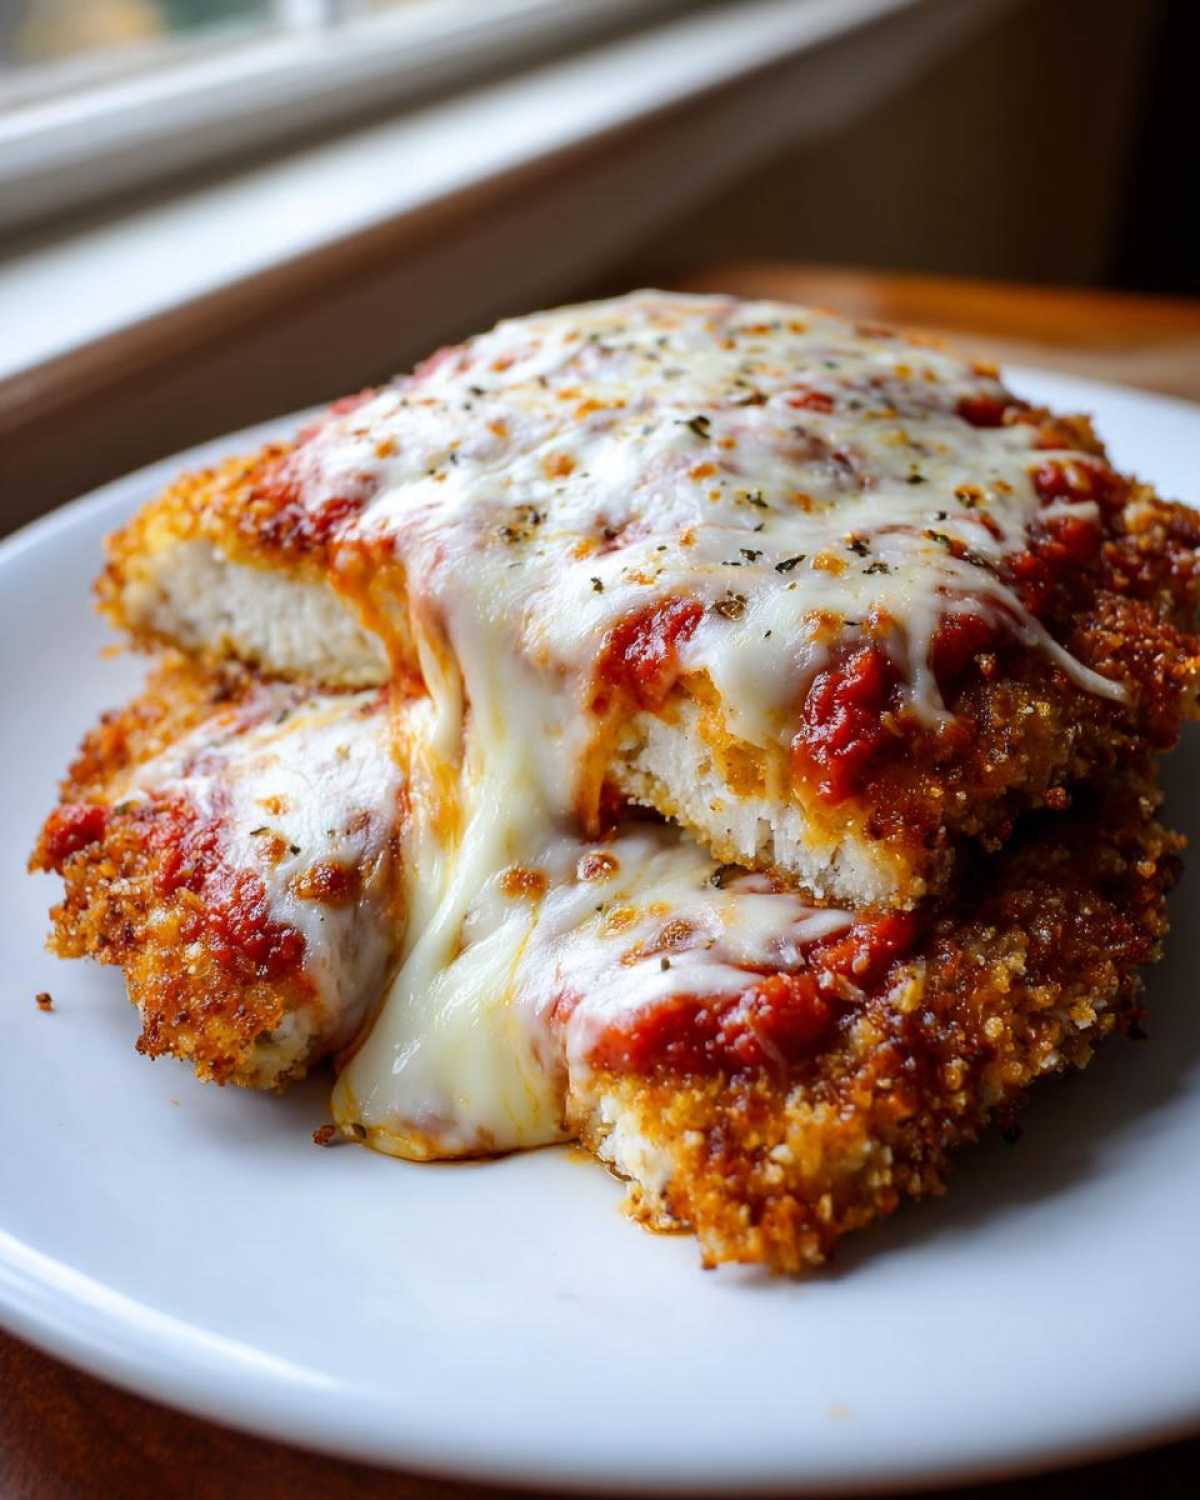
Check out this fantastic Caprese Chicken if you want another speedy baked winner!
Expert Tips for the Best Baked Chicken Parm Recipe
We’ve got a fantastic, easy baked method here, but if you’re like me and sometimes you just need that extra reassurance that the crust is locked in—I have a little secret Simon taught me about boosting the crispiness. Remember, the goal isn’t passing a test; it’s creating a memory, and a crunchy chicken cutlet definitely makes for a happier memory!
Don’t stress if the chicken doesn’t look perfectly golden after the first 15 minutes in the oven; we have backup plans! I always tell people to check the edges, and if they look a little pale, we can easily amp things up before the cheese goes on. This recipe is all about flexibility!
Achieving Golden Edges: The Optional Pan-Fry Boost
If you are craving that extra shatter when you cut into your chicken, here is where you channel your inner short-order cook for two minutes. After the initial 15-minute bake, pull that pan out. Before adding the sauce and cheese, take a clean skillet and heat about 1 tablespoon of oil over medium-high heat. You just want it shimmering a bit.
Carefully transfer your breaded cutlets (just the ones that need help!) directly to that hot skillet. Pan-fry them for about 2 minutes per side, just until you see that beautiful golden crunch developing. Don’t cook them all the way through—remember, they’re going back in the oven to finish cooking with the cheese. This quick sear just locks in that texture. It’s an extra step, sure, but if you’re hosting or just feeling ambitious, it makes all the difference between a nice crispy breaded chicken breast and an *epic* one. Then, top with sauce and cheese and finish baking as usual. You’ll feel like a culinary superstar, I promise! If you want to see what else we’re cooking up that keeps the praise flowing, check out our main blog page!
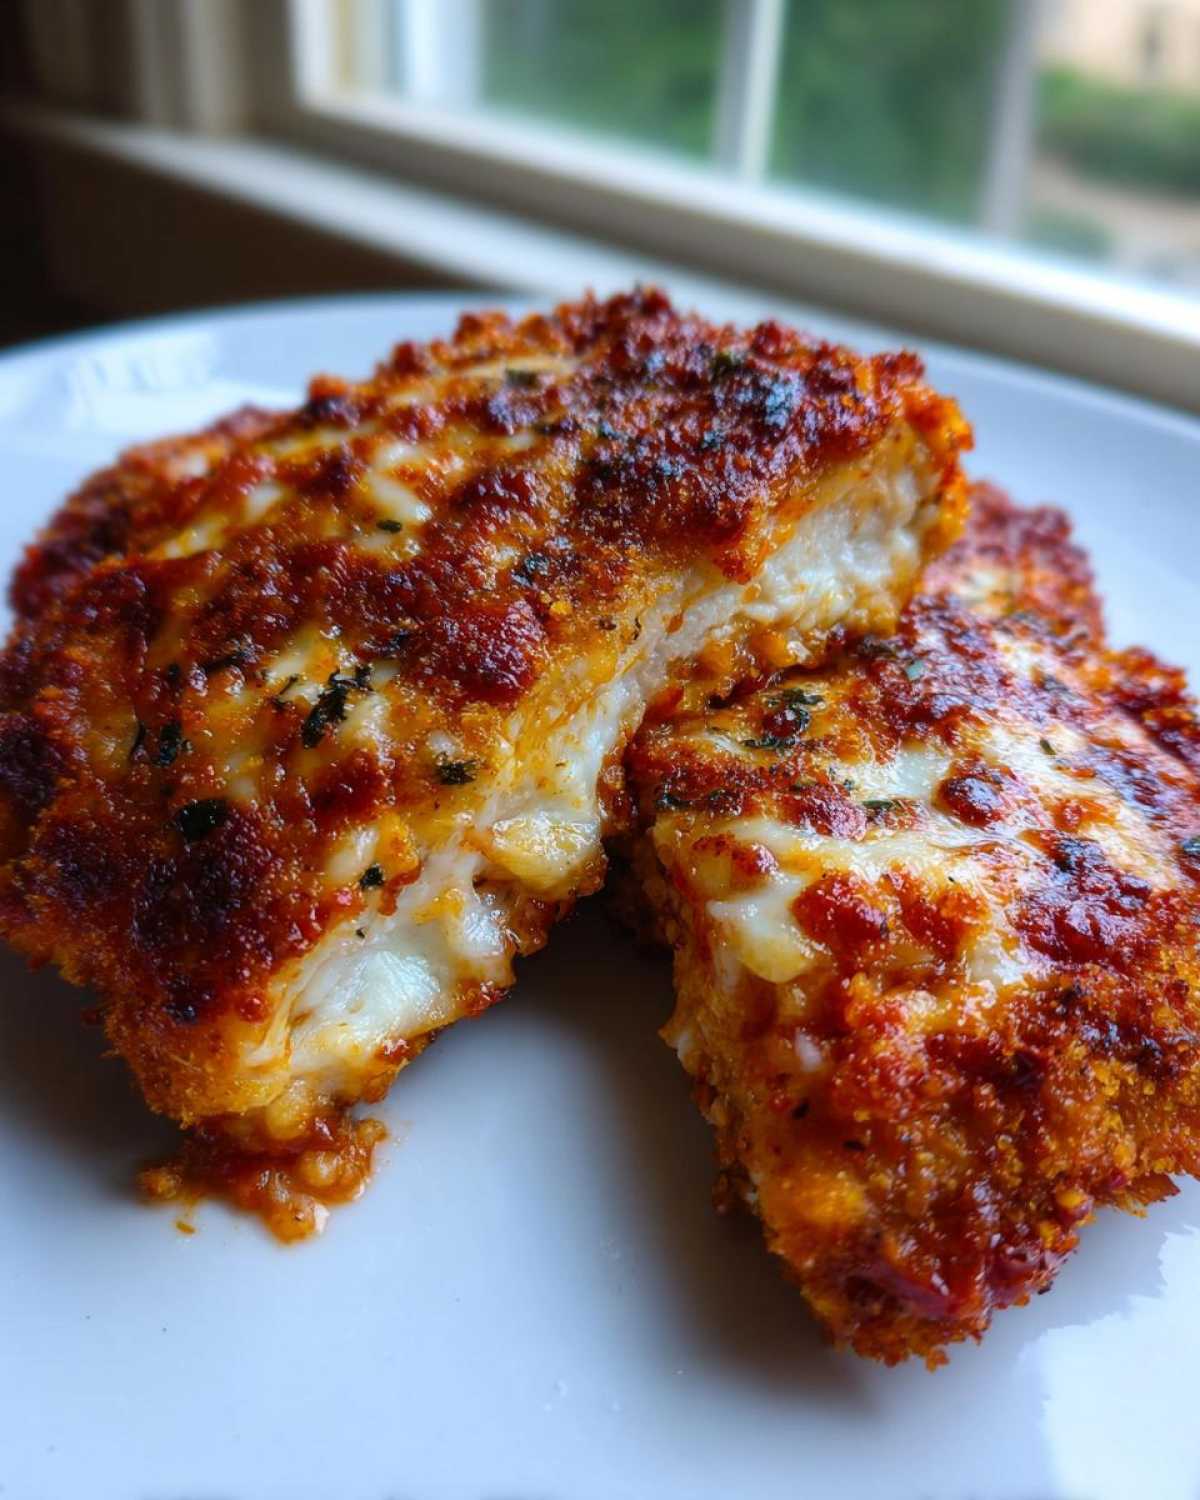
Serving Suggestions for Family Friendly Pasta Night
You’ve done the work, you’ve earned the applause for whipping up this amazing Easy Chicken Parmesan! But now comes the fun part: assembling the rest of the meal. This dish is the ultimate statement piece for any Italian comfort food at home spread. When I serve this, I like to keep the sides simple so the cheesy chicken cutlets really get to shine. Simon doesn’t believe in complicating side dishes when the main event is this delicious!
The most obvious choice, and my personal favorite since childhood, is a big bed of spaghetti underneath. Just toss your cooked pasta with a little extra marinara sauce—maybe even grab a few spoonfuls from the jar you used for the chicken—and nestle that crispy, saucy cutlet right on top. It’s instant nostalgia, and the kids absolutely devour it. If you want a little acidity to cut through all that rich cheese, a drizzle of fresh lemon juice over the sauced pasta is a game-changer.
If you’re trying to keep things a little lighter, or you’re serving this for a date night instead of a family gathering, a simple green salad works wonders. Don’t overthink the dressing! A light vinaigrette made with olive oil, red wine vinegar, and a pinch of dried oregano is all you need. It offers that perfect fresh, herbaceous counterpoint to the richness of the mozzarella.
For vegetables, roasted asparagus or garlicky sautéed green beans are fantastic partners. They roast right alongside your chicken if you time it well! Seriously, once you master this baked chicken parm recipe, it opens up so many possibilities for quick, impressive Italian nights. If you’re looking for another quick, zesty baked chicken idea that offers a totally different flavor profile, you should peep my Easy Chicken Piccata next time!
Storage and Reheating Your Easy Chicken Parmesan
Okay, let’s talk about the aftermath, because sometimes the leftovers are even better the next day, right? Part of what makes this Easy Chicken Parmesan such a winner is that it truly holds up well. When I’m planning for maximum efficiency, I always make sure to cook a little extra chicken, just so we have those fantastic, cheesy leftovers for lunch the next day. Simon is always cheering when he finds one tucked away in the fridge!
Storing them correctly is the key to enjoying that delicious Italian comfort food at home again tomorrow. You need to make sure they are completely cooled down before you put them away. Once cool, place the baked cutlets in a single layer if possible inside an airtight container. If you have to stack them, put a small piece of parchment paper or wax paper between the layers. This keeps the sauce from sticking and helps preserve some of that texture we worked so hard for during the breading process!
Now, for the important part: reheating! If you are a microwave user, I have to gently ask you to step away from the button! Microwaving this beautiful crispy breaded chicken breast will turn it sad and soggy almost instantly. We are aiming for crispness, remember? No points lost for trying, but we want kudos for delivery!
The very best way to reheat this is in the oven. Preheat it to about 350 degrees Fahrenheit—lower than baking, since it’s already cooked through. Pop the cutlets onto a small baking sheet (use foil or parchment) and warm them up for about 10 to 12 minutes. This gentle heat warms the chicken, melts the cheese again just slightly, and wakes up that crust. If you have an air fryer, even better! Set it to 350°F for about 6 to 7 minutes. It brings back the crunch wonderfully! We don’t want to fuss too much; we want a quick reheat so we can get back to enjoying our evening!
Frequently Asked Questions About This Easy Chicken Dinner Idea
I love hearing from you all! Whenever I share this Easy Chicken Parmesan recipe, people always have great questions about making sure that baked crust comes out perfectly. Don’t worry if you’re tweaking things to fit your schedule; that’s what cooking is all about! Simon always tells me to embrace the questions because they mean someone is actually trying to make the recipe—give yourself kudos just for showing up!
Here are a few things I hear most often about turning this into a reliable, family friendly pasta night staple.
Can I make the breading ahead of time for this Easy Chicken Parmesan?
Oh, I totally get wanting to prep assembly tasks ahead of time to save those precious evening minutes! You absolutely can mix up your breading station ingredients together beforehand—that panko, Parmesan, oregano, and spices mix that goes into the third dish? Go ahead and mix that up and keep it in an airtight container on the counter or in the pantry. That’s a great win!
However, for the actual coating process, I strongly recommend keeping the chicken breasts plain until just before you put them in the oven. If you bread the chicken too far ahead of time—say, hours before—the moisture from the egg wash starts to soak into the Panko, and you lose some of that beautiful, crispy, light texture we worked so hard for with the baking method. For the best results on your crispy breaded chicken breast, wait to dredge the chicken right before brushing it with oil and baking. It’s worth the 5 extra minutes!
Is it better to bake or fry for the most authentic taste?
This is the million-dollar question, isn’t it? If you have the time and don’t mind the cleanup, traditional frying will always give you a deeper, richer brown color and a slightly heavier crust. But for a dependable, healthy, and seriously delicious easy chicken dinner idea, this baking method is incredible. It uses far less oil and still manages to crisp up beautifully because of the Panko and the light oil brush. I serve this exact baked version for guests all the time, and honestly, nobody misses the frying!
How thick should the chicken cutlets really be?
The 1/2-inch thickness isn’t just a suggestion; it’s vital for success in this baked recipe! Why? Because we have a dual cooking stage: 15 minutes to cook the chicken, and then 5–8 minutes to melt the cheese. If your cutlets are much thicker than half an inch, the exterior will burn before the center is safely cooked through (remember, we need 165°F!). Pounding them thinly ensures everything finishes together perfectly at the same time. If you’re looking for other fast favorites, you might enjoy my Honey Garlic Chicken Stir Fry for a huge flavor dump on a different night!
Can I freeze leftover chicken Parmesan?
Yes, you totally can! Freezing leftovers is the definition of future kudos. Cool the cooked cutlets completely, and then you can freeze them either before or after adding the sauce and cheese. If you freeze them *after* baking but *before* topping with sauce, they reheat up nicely in the oven. If you freeze them already fully assembled, it’s best to take them out the night before and reheat slowly in the oven at 350°F until hot throughout. Avoid the microwave for leftovers if you want to preserve any remaining crispness!
Understanding the Nutrition in This Easy Chicken Parmesan
Now, I know some of you are tracking macros, and some of you just want to know if this delicious Italian comfort food at home is going to weigh you down! As the Lead Documentarian here at Kitchn Kudos, I always try to translate our joy into clear, achievable information, and that means looking at the numbers too. Simon always says, “If you feel good after eating, that’s the best nutrition plan!” But for those who like the data, here are the estimates for one serving of this amazing baked chicken.
Please remember, because we are brushing with oil, using jarred sauce (which varies wildly!), and topping with fresh mozzarella, these figures are always an estimation. They give you a fantastic baseline for our Easy Chicken Parmesan, but they aren’t guarantees down to the milligram! For detailed nutritional policies, you can always check out our full disclaimer page.
- Serving Size: 1 cutlet (plus sauce)
- Calories: Approximately 480 per cutlet
- Protein: A whopping 45 grams! (That’s a big win right there.)
- Fat: Around 22g total, with about 9g of that being saturated fat from the cheese and butter in the coating.
- Carbohydrates: Around 28g, mainly coming from the panko breading and the sugar content in the marinara sauce.
- Sodium: About 650mg, so keep an eye on how salty your particular brand of marinara sauce is!
See? That’s a serious amount of protein packed into this simple dish. When you compare that to a heavier, fried version, you realize how much of a savvy win this baked version truly is. You get all the cheesy satisfaction and flavor payoff without the heavy feeling afterward. That means you still have room for a little dance break after dinner!
Share Your Kitchen Kudos on This Easy Chicken Parmesan
Whew! We did it! We made incredible, restaurant-worthy Easy Chicken Parmesan without turning on the deep fryer, and trust me, that deserves a moment of recognition. This is where you get to give yourself some serious kitchen kudos. I am so proud of you for stepping away from perfectionism and just enjoying the process of making something delicious and totally satisfying for the people you love!
Simon is already asking when we get to make this amazing easy chicken dinner idea again. Honestly, the best feeling for me as the Lead Documentarian is knowing that a recipe I share actually makes your weeknights feel a little bit lighter and a lot more celebratory. Don’t keep all that joy to yourself!
I truly want to hear about your experience! Did you find yourself clapping to the music while you pounded the chicken? Did you discover a new favorite jar of marinara? Please, don’t be shy. Drop a comment below and let me know how your cheesy chicken cutlets turned out. If you’re a recovering perfectionist like I was, tell me what part of the process felt surprisingly easy or fun!
If you snapped a picture of your gorgeous final plate, full of that beautiful, melted cheese ready for a family friendly pasta night, please share it! You can tag us on social media—seeing your successes makes my day. We created Kitchn Kudos specifically so people like us, who used to feel intimidated, can celebrate every step. If you need to officially reach out with questions outside of the comments, you can find us on the Contact Page anytime. Thank you so much for baking with us today. Give yourself a high-five—you absolutely earned it!
PrintEasy Baked Chicken Parmesan for a Weeknight Win
Make restaurant-quality cheesy chicken cutlets at home without the fuss. This simple baked chicken parm recipe delivers crispy flavor perfect for your next family pasta night.
- Prep Time: 15 min
- Cook Time: 23 min
- Total Time: 38 min
- Yield: 4 servings
- Category: Dinner
- Method: Baking
- Cuisine: Italian
- Diet: Vegetarian
Ingredients
- 4 boneless, skinless chicken breasts, pounded to 1/2-inch thickness
- 1 cup all-purpose flour
- 2 large eggs, beaten
- 1 1/2 cups panko breadcrumbs
- 1/2 cup grated Parmesan cheese, plus more for topping
- 1 teaspoon garlic powder
- 1/2 teaspoon dried oregano
- 1/4 teaspoon salt
- 1/4 teaspoon black pepper
- 2 tablespoons olive oil, divided
- 1 1/2 cups marinara sauce (your favorite jarred sauce works great)
- 8 ounces fresh mozzarella cheese, sliced
Instructions
- Preheat your oven to 400 degrees Fahrenheit. Lightly grease a baking sheet or line it with parchment paper.
- Set up your breading station: Place flour in one shallow dish. Whisk the eggs in a second shallow dish. In a third shallow dish, combine the panko breadcrumbs, 1/2 cup Parmesan cheese, garlic powder, oregano, salt, and pepper.
- Take one pounded chicken cutlet and dredge it completely in the flour, shaking off any excess. Dip it into the egg mixture, letting the excess drip off. Finally, press the chicken firmly into the breadcrumb mixture until fully coated. Repeat with the remaining chicken.
- Lightly brush both sides of each breaded cutlet with olive oil. Place the cutlets on the prepared baking sheet.
- Bake for 15 minutes.
- Remove the pan from the oven. Spoon about 3 tablespoons of marinara sauce over the top of each cutlet. Top each with slices of mozzarella cheese and a sprinkle of extra Parmesan cheese.
- Return the pan to the oven and bake for another 5 to 8 minutes, or until the cheese is melted, bubbly, and lightly golden brown.
- Serve immediately over your favorite pasta for a complete Italian comfort food at home experience.
Notes
- For extra crispy edges, you can briefly pan-fry the breaded cutlets in a skillet with 1 tablespoon of oil for 2 minutes per side before topping with sauce and cheese and moving them to the oven.
- Use high-quality marinara sauce; since this recipe is simple, the sauce flavor really shines through.
- If you prefer a thinner cutlet, you can slice the chicken breasts in half horizontally before pounding them.
Nutrition
- Serving Size: 1 cutlet
- Calories: 480
- Sugar: 8
- Sodium: 650
- Fat: 22
- Saturated Fat: 9
- Unsaturated Fat: 13
- Trans Fat: 0.5
- Carbohydrates: 28
- Fiber: 3
- Protein: 45
- Cholesterol: 130