

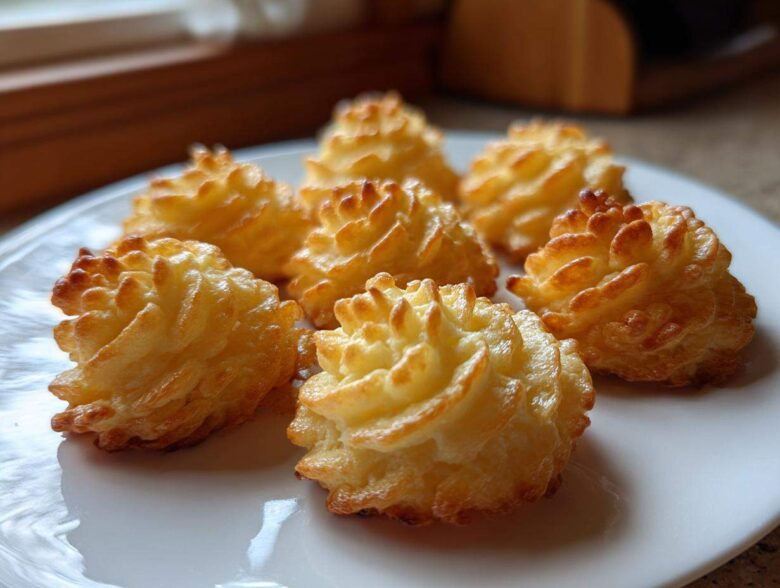
Let’s be honest, sometimes you just want your side dishes to steal the show, right? When you hear French cuisine, you might think it’s too complicated, but I’m here to prove you wrong! These Duchess Potatoes are my absolute go-to for making any weeknight feel like a holiday. Forget those flat, boring mashed potatoes most people serve; we are making swirls that look like they came straight from a fancy restaurant.
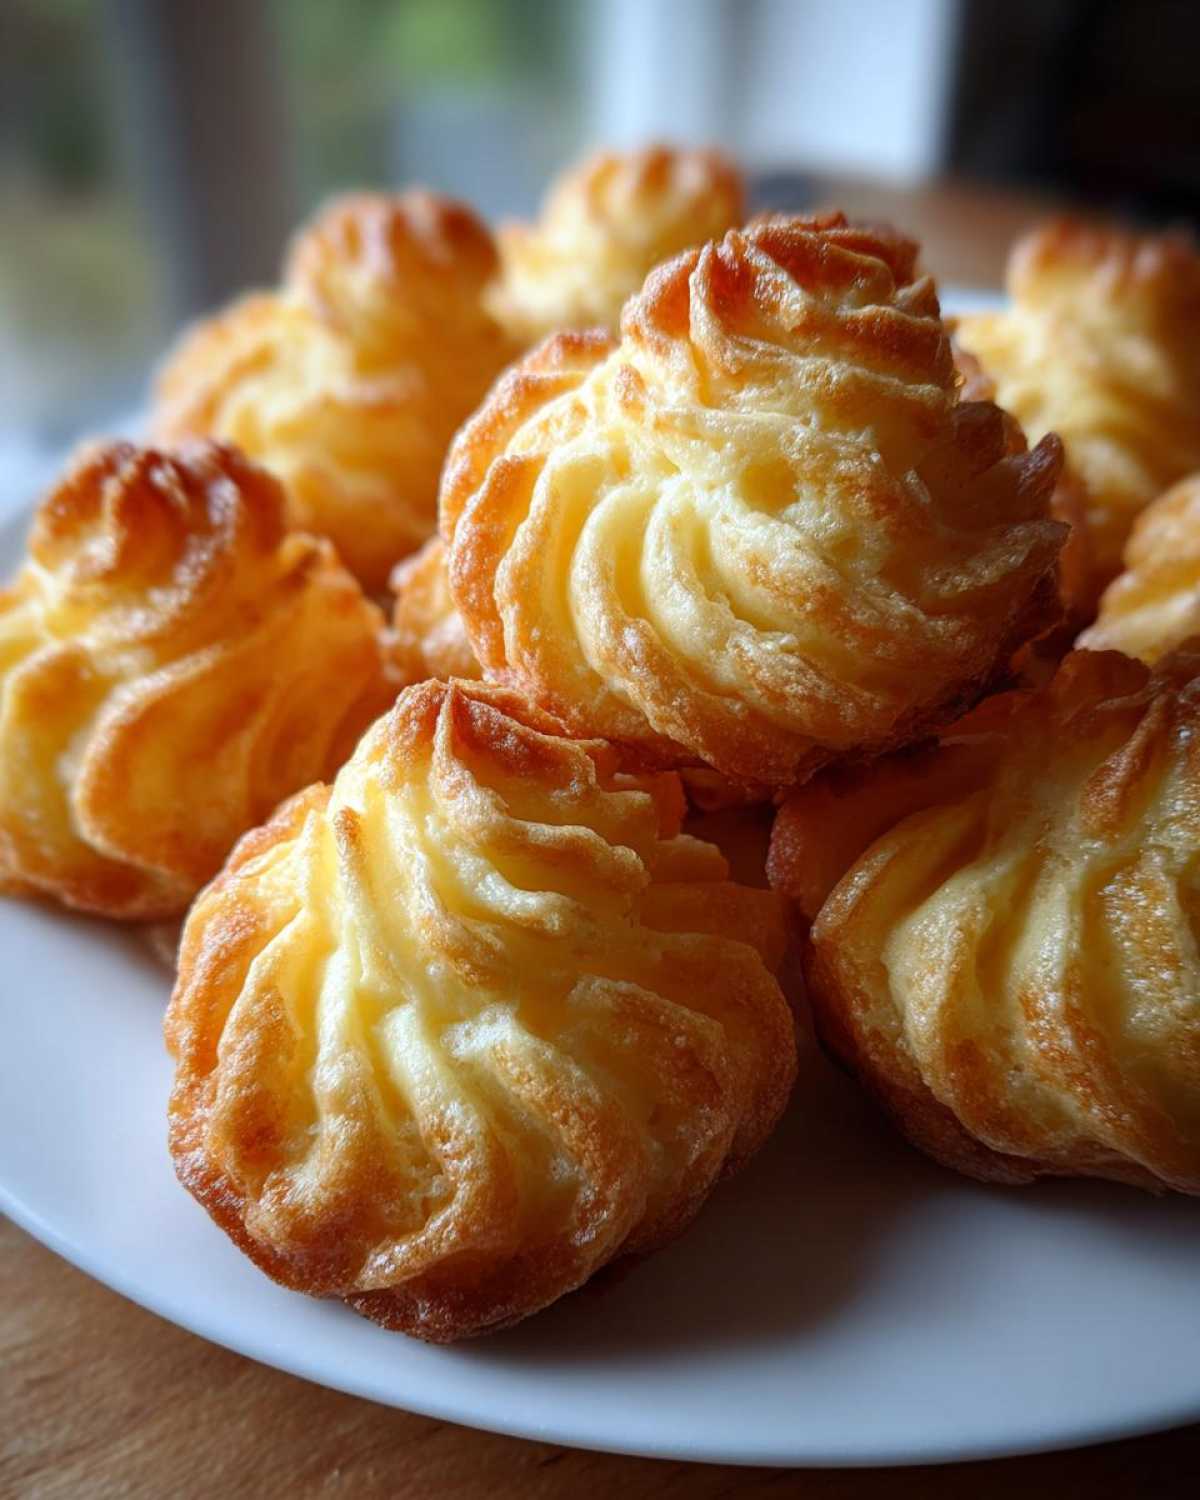
The real magic here is the texture—we nail that perfectly creamy, almost cloud-like interior while getting those gorgeous, crispy, golden-brown edges. I spent way too many afternoons messing around with piping bags until I figured out the foolproof method that keeps everything stable. Seriously, mastering this classic French technique is easier than you think, and trust me, once you serve these, everyone will ask for the recipe. You can see the dedication we put into making sure every recipe on this site is simple, which is why I love sharing my kitchen secrets with you!
Why This Easy Duchess Potatoes Recipe Works Every Time
I know what you’re thinking: piped potatoes? That sounds like fussy work! Nope, not with my method. I swear, this simple process guarantees you get the perfect result, even if you’re new to this. These Duchess Potatoes are built for success because we focus on texture first.
- We get an amazingly creamy interior that melts in your mouth.
- The mixture holds its shape perfectly when piped—no slumping allowed!
- It’s surprisingly fast, meaning you get maximum impact for minimum effort.
Achieving the Perfect Creamy Interior
The richness comes from skipping plain milk and going straight for heavy cream and egg yolks. These fats give that luxurious mouthfeel that makes these more than just mashed potatoes. But listen, the real secret weapon is drying the taters! You have to let them steam dry fully after boiling. If they’re waterlogged, no amount of yolk will save you from a soupy disaster.
The Secret to a Golden Brown Potato Puffs Exterior
We bake these hot and fast! The high oven temperature hits the outside immediately and starts crisping things up while the inside stays soft. The egg wash is crucial here—it acts like glue and turns the outside into those stunning, crisp, golden brown potato puffs that look so professional. Seriously, don’t skip that light brush of egg!
Essential Ingredients for Classic Duchess Potatoes
When you’re aiming for an impressive, elegant side dish, you simply can’t cut corners on the core components. These ingredients are what separate the good, simple mashed potatoes from the show-stopping, classic French Duchess Potatoes. I always lay everything out before I even start boiling the water, just so I can appreciate the quality I’m working with.
We need the right structure builders and the right flavor boosters. This recipe keeps things classic, focusing on rich dairy and fresh eggs to create that perfect blend of flavor and stability for piping. Get these items right, and I promise you success!
Ingredient Notes and Substitutions
Let’s talk specifics about what really matters for these piped dreams. First, potatoes—you absolutely must use Russets. They are beautifully starchy and break down perfectly without turning gummy when handled right. Skip the waxy ones, trust me on this one!
Next, the dairy: make sure your cream and the four egg yolks you’ll be adding are as close to room temperature as you can get them. This helps everything incorporate smoothly without shocking the mash, keeping it silky. And finally, if you have one, use a potato ricer! It’s the secret tool for taking your standard mashed potatoes up about ten levels, ensuring the fluffiest base for your Duchess Potatoes before they even hit the oven.
Step-by-Step Easy Duchess Potato Technique
Alright, here’s where we turn simple mash into a showstopper. This technique guarantees you get those beautiful, stable swirls that stand up tall on the plate. Follow these steps closely, and you’ll be whipping up perfect Duchess Potatoes every single time. It’s all about managing heat and moisture!
Preparing the Potato Base for Piped Mashed Potatoes
First things first: boil those Russets until they are fork-tender, no ifs, ands, or buts about it. The second they are done, drain them completely. Then, leave them in that empty colander for about five minutes. That steaming time is non-negotiable! We need to evaporate as much water as possible. Once dry, smash those things up—if you have a potato ricer, now is the time to use it! A ricer creates the smoothest, fluffiest base possible for piped mashed potatoes.
Mixing and Piping Your Duchess Potatoes
Once they are mashed smooth, we slowly mix in our rich blend of yolks, melted butter, and cream. You must mix gently here! Overworking them turns the starch gummy. Once just combined, scoop that lovely mixture into your piping bag. I love using a big star tip, like a Wilton 1M. That tip makes those classic, ridged swirls that look so impressive without needing extra effort!
Baking for Crispy Exterior Potatoes
Set your oven to a hot 400°F (200°C) and line a tray. Before they go in, use a pastry brush to give the tops a light coating of beaten egg wash. This is what gives you that stunning golden brown color and helps them hold their crispiness. Bake them for about 20 to 25 minutes. You’re waiting for those edges to become gorgeous, crispy exterior potatoes. Peek in around the 20-minute mark to see if they look beautifully golden! If you’re looking for more amazing baking guides, check out my latest posts over at the main blog.
Variations: Creating Garlic Parmesan Duchess Potatoes
If you want to take these already incredible Duchess Potatoes and turn them into something truly over-the-top amazing for your next big meal, we have to talk about the Garlic Parmesan variation. It’s honestly so simple to add this savory punch, and the cheese gets gloriously crisp in the oven. This is easily one of my favorite ways to serve them, especially when paired with roasted chicken or maybe some of my famous sheet pan salmon!
The key here is incorporating the new elements smoothly before piping, just like we did with the original butter and cream. You don’t want anyone biting into a lump of uncooked garlic, so preparation really matters.
To transform your recipe, you only need to make two small additions to the potato mixture right after combining the wet ingredients with the mash. First, grab about half a cup of freshly grated Parmesan cheese. Freshly grated melts so much better than the stuff in the green shaker can, trust me when I say it makes a difference!
Second, add in one clove of garlic that you have minced up really, really fine. If you’re worried about raw garlic flavor, you can sauté it in the butter before melting it down, but I tend to just mince it really small and rely on the high heat of the oven to mellow out that sharpness while it bakes.
Mix that Parmesan and garlic right into the piping-ready mixture. Taste it quickly—maybe just a tiny dab on your finger—to make sure the seasoning is where you want it before you transfer it to the bag. Then, proceed with the piping and egg washing exactly as written above. You will absolutely love these rich, savory swirls!
Tips for Success with Showstopper Side Dish Presentation
Okay, we’ve made the perfect creamy base and we’re ready to pipe, but presentation matters when you’re calling these Duchess Potatoes a showstopper side dish! Getting those lovely swirls sharp and uniform is the final hurdle. It really comes down to the right consistency and a little bit of patience before baking.
If your potato mixture feels too soft mid-piping—maybe your kitchen is a little warm, or you overmixed the butter—don’t panic! Pop the whole piping bag into the fridge for about fifteen minutes. A slightly chilled mixture is firmer, which means your ridges will hold their shape beautifully when you pipe them onto the sheet. Firmness equals sharp edges!
Also, try to make all your potato bites uniform in size. If some mounds are tiny and others are enormous, the little ones will burn before the big ones are fully golden brown. Keep your piping swirls about the same diameter across the whole pan for even baking. This small step makes a huge difference in how elegant the final tray of buttery potato swirls looks!
Make Ahead Potato Sides and Storage for Duchess Potatoes
I get asked all the time if you can save time on big cooking days by prepping these ahead, and I have good news! Since these are considered wonderful make ahead potato sides, you absolutely can get a head start on your Duchess Potatoes. The mixing part is the key; the piping is best saved for close to serving time.
You can mash your potatoes, mix in all the yolks, cream, and seasoning exactly as the recipe dictates. Once it’s all combined into that rich potato base, cover the bowl TIGHTLY with plastic wrap. Make sure the wrap is touching the surface of the potatoes so a skin doesn’t form. You can store this prepared mixture in the fridge for up to two days. When you’re ready to bake, let it sit on the counter for about 30 minutes just to take the chill off—this makes piping so much easier!
If you piped them but aren’t ready to bake? No problem! Once piped onto the parchment paper, place the whole tray in the freezer until firm—this might take an hour or two. Once solid, you can transfer those frozen swirls into a zip-top freezer bag. You’ll find these freezer-friendly breakfast sandwiches (and potato swirls!) are lifesavers when hosting. You can bake them straight from frozen, but just add about 5 to 10 minutes onto the baking time. Check out how I manage freezer items over at my freezer guide!
As for leftovers? They are still delicious! Store any leftover Duchess Potatoes in an airtight container in the fridge for up to four days. Reheating them is best done in the oven—maybe 350°F (175°C) for about 10 minutes—to crisp up that beautiful exterior again. I tried the microwave once, and let’s just say it turns them into sad, soggy puffs. Stick to the oven for the best texture!
Serving Suggestions for Elegant Potato Sides
Honestly, these beautiful, piped Duchess Potatoes deserve a spot right next to the best roast on the table. They transform any meal from just ‘dinner’ into a real, impressive event. If you’re putting this much effort into making gorgeous, golden brown potato puffs, you need the perfect main course to match!
These are my ultimate holiday potato recipes. Seriously, if you’re hosting Thanksgiving or Christmas, swap out the plain bowl of mash for these swirls—everyone notices! They pair fantastically with rich roasted meats because they soak up all those wonderful pan juices. Think about a beautiful herb-crusted prime rib or perhaps a show-stopping glazed ham. The buttery richness of the potatoes cuts through the savory meat perfectly.
They work just as well for a special occasion dinner on any random Tuesday, though! I often make them when I’ve gone to the trouble of making a fantastic, slow-braised pot roast. The sauce from the roast just pools perfectly around the base of each swirl. It’s elegant, it’s French-inspired, and it makes you feel fancy just eating them.
If you are looking for more amazing inspiration on what to serve alongside these majestic swirls, especially for your biggest holiday spreads, I have a whole collection of ideas dedicated to making those famous meals shine! You really should check out all my best Thanksgiving potato ideas and other special occasion sides for inspiration!
Frequently Asked Questions About Piped Mashed Potatoes
We’ve covered the creamy interior and the crispy exterior, but sometimes you just have one last little question burning in your mind before you commit to making these gorgeous Duchess Potatoes. I tried to cover almost everything in the steps, but here are the most common things folks ask me when they are attempting these impressive dinner sides for the first time. Don’t worry if you mess up the first time; that’s how we learn!
Troubleshooting Common Issues
What is the absolute WORST thing that can happen? Gumminess. It’s the bane of every mashed potato maker’s existence, and it’s usually caused by one of two things when making these buttery potato swirls. If your mixture turns out slightly sticky or pasty, it’s almost always because you either used a food processor or blender, or you just mixed the ingredients way too long after adding the egg yolks.
A blender essentially starts breaking down the starch too much, making that gluey texture we hate. If you’ve already made the mistake, you can sometimes save it by gently folding in another half tablespoon of cold heavy cream—but only if you can clearly see the mixture is too stiff, not if it’s already gummy. If you stuck to a ricer and mixed gently, you shouldn’t have this problem at all, and your puffs will be fluffy!
What if my mixture is too runny to pipe?
This happens mostly when the potatoes weren’t dried out enough after boiling! If you’re trying to pipe those beautiful swirls, but the mixture is just sliding right out of the bag in a puddle, don’t throw it away! These are still great for making alternative rustic mounds, but if you want the classic look, the best fix is chilling. Cover the piping bag or bowl and pop it in the fridge. The cold helps the fat and starch firm up again. Give it 30 minutes, and you should be able to pipe those elegant shapes successfully. If you need more help, feel free to reach out to me on my contact page!
Can I use a potato masher instead of a ricer?
Yes, you *can* use a masher, but be prepared to work a little harder to get that signature light texture for these piped mashed potatoes. If you use a masher, you must stop early! Mash until *most* lumps are gone, but **do not** beat it into total submission. Over-mashing with a hand masher incorporates too much starch, which leads to that dense texture. A ricer is truly better, but a gentle hand with the masher works in a pinch for these classic French potatoes.
How long before serving should I pipe the potatoes?
I find that piping them no more than 30 minutes before they go into the oven results in the best look. Egg wash dries out quickly, and if they sit too long exposed to the air, the surface can get a bit tacky up top. Because these are such a showstopper side dish, the extra five minutes of piping right before they bake is worth it to ensure those swirls come out looking flawless and ready to eat!
Estimated Nutritional Data for Duchess Potatoes
So, they look fancy, they taste incredible, but what about the numbers? Because these classic French potatoes rely on butter, cream, and egg yolks to get that luxurious texture, of course, they are a bit richer than plain mashed potatoes. But hey, they are for special occasions, right? You deserve a little delicious indulgence!
It’s really important to remember that these values are just estimates based on the ingredients listed above, and they can change slightly depending on the exact size of your potatoes or how much butter you use brushing the tops. I always recommend checking out a full disclaimer for recipe nutrition facts over at my site disclaimer page just for peace of mind.
For a standard serving size of about four of these beautiful swirls, here is what you can generally expect from our Duchess Potatoes:
- Calories: Around 240
- Fat: Roughly 15 grams (Remember most of that comes from delicious butter and egg yolks!)
- Carbohydrates: About 23 grams
- Protein: Around 5 grams
See? Not too bad for a showstopper side dish you can be proud to serve! They really are the perfect balance of richness and flavor without being overly heavy.
PrintEasy and Creamy Duchess Potatoes

Make impressive Duchess Potatoes with a creamy inside and golden, crispy exterior. This recipe is simple enough for beginners and perfect for holidays.
- Prep Time: 20 min
- Cook Time: 25 min
- Total Time: 45 min
- Yield: 6 servings
- Category: Side Dish
- Method: Baking
- Cuisine: French
- Diet: Vegetarian
Ingredients
- 2 lbs Russet potatoes, peeled and quartered
- 4 large egg yolks
- 4 tablespoons unsalted butter, melted
- 1/2 cup heavy cream
- 1/2 teaspoon salt
- 1/4 teaspoon black pepper
- Pinch of nutmeg
- 1 large egg, beaten (for egg wash)
Instructions
- Place the peeled and quartered potatoes in a large pot and cover with cold, salted water.
- Bring the water to a boil and cook until the potatoes are very tender, about 15 to 20 minutes.
- Drain the potatoes completely and let them steam dry in the colander for 5 minutes.
- Mash the potatoes until completely smooth. You can use a potato ricer for the best texture.
- In a small bowl, whisk together the 4 egg yolks, melted butter, heavy cream, salt, pepper, and nutmeg.
- Gradually mix the wet ingredients into the mashed potatoes until just combined. Do not overmix.
- Transfer the potato mixture to a piping bag fitted with a large star tip (like a Wilton 1M).
- Preheat your oven to 400°F (200°C). Line a baking sheet with parchment paper.
- Pipe small mounds or swirls onto the prepared baking sheet.
- Brush the tops of the piped potatoes lightly with the beaten egg wash.
- Bake for 20 to 25 minutes, or until the edges are golden brown and crisp.
Notes
- For Garlic Parmesan Duchess Potatoes, add 1/2 cup grated Parmesan cheese and 1 clove of minced garlic to the potato mixture before piping.
- Use a potato ricer instead of a masher to avoid developing a gummy texture.
- If you do not have a piping bag, you can drop spoonfuls of the mixture onto the baking sheet for a rustic look.
Nutrition
- Serving Size: 4 swirls
- Calories: 240
- Sugar: 2
- Sodium: 250
- Fat: 15
- Saturated Fat: 9
- Unsaturated Fat: 6
- Trans Fat: 0
- Carbohydrates: 23
- Fiber: 2
- Protein: 5
- Cholesterol: 105