

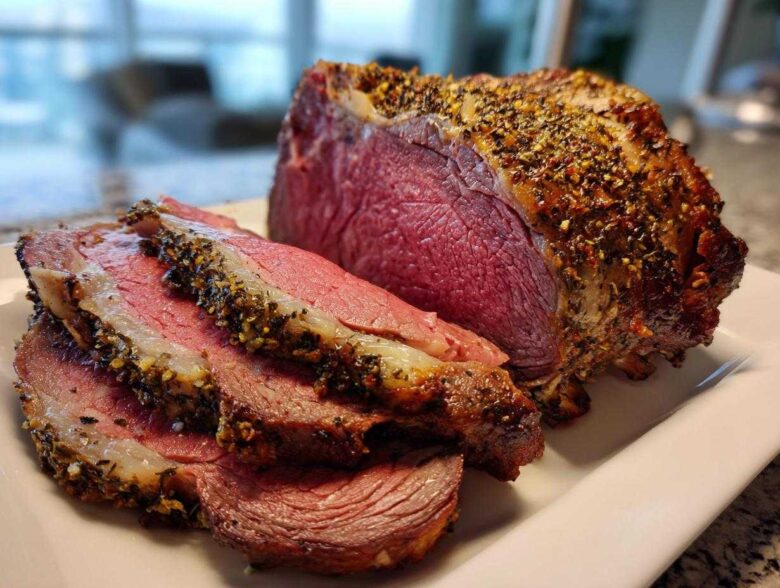
When the holidays roll around, or when you just need a dinner that makes everyone stop talking and stare, you simply have to go big. Forget those fussy little cuts of meat! For me, nothing screams celebratory quite like a glorious standing rib roast perched on the table. But let’s be honest—cooking something this expensive and massive can feel terrifying. You worry non-stop: Will it be dry? Will it be blue in the middle? Trust me, I’ve been there, sweating over the oven, checking the thermometer every five minutes. Over the years, I’ve finally locked down the most reliable, truly foolproof method to guarantee you get that beautiful, savory crust and a perfectly juicy, rosy medium-rare center every single time. This is the recipe you’ll turn to year after year. If you ever want to try slow-cooked beef that just falls apart, check out my guide for slow cooker beef barbacoa tacos for a change of pace!
Why This Is the Ultimate Standing Rib Roast Recipe
What makes this the best roast beef recipe out there? It’s all about the temperature dance we do in the oven. Other recipes just stick to one heat, which ends up drying the outside while the center stays stubbornly cold. Nope, not here! We start hot—really hot—to lock in all those amazing herb flavors and create that signature crust we all crave. Then, we back off the heat way down low. This two-step attack is my secret sauce for delivering the most tender beef roast recipe you’ve ever tried.
I remember the first Christmas I tackled this technique instead of just roasting it the traditional way. My in-laws, who are professional food critics—I’m only slightly exaggerating—actually asked for seconds! That’s when I knew this method was a keeper for creating your perfect medium rare roast.
Achieving the Perfect Medium Rare Standing Rib Roast Temperature
Listen, you absolutely must use a good digital meat thermometer for this. Guessing? Forget it. We are aiming to pull the roast when the thermometer buried deep in the thickest part (away from the bone!) hits exactly 125 degrees Fahrenheit. That might seem low, but stick with me!
This low removal temperature accounts for what we call carryover cooking. When you pull that gorgeous roast out and cover it, it keeps cooking internally for 20 to 30 minutes while it rests. That’s when the temperature creeps up healthily to that magical 130°F to 135°F sweet spot. Skipping the rest means all those beautiful juices—which are currently running like crazy inside the roast—will spill right onto your cutting board. You need that rest so you end up with a wonderfully juicy standing rib roast. Trust me, this precision ensures the ultimate holiday table centerpiece. If you want another easy, meaty win for dinner later in the week, you should really check out my recipe for one-pot beef stroganoff, too!
Ingredients for Your Garlic Herb Standing Rib Roast
Okay, gathering your supplies is almost as important as the cooking itself. Since we are using only a few heavy-hitting ingredients here, you don’t want anything subpar. Get the best cut of meat you can find, preferably bone-in, because that bone acts like a natural insulator, keeping things extra tender. When you look at this list, remember that freshness matters, especially for the herbs! You’ll need one large bone-in standing rib roast, usually about 5 to 7 pounds is perfect for feeding a crowd.
For flavor, we are building a powerhouse paste. Make sure you have four cloves of garlic that you can mince up really fine—no big chunks allowed! You also need 2 tablespoons of fresh rosemary, chopped, and 1 tablespoon of fresh thyme leaves stripped right off the stem. For seasoning, keep it simple but substantial: 1 tablespoon of coarse salt and 1 teaspoon of black pepper. That salt is going to help draw out flavor, so don’t be shy with it.
The binder and moisture agents are the final puzzle pieces. You’ll need 1/4 cup of good quality olive oil, which mixes beautifully with the herbs. Then, we use 2 tablespoons of Dijon mustard—this is fantastic because it helps anything stick to the roast and adds a tiny bit of necessary tang. Finally, keep about 1/2 cup of beef broth handy for the roasting pan; this keeps the bottom from burning and starts us off on our au jus!
Preparation Steps for the Best Standing Rib Roast Seasoning
Okay, before this magnificent piece of beef even thinks about entering the oven, we have some vital prep work to do. And this is where you cement your status as the holiday hero! The very first thing—and please trust me on this—is taking it out of the fridge! A cold roast hitting a hot oven is the fastest way to get uneven cooking. You want it sitting on the counter for a good two to three hours so it can warm up gently. This helps tremendously when we talk about those amazing rib roast seasoning ideas.
Once it’s cozy, you need to pat that entire surface bone-dry with paper towels. Moisture is the enemy of a good crust! After that, we build our flavor shield. Mix up that minced garlic, rosemary, thyme, salt, and pepper with the olive oil. This combination becomes your signature garlic herb rib roast paste. Rub it everywhere! Then slather on a thin layer of Dijon mustard first—the mustard helps the herbs stick stubbornly to the meat. This process ensures every inch gets coated, giving you that fantastic deep flavor in the final slices.
If you want to see some truly impressive presentation magic, take a peek at my ideas for garlic butter steak bites; the flavor concept is similar! Don’t let the size intimidate you; getting this surface flavor right is easier than you think.
Expert Tip: Frenching the Bones for Presentation
This is a tiny step that makes your finished roast look like it came straight from a gourmet magazine shoot. You know how some roasts have that messy, meaty covering on the ends of the bones? Frenching is just a fancy butcher term for trimming that excess fat and meat away from the ends of the rib bones, often leaving just a clean bone handle sticking out!
Why do we bother? Because when you slice into this gorgeous centerpiece beef roast at the table, those clean bones look stunning. You can often ask your butcher to do this for you when you order, which saves you the mess! If they don’t offer it, just take a sharp paring knife and scrape the meat and fat cleanly off the last inch or two of each exposed bone. It’s worth the two extra minutes of trimming, I promise!
How to Cook Prime Rib: The Oven Roasted Standing Rib Roast Method
Alright, deep breath! This is where we put that gorgeous, seasoned meat into the heat. If you’re asking yourself exactly how to cook prime rib without messing up, this two-temperature strategy is your secret weapon. Forget guesswork; we are using science to get that incredible crust!
First things first: crank your oven up to a screaming hot 450 degrees Fahrenheit. We want that initial blast of heat to start building that savory exterior. Place the roast (fat-side up, always!) in the pan and let it sear hard for exactly 15 minutes. Don’t open the door, don’t peek—just let it work its magic.
After those initial 15 minutes, immediately drop the oven temperature way down to 325 degrees Fahrenheit. Now we move into the slow roast, which is what makes this oven roasted prime rib method so foolproof. For a 5 to 7-pound roast, after that initial sear, you’re looking at roughly 13 to 15 minutes of roasting time *per pound* at this lower temperature. You are aiming to pull the roast when your thermometer hits 125°F. Keep checking that temperature! If you need a slightly softer, fall-apart beef for a different dish, you might want to see my recipe for Mississippi pot roast.
Crucial Resting Time for a Juicy Standing Rib Roast
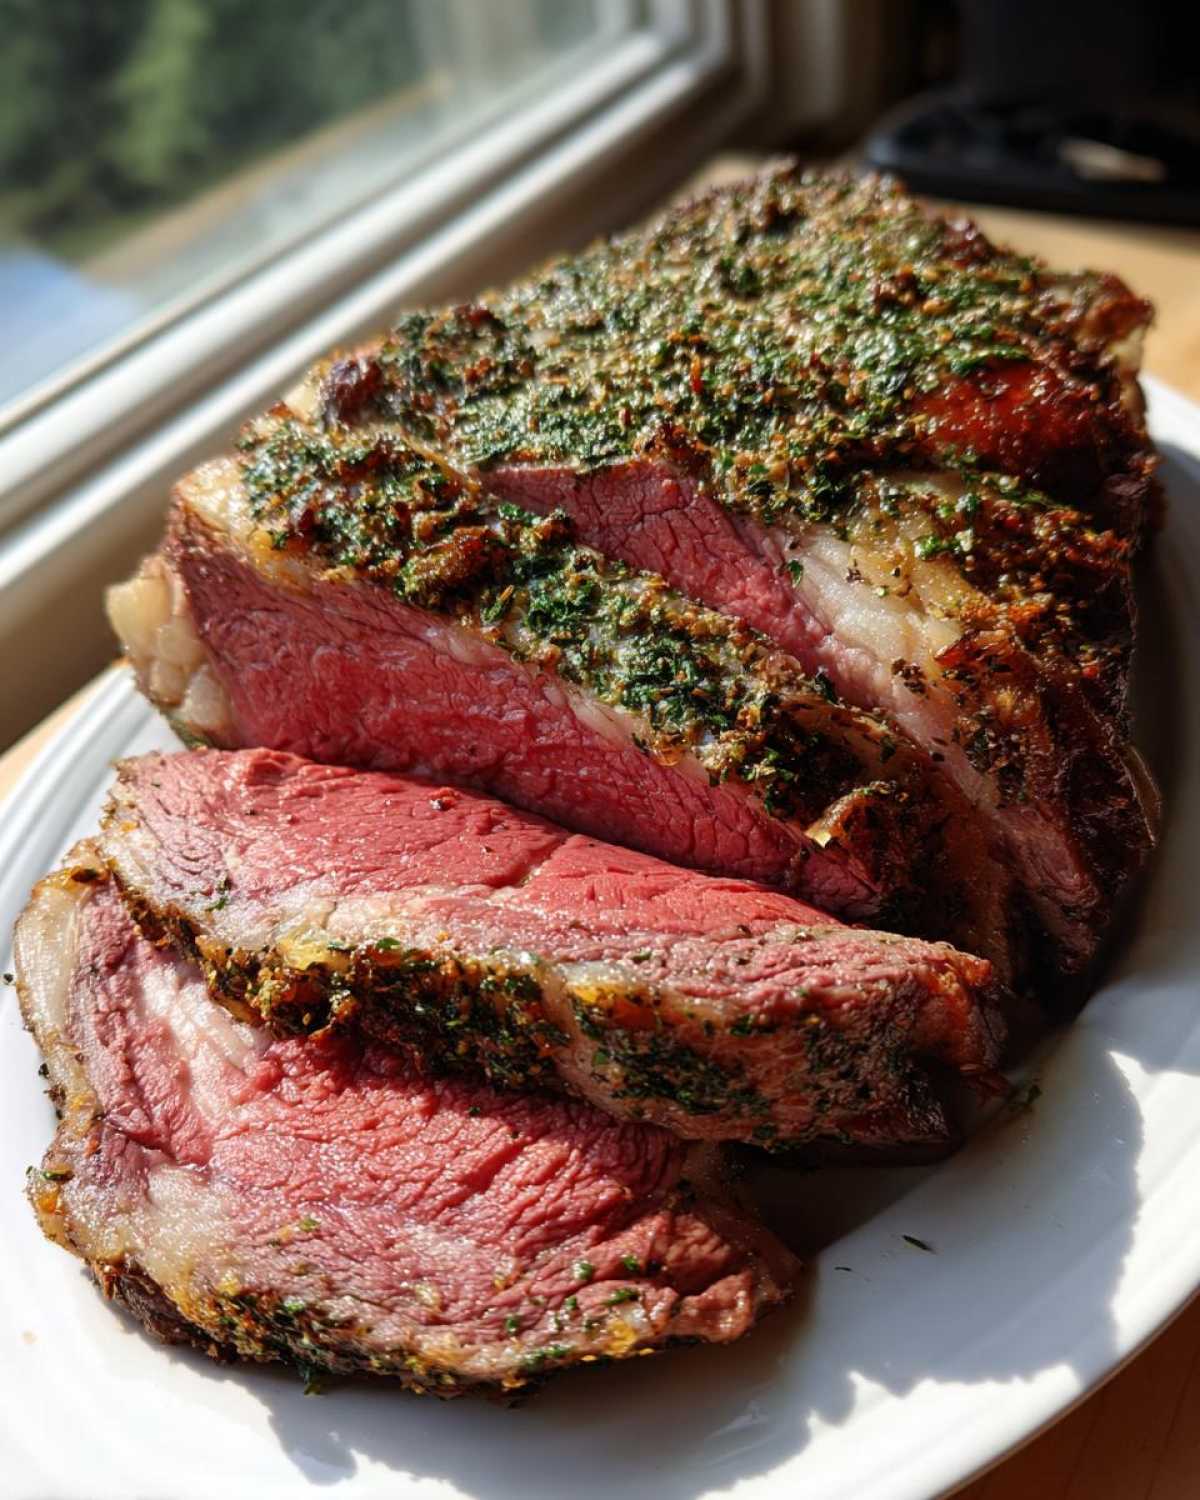
This step is non-negotiable, so don’t even think about slicing this beauty right out of the oven! Once that thermometer hits 125°F, pull the roast out, tent it loosely with foil, and walk away. I mean it—go pour yourself a glass of wine, load the dishwasher, chat with your guests. You need to let that roast sit for a minimum of 20 to 30 minutes.
Why? Because when meat is hot, all the moisture—those precious juices—are crowded right in the center, ready to burst out. Resting allows those juices to slowly redistribute throughout the muscle fibers. This redistribution is the absolute key to getting that incredibly juicy standing rib roast every single time. As it rests, the temperature will climb another 5 or so degrees, bringing you right into that perfect medium-rare zone without any risk of drying it out.
Making Au Jus from Your Standing Rib Roast Pan Drippings
You’ve just endured the hardest part—the cooking and the waiting—and now you have this incredible, rich liquid sitting on the bottom of your roasting pan. Please, for the love of roast beef, do not throw that away! That liquid, full of meat juices, fat drippings, and those garlicky herb bits, is pure gold. It’s the foundation for an amazing, simple au jus that tastes ten times better than anything you can buy in a jar.
You already poured in that half-cup of beef broth earlier, right? That was Step 5 in the instructions! To make a truly simple sauce, just take the roasting pan off the heat once the roast is resting. Skim off most of the clear fat layer from the top. Don’t worry about getting every bit, but you don’t want a pool of grease in your sauce, either. Just use a big spoon! What’s left behind is concentrated flavor.
Set the pan directly on your stovetop burner—yes, right on the stove—over medium heat. Use a wooden spoon or a small whisk to slowly scrape up all those browned, stuck-on bits (that’s called the fond, and it’s flavor city!) into the liquid. Let it bubble gently for about five minutes so it reduces slightly. If it looks too thick, add a splash more broth or even just water. If it looks too thin, whisk in a teaspoon of cornstarch mixed with cold water until it thickens just enough to lightly coat the back of that spoon. Serve it warm right along with the beef. It’s so easy, and it makes the whole dinner feel gourmet. If you want another easy sauce option to practice with, you should check out my recipe for easy honey garlic chicken!
Tips for Success with Your Bone In Rib Roast Cooking
Even with the best recipe, sometimes things just don’t go perfectly, right? That’s part of cooking! When it comes to bone in rib roast cooking, the biggest hurdle is often getting heat into the middle without turning the herb crust into charcoal. If you happen to have a convection setting on your oven—the one that blows air around—use it, but you have to adjust! Convection cooks faster, so if you use it for the low-temperature phase, drop that 325°F down to 300°F to keep the process steady.
And what if you notice that beautiful crust is browning way too fast during the slow roast? Quick fix: Just loosely tent a piece of foil over the top of the roast. It acts like a tiny umbrella, shielding the herbs from direct heat while the inside finishes cooking. This little trick has saved many a holiday dinner for me!
Another great tip I learned involves the rack. Don’t let your roast sit flat on the bottom of the pan where it might steam a little. Make sure it’s held up high on the roasting rack. This lets the hot air circulate completely around the entire roast, ensuring those sides cook evenly instead of just the top and bottom. If you’re looking for another impressive but easier-to-manage fish dish, give my garlic Tuscan salmon a try sometime this week!
Serving Suggestions for Your Special Occasion Beef Dinner
Now that you’ve conquered a beautiful standing rib roast, the table needs to match its glory! A centerpiece beef like this deserves sides that are hearty, comforting, and definitely worthy of a celebration like Christmas or a big family gathering. You want dishes that soak up all those glorious pan juices we talked about making into au jus.
You can never, ever go wrong with creamy mashed potatoes. They provide the perfect soft base for the sliced roast beef. I usually load mine up with extra butter and chives because, honestly, when you’re eating prime rib, you’re beyond counting calories for one night, right?
For a vegetable, something green and slightly luxurious is the way to go. Creamed spinach is a classic for a reason—it’s rich and savory and stands up well against the intense beef flavor. If you want something lighter but still elegant, roasted asparagus drizzled with a little lemon is fantastic. If you’re looking for a lovely side salad to cut through the richness, I have a wonderful autumn harvest salad that would be perfect when apples are in season!
And don’t forget your Yorkshire puddings if you’re feeling ambitious! They are the perfect little cups to catch every bit of that roast drippings flavor. It just completes the whole experience. Remember, presentation isn’t just about the roast; it’s about creating a beautiful spread around it!
Storing and Reheating Leftover Standing Rib Roast
The biggest compliment to your incredible cooking skills is having leftovers! But let’s face it, reheating prime rib can be downright stressful because the first time you cooked it perfectly, and now you’re worried about turning it into sad, dry little brown chips. You deserve better than that after all that hard work!
First, let’s talk storage. Once it’s completely cooled down after resting, slice off any remaining ribs or just cut the meat into serving-size portions. Store the leftovers in an airtight container in the fridge. Honestly, it keeps beautifully for about three to four days. If you have a big chunk of roast left and you aren’t planning to eat it within four days, I highly recommend slicing it all up and freezing it right away; it freezes really well!
Now for the reheating magic—we are going low and slow, and we are adding moisture back in. Never, ever microwave thin slices; it turns prime rib into tough leather almost instantly! My trick is using your oven, but at the lowest possible temperature—around 250 degrees Fahrenheit is often perfect.
Place your leftover slices in a shallow baking dish. Here’s the secret for that tender texture again: add a little splash of liquid to the bottom of the dish before you cover it tightly with foil. You can use that leftover au jus if you saved some, or just a bit of beef broth or even water. The liquid creates steam under the foil, gently warming the meat so it stays juicy. It only takes about 10 to 15 minutes to warm through. Keep checking it! You aren’t trying to cook it more; you are just gently persuading it back up to a pleasant eating temperature. If you’re planning to use up leftovers in a casserole format next time, you have to see how comforting my recipe for chicken pot pie casserole is!
Frequently Asked Questions About the Standing Rib Roast
I always get so many questions after I post this recipe, especially around the holidays! It’s a big investment of time and money, so you want to get every detail right. Below are some of the biggest questions I hear. Don’t worry if you’re new to large roasts; we’ll clear it all up so you can cook with confidence. If you want to know more about me and why I love cooking big feasts like this, you can always check out the About Us page!
Can I use the reverse sear method instead of the high/low heat method?
That’s a fantastic question! Yes, you absolutely can, and it’s a wonderful technique for achieving a very even cook across the entire roast. The reverse sear method is often called a slow roasted rib roast approach where you cook it at a very low temperature—say 225°F or 250°F—until it hits about 120°F internally. Then, when it’s done resting, you blast it in a ripping hot oven (or even on a grill) for just a few minutes to build that crust right at the end. Both methods yield incredible results, but I stuck with the high/low sear because I find it’s a little faster overall when you’re racing the clock on Thanksgiving or Christmas Eve!
What internal temperature signifies a perfect roast beef for Christmas?
If we are making a roast beef for Christmas, we are going for that beautiful pink center—medium-rare perfection! Remember what I always say: you must pull the roast when your thermometer registers 125 degrees Fahrenheit. That seems low, but it’s essential. Once you pull it out, tent it up, and let it rest for 20 minutes or more, the internal temperature will climb, or carry over cook, up to that sublime 130°F to 135°F range. This leaves you with a truly tender and juicy final product.
Does the bone affect cooking time significantly?
Oh yes, it totally does! That’s why we always emphasize that this recipe is specifically for a bone in rib roast cooking. The bone acts like a buffer or an insulator, protecting the meat closest to it from cooking as fast as the outside cuts. If you tried to follow the timing instructions for a boneless roast, you’d end up seriously undercooking the interior of a bone-in cut. Always remember the bone adds major cooking time; that’s why we use the per-pound guide *after* the initial sear!
How should I adjust this for a smaller roast?
When dealing with a smaller roast—say, just two or three ribs—you might want to use my tips for an easy prime rib instruction set. You can totally use this same seasoning and the two-step temperature method! The main difference will be the time. A smaller roast needs less time at the lower temperature, obviously. The key is that 13-15 minutes per pound rule *after* the 15-minute blast at 450°F. If you have a very small cut, you might skip the high-heat sear altogether and just roast it low and slow the whole time, but I still recommend the high/low if you have the oven space!
PrintFoolproof Standing Rib Roast with Garlic Herb Crust
A reliable method for cooking a tender, juicy standing rib roast to a perfect medium-rare, featuring a flavorful garlic and herb crust.
- Prep Time: 20 min
- Cook Time: 2.5 hours
- Total Time: 3 hours 50 min
- Yield: 6-8 servings
- Category: Main Course
- Method: Roasting
- Cuisine: American
- Diet: Low Calorie
Ingredients
- 1 bone-in standing rib roast (about 5-7 lbs)
- 4 cloves garlic, minced
- 2 tablespoons fresh rosemary, chopped
- 1 tablespoon fresh thyme leaves
- 1 tablespoon coarse salt
- 1 teaspoon black pepper
- 1/4 cup olive oil
- 2 tablespoons Dijon mustard
- 1/2 cup beef broth (for pan drippings)
Instructions
- Remove the roast from the refrigerator 2 to 3 hours before cooking to allow it to come closer to room temperature.
- Preheat your oven to 450 degrees Fahrenheit.
- In a small bowl, combine the minced garlic, rosemary, thyme, salt, pepper, and olive oil to form a paste.
- Pat the roast dry with paper towels. Rub the Dijon mustard evenly over the entire surface of the roast.
- Press the herb and garlic paste firmly onto the mustard coating on all sides.
- Place the roast, fat side up, in a roasting pan. Add the beef broth to the bottom of the pan.
- Sear the roast at 450 degrees Fahrenheit for 15 minutes.
- Reduce the oven temperature to 325 degrees Fahrenheit. Continue roasting until the internal temperature reaches 125 degrees Fahrenheit for medium-rare (this usually takes about 13-15 minutes per pound after the initial sear). Use a meat thermometer inserted into the thickest part, avoiding the bone.
- Remove the roast from the oven when it reaches 125 degrees Fahrenheit. Tent it loosely with foil.
- Let the roast rest for at least 20 to 30 minutes before carving. The internal temperature will rise to about 130-135 degrees Fahrenheit during resting.
- Carve between the bones and serve immediately.
Notes
- For easier carving, ask your butcher to ‘French’ the bones (trim meat from the ends of the bones).
- If you prefer a crispier crust, you can briefly place the roast under the broiler for the last 2 minutes of cooking, watching carefully to prevent burning.
- Use the pan drippings to make a simple gravy or au jus.
Nutrition
- Serving Size: 6 oz cooked meat
- Calories: 450
- Sugar: 0
- Sodium: 450
- Fat: 30
- Saturated Fat: 12
- Unsaturated Fat: 18
- Trans Fat: 0
- Carbohydrates: 0
- Fiber: 0
- Protein: 40
- Cholesterol: 140