

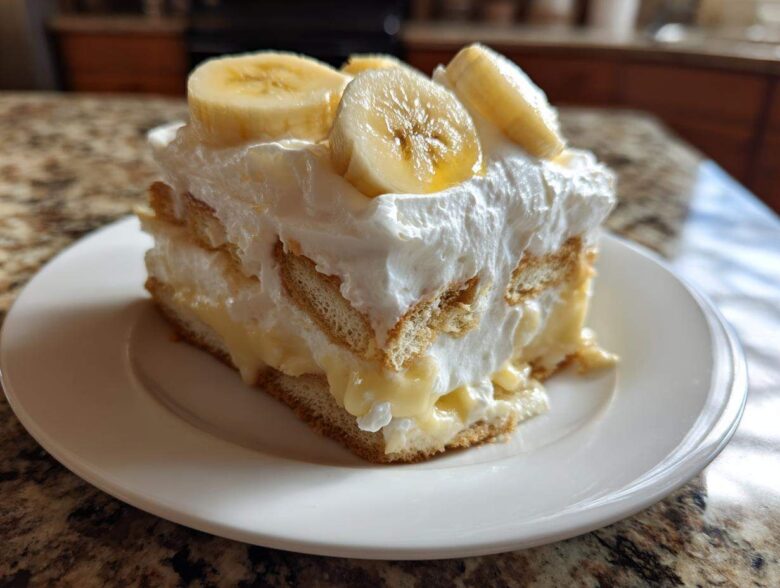
Oh my goodness, if there is one dessert that just teleports me right back to a summer porch swing feeling instantly, it’s the perfect, dreamy, never-endingly creamy banana pudding. Forget those thin, watery puddings you sometimes see! We aren’t doing that here. I’ve tried every single Southern recipe under the sun, but for speed and sheer texture perfection, nothing beats the version that mimics that famous bakery style—you know the one! It hits that sweet spot where the vanilla wafers are just barely soft, the bananas are perfectly ripe, and the pudding itself is miraculously thick without needing hours over a stove. I learned so much about making great recipes accessible from the folks over at Kitchn Kudos, and this one definitely embodies that spirit!
This specific banana pudding recipe is my emergency Sunday dessert because it’s practically foolproof—truly a no-bake miracle. Trust me when I say this copycat method is what our family reaches for when we need comfort food, potlucks, or just Tuesday night happiness. If you’re worried about complicated custards, you can stop worrying right now. This is the ultimate easy banana dessert, and it always disappears first!
Why This Copycat Banana Pudding is the Best Banana Pudding Recipe
Why mess around with tedious cooking times when you can get this unbelievable texture instantly? That’s the joy of this particular pudding! It’s the fastest route to a truly amazing dessert. We get that intensely rich, **creamy pudding recipe** texture using a couple of convenience champions, making it the perfect **no bake dessert** for busy weeks. It’s truly comfort food that travels well, too!
Achieving That Signature Creaminess in Banana Pudding
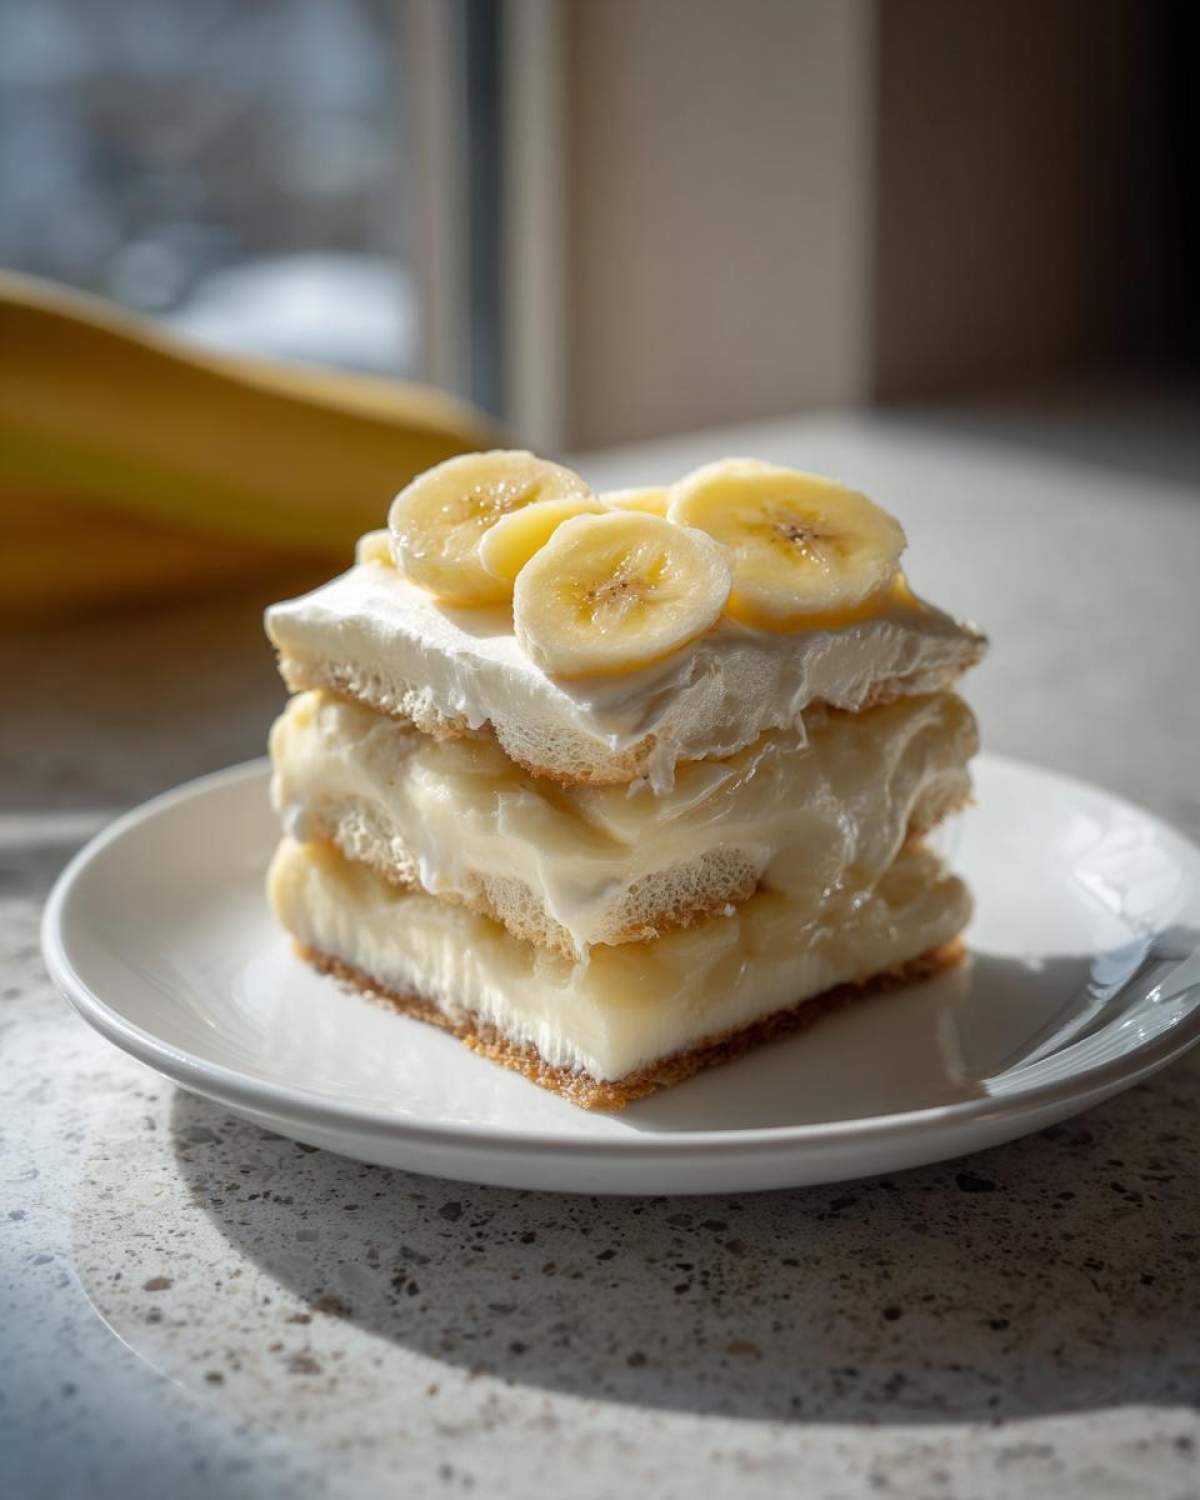
The secret sauce here is ditching the stovetop custard. We rely on *both* that instant vanilla and instant banana pudding mix combined with the cold water. That one-two punch gives us intense flavor and incredible body. When we fold in the whipped topping, it aerates the mixture beautifully. It’s much lighter and dreamier than heavy, egg-yolk-based custards, honestly.
The Perfect Vanilla Wafer Dessert Texture
This is where patience pays off, and it’s the main reason this is the absolute **best banana pudding recipe** out there. Those crisp **vanilla wafer dessert** layers need time to soak up the vanilla and banana goodness. If you rush this chilling step, you end up with a crunchy wafer, and that’s just not right for a proper **banana pudding**. Give it those hours!
Gathering Ingredients for Your Famous Banana Pudding
Okay, let’s get real about what goes into this legendary dessert. The real magic of this recipe is how few things you actually need to buy. It’s designed to be an amazing, rich dessert using pantry staples, which is why it travels so well for potlucks and family reunions. You don’t need heavy cream or egg yolks, which just means fewer things to worry about spoiling or curdling!
Before you run to the store, make sure you have bowls ready—you’ll need a big one for mixing the pudding and a large serving bowl for assembling, unless you’re making individual cups which I totally recommend for parties!
Speaking of supplies, check out how great this apple cinnamon French toast bake turned out last weekend; same principle—simple ingredients creating maximum flavor!
Ingredient Specifics and Notes
This is where we build trust, folks, because using exactly the right mixes makes all the difference. You absolutely *must* use the instant pudding mixes—we need the specific vanilla box (5 oz) and the banana box (3.4 oz). Don’t grab the cook-and-serve ones; they won’t set up right with the cold water method we’re using here. For the bananas, aim for slightly spotty. Yellow is great, but those little brown freckles mean the sugar level is perfect and they won’t taste bitter next to the sweet pudding. Also, make sure your whipped topping is thawed, but still cold, not soupy. It’s the stabilizers in those mixes and the topping that keep this **banana pudding** looking flawless for days!
Step-by-Step Instructions for Classic Banana Pudding
Alright, this is it—the action phase! Even though it’s a no-bake dessert, how you mix and layer your ingredients is crucial for that legendary texture. Don’t let the simplicity fool you; a little intention goes a long way here. Remember, we are aiming for cloud-like fluffiness, not a dense slab of sugary goo!
And hey, if you’re looking for another easy, amazing baked treat to try out later, you’ll love this easy pear crisp topping—it uses similar pantry skills!
Mixing the Creamy Pudding Base
First things first, grab your biggest mixing bowl. We need the sweetened condensed milk, both those instant pudding boxes (vanilla and banana!), and all four cups of cold water to go in together. Now, whisk! You need to commit to whisking this vigorously for a solid two minutes. Don’t stop early! After two minutes, set your bowl down. It might look a little thin, but here’s the crucial trick: let it stand undisturbed for five whole minutes. That’s how the instant starch activates properly and starts that thickening magic.
Once those five minutes are up, take your thawed whipped topping. You have to fold this in super gently. We are not whisking again! We want to maintain all those beautiful air bubbles we just created. Just use a spatula and use an under-and-over motion until you don’t see any big white streaks left. Be patient, folding keeps our banana pudding light!
Layering Your Banana Pudding Dessert
Now for assembly! This builds the texture we crave. Start with a nice, thick layer of vanilla wafers covering the bottom of your dish. Next, arrange your banana slices neatly over those wafers—try not to leave huge gaps. Then, spoon about one-third of that glorious, fluffy pudding mixture right on top of the bananas.
We just repeat that pattern! Wafers, then bananas, then more pudding. We keep stacking until we run out of ingredients, but make sure your very last layer is smooth pudding. This final topping layer acts like a seal, keeping the bananas underneath fresh and helping the bottom wafers get perfectly soft. For an extra fancy look, assembling this in individual clear cups makes for stunning **banana pudding** presentations for everyone!
Tips for the Ultimate Southern Banana Pudding Experience
Now that we’ve mixed and layered everything—pat yourself on the back! But hold on, we aren’t done yet. True **Southern Banana Pudding** perfection requires one final, extremely important waiting game. This is how we elevate this dish from ‘good’ to ‘I need the recipe immediately’ territory. These little secrets separated my grandmother’s recipe from everyone else’s!
The Critical Chilling Time for Banana Pudding
I know you want to dig in right now, but you absolutely must resist the urge! If you serve this right after layering, you’ll have hard vanilla wafers floating in pudding—and that’s just not what we want in a great **banana pudding**. The minimum time is four hours in the fridge, but honestly, chilling it overnight is the game-changer. That long soak allows the wafers to absorb so much moisture that they turn into this tender, cake-like layer. The flavors of the banana, vanilla, and that sweet pudding just meld together into something spectacular.
Variations on This Easy Banana Dessert
While this semi-homemade version is fantastic, sometimes you want to jazz things up a bit, right? If you’re feeling adventurous, you can absolutely swap out the banana instant pudding for butterscotch or even vanilla pudding, though you’ll need one more banana layer, obviously! A little dusting of cinnamon right over the top layer of pudding before it chills adds a lovely warmth that plays well with the sweetness. Also, remember the notes mention using a homemade custard if you want a richer flavor, which is what my neighbor does. That takes more effort, but boy, is it decadent!
Don’t forget to check out this recipe for brown butter pumpkin bread if you want another cozy treat that leans into that comforting, made-from-scratch vibe.
Storage and Make Ahead Desserts for Your Banana Pudding
One of the greatest things about this specific banana pudding recipe is that it’s totally built for advance planning. Honestly, it’s one of my favorite qualities! Since the chilling time is mandatory anyway, this is the ultimate **make ahead dessert** for busy cooks.
You can mix and layer the entire dish, cover it tightly with plastic wrap—I usually press a layer of plastic wrap directly onto the surface before covering the whole bowl, just so no air touches the pudding—and stick it in the fridge. It keeps beautifully for a good 24 hours before serving. I often put it together the night before a party, and it’s even better the next day! This recipe is a lifesaver when you need reliable **potluck desserts**.
If you’re looking for more excellent make-ahead options, I always rely on these no-bake peanut butter bars when I need something set and ready to go without turning on the oven!
Just remember one thing about storing: the bananas are the weak link. If you are storing it longer than 36 hours, the bananas might start turning greyish, even underneath all that glorious pudding. If you’re prepping way ahead, you could always slice the bananas fresh in the morning of the party and just gently layer them in at that point, covering them with pudding right away.
Frequently Asked Questions About Layered Pudding Dessert
I always get so many questions about this recipe, especially since it’s so popular for parties and gatherings! People want to make sure their **Layered Pudding Dessert** turns out just right, so I pulled together the most common things folks ask me when they are trying it for the first time. Don’t fret if you’ve never made a true **Southern Banana Pudding** before; these answers should clear everything up!
Can I use fresh whipped cream instead of frozen whipped topping in this banana pudding?
Oh, you totally can! If you prefer the taste of homemade, that’s fantastic. You’ll whip up heavy cream with a tiny bit of sugar until stiff peaks form. But here’s the slight catch: the pre-made frozen topping is stabilized, which means it holds its airy shape much longer as the **banana pudding** chills and sits out at a party. If you use fresh cream, just know that it might deflate a bit more over the course of a day, potentially making your pudding a little less lofty.
How long does homemade banana pudding stay fresh?
This is a great topic, especially if you’re making it ahead of time. Because we are using fresh fruit, the quality really starts dipping after day three. I always tell people this **Creamy Pudding Recipe** is best eaten within the first two days, but it will definitely hold up fine in the fridge for up to four days. The main thing you’ll notice declining isn’t the pudding itself, but the texture of those vanilla wafers; they’ll become much more cake-like the longer they sit, which some people actually prefer!
What is the best type of banana for this recipe?
If you use bananas that are perfectly green and hard, the flavor won’t be sweet enough. If you use bananas that are completely black and spotty, they turn to mush too fast once they hit the cold pudding! The sweet spot—the absolute best choice—is a banana that is bright yellow, but you can see just a few small brown specks starting to show up, especially near the ends. They are firm enough to hold their shape during layering but sweet and soft enough to blend perfectly into the **no bake dessert** a few hours later.
If you have any other burning questions about making this dessert perfect, feel free to reach out on my contact page! Happy pudding making!
Estimated Nutritional Data for This Creamy Pudding Recipe
Now, I’m definitely not a nutritionist, so please take these numbers with a grain of salt (and a whole lot of sugar!). These are just standard estimates based on the ingredients we used in our batch of this amazing **creamy pudding recipe**. Remember, if you use full-fat whipped topping or sweeter bananas, these numbers will shift a little bit.
We always treat this magnificent dessert as an occasional treat, not a daily staple! But keeping track, even loosely, is just part of being a good home cook, right? Here’s the breakdown per serving size (which this recipe makes about 8 of):
- Serving Size: 1 serving
- Calories: 450
- Total Fat: 20g
- Saturated Fat: 10g
- Carbohydrates: 65g
- Sugar: 55g (Yes, it’s a sweet treat!)
- Protein: 5g
- Cholesterol: 35mg
Just a quick heads-up: since this is a copycat recipe relying heavily on condensed milk and instant mixes, the sugar content is naturally higher than an old-fashioned, completely from-scratch custard. That’s what makes this **easy banana dessert** so addictively delicious, though! Use this information just as a guideline; the real joy is in the incredible layered texture, not the macros!
Share Your Thoughts on This Family Favorite Sweet Treat
Whew! We’ve done the mixing, we’ve done the layering, and now the hard part—waiting for it to chill! But before you cover that glorious dish and stick it in the fridge, I’d truly love to know what you think. This recipe has given my family so many happy moments, and I hope it does the same for yours. It just tastes like pure, sweet nostalgia!
Have you tried making this famous version of **banana pudding** yet? Did you stick to the large serving dish, or did you opt for those cute individual cups I mentioned earlier? Those single servings look so elegant at a party, even though they disappear twice as fast!
Jump down to the comments below and let me know! Rate this **family favorite sweet treat** on a scale of 1 to 5 stars. Are you already planning your next batch? I always love seeing photos of everyone else’s successful **Southern comfort food** creations! If you’re looking for more recipes that bring the family together, check out my main blog page for more sweet and savory ideas!
PrintFamous Copycat Banana Pudding
A creamy, layered dessert mimicking the famous Magnolia Bakery style, using instant pudding and whipped topping for ease.
- Prep Time: 20 min
- Cook Time: 0 min
- Total Time: 4 hr 20 min
- Yield: 8 servings
- Category: Dessert
- Method: No Bake
- Cuisine: American
- Diet: Vegetarian
Ingredients
- 1 (14 ounce) can sweetened condensed milk
- 1 (5 ounce) box instant vanilla pudding mix
- 1 (3.4 ounce) box instant banana pudding mix
- 4 cups cold water
- 1 (8 ounce) container frozen whipped topping, thawed
- 1 (12 ounce) box vanilla wafers
- 4 large ripe bananas, sliced
Instructions
- In a large bowl, whisk together the sweetened condensed milk, both instant pudding mixes, and the cold water for two minutes.
- Let the mixture stand for five minutes to allow it to thicken.
- Gently fold in the thawed whipped topping until just combined. Do not overmix.
- In a large serving bowl or individual cups, begin layering the ingredients. Start with a layer of vanilla wafers.
- Arrange a layer of sliced bananas over the wafers.
- Spoon about one-third of the pudding mixture over the bananas.
- Repeat the layers: wafers, bananas, pudding, until all ingredients are used, ending with a layer of pudding.
- Cover the bowl tightly with plastic wrap.
- Refrigerate for at least four hours, or preferably overnight, to allow the wafers to soften.
Notes
- For the best texture, chill the pudding for a minimum of six hours so the vanilla wafers absorb moisture.
- Use slightly under-ripe bananas if you prefer less mushiness after chilling.
- You can use homemade custard instead of instant pudding for a richer, old-fashioned flavor.
Nutrition
- Serving Size: 1 serving
- Calories: 450
- Sugar: 55
- Sodium: 250
- Fat: 20
- Saturated Fat: 10
- Unsaturated Fat: 10
- Trans Fat: 0
- Carbohydrates: 65
- Fiber: 1
- Protein: 5
- Cholesterol: 35