

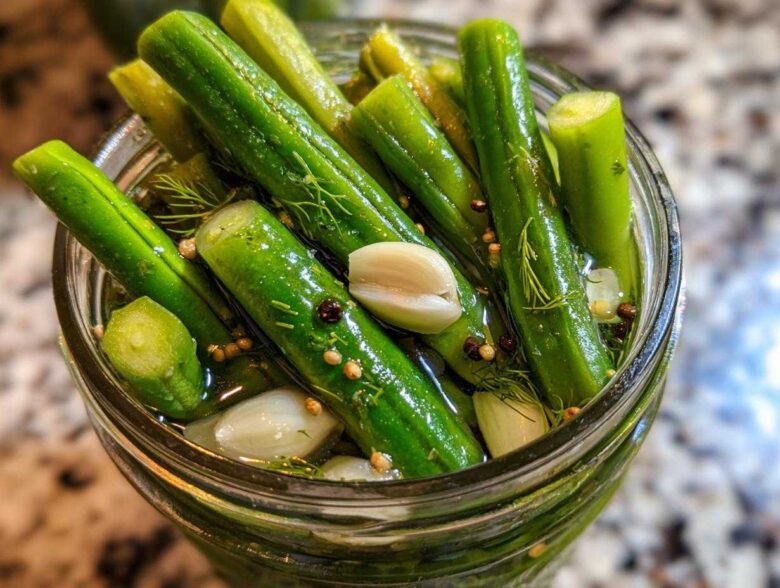
Oh, those gorgeous green bean harvests! When the garden is overflowing and you just need a little snap of flavor to get you through the rest of the summer, you know exactly what you need: the perfect batch of **dilly beans**. Trust me, after years and years messing around with preserving every summer vegetable under the sun, I’ve perfected the easy way. Forget the boiling water bath for now—we’re making refrigerator pickles here! I’ve linked to my main recipe page at my recipe index because this is just one of my many garden favorites.
This recipe is hands-down my favorite **Pickled Green Beans Recipe** because these aren’t the floppy pickles you sometimes end up with. We are harnessing the power of quick pickling to lock in an unbelievable, satisfying crunch. These are tangy, garlicky, and ready whenever that craving hits. You won’t believe how fast these come together; it’s barely any oven time, and you get the best crunchy snack imaginable!
Why You Will Love These Quick Dilly Beans
- They are the ultimate **Quick Pickle Recipe**: Seriously, you are minutes away from having amazing treats, no canning required!
- Texture is EVERYTHING: I’m guaranteeing you the crispest, snappiest green beans you’ve ever pickled at home. They stay crunchy!
- Ready for snacking fast: These are fantastic **Crunchy Snack Recipes**—so good you’ll be dipping into the fridge constantly.
- Big Dill Flavor: We pack them with garlic and fresh dill, so the flavor is super sharp and tangy, just like the best **Homemade Pickles**.
- Perfect for using up the harvest: If your garden explodes in green beans overnight, this is your solution for **Preserving Green Beans** without firing up the canner.
- Incredible flavor enhancers: I sometimes make a big batch and then toss them into salads, like my Crunchy Thai Peanut Salad Bowl, or just eat them straight!
- You can sneak in some spice: If you love heat, we show you just how easy it is to turn these into **Spicy Pickled Vegetables** too! Check out how I handle spice in my Spicy Roasted Chickpeas for inspiration.
Honestly, these are my go-to all summer long. They are so much easier than traditional canning but give you that wonderful, tangy punch. You just mix the brine, drop the spices in, pack the jar, and wait. That’s it! Don’t worry about a complicated process; these are designed for quick kitchen magic.
Essential Ingredients for Perfect Dilly Beans
Okay, let’s talk about what goes into these magic jars! Since we aren’t canning these babies for forever storage, the amounts are perfect for a quick batch that’s ready in a day. You need the freshest green beans you can find—seriously, if you can pick them that morning, do it! We are shooting for flavor here, so don’t skimp on the aromatics. Everything listed below is crucial for that classic tangy punch that makes **dilly beans** so addictive.
You’ll need exactly 2 lbs fresh green beans, trimmed, because we want every bite to be perfect. And for the brine, make sure you grab white vinegar (5% acidity). We need that specific acidity level for the quick pickle process to work its magic.
- 2 lbs fresh green beans, trimmed
- 4 cloves garlic, peeled and halved
- 1 teaspoon mustard seeds
- 1 teaspoon whole black peppercorns
- 1/2 teaspoon red pepper flakes (optional, for a little kick!)
- 4 sprigs fresh dill (or 2 teaspoons dried dill seed)
- 2 cups white vinegar (5% acidity)
- 2 cups water
- 2 tablespoons pickling salt (don’t use iodized table salt, please!)
Ingredient Notes and Substitution Tips for Dilly Beans
This is where we build trust, right? Every experienced pickler knows the little secrets! If you can’t find fresh dill sprigs, go ahead and use the dried dill seed, but bump it up to two teaspoons because the fresh stuff has more presence. Remember that tip about crunch? If your beans aren’t exactly farm-fresh, go ahead and soak them in ice water for 30 minutes before packing them in the jars. That shock of cold water really firms up the cell walls. Also, please stick to **pickling salt**; regular table salt has anti-caking agents that can make your brine cloudy. We are aiming for crystal clear, tangy perfection here, not cloudy mess!
Step-by-Step Instructions: How to Make Dilly Beans
This is the fun part, and honestly, it moves so fast! Once you have your ingredients ready—and I mean *ready*—the actual hands-on time is practically zero. We’re talking about a super quick brine, a little packing, and then they wait patiently in the fridge. It feels like cheating because the final flavor is intense, but the actual process takes less than ten minutes of active work. Remember to have your jars and lids already clean and waiting nearby, especially if you’re making a big batch. If you’re interested in making these in jars for meal planning, you might peek at my Greek Quinoa Salad Jars for jar-packing inspiration!
Preparing the Jars and Aromatics for Your Dilly Beans
First things first: Wash those green beans until they squeak, and snip off those tough ends. Then, grab your clean jars. This layering is vital for flavor distribution, so do it carefully! In the bottom of *each* jar, you need to place one garlic half, a teaspoon of mustard seeds, the peppercorns, your fresh dill sprigs, and those red pepper flakes if you decided to risk the heat. 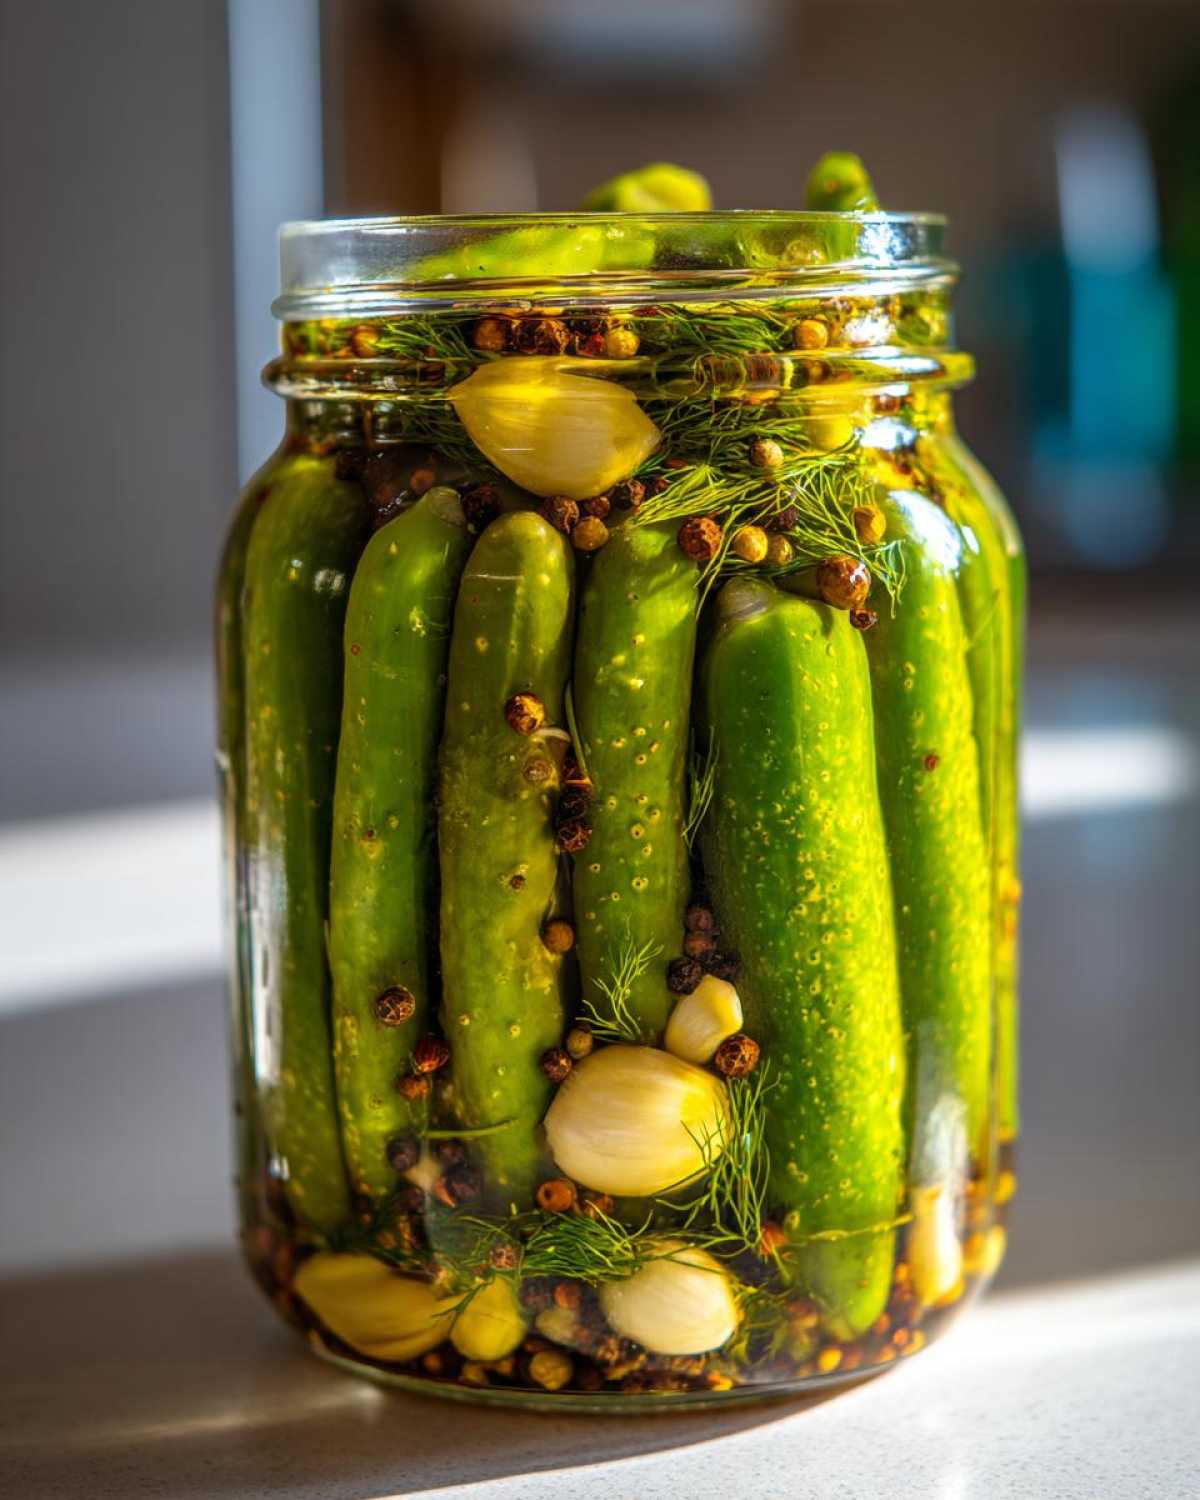 Now, pack those beans in vertically, pressing them down snugly. You want them tight so they don’t float, but not so tight that they bruise.
Creating and Pouring the Hot Brine Over the Beans
Time for the magic liquid! In a small saucepan, mix your vinegar, water, and pickling salt. Get this boiling—just bring it to a rolling boil, stirring until you see that salt completely vanish. That usually takes about five minutes, tops. Once it’s dissolved, turn off the heat. Now, carefully pour that hot brine over the packed beans in the jars. You must leave about a half-inch space at the very top—that’s called headspace, and it’s important! Give the jar a gentle tap or two on the counter; this helps release any grumpy air bubbles hiding near the bottom to ensure everything gets pickled evenly.
Achieving Maximum Crunch in Your Refrigerator Dilly Beans
If you’ve ever been disappointed by soft, limp pickles, I hear you! That is the absolute WORST, which is why maintaining the crunch is my number one focus when I make these **dilly beans**. We already talked about the ice bath trick, but let me stress it again: an ice bath before jarring is non-negotiable if your beans have been sitting around for a day or two.
Another thing—please don’t let that brine boil for ages! You only need high heat to dissolve the salt. Too much boiling time essentially cooks the beans before they even get jarred, and that destroys the crispness we are fighting for. These **Vinegar Pickled Beans** need minimal heat treatment. Just enough to dissolve the salt, then pour it right over those fresh aromatics. The magic happens later in the cold of the fridge, not on the stovetop. If you love how versatile these are, you’ll definitely want to check out my recipe for Fried Pickle Dip—it’s amazing served alongside these!
Flavor Development and Storing Your Homemade Dilly Beans
Now comes the agonizing part: waiting! Seriously, I know you want to rip those lids off five minutes after pouring the hot brine, but you absolutely cannot rush flavor development here. For these refrigerator **dilly beans** to transform from fresh green beans into tangy treats, they need time to absorb all that garlicky, vinegary goodness. I tell everyone they must wait a minimum of 24 hours. If you can hold out for 48 hours, wow, the results are even better!
When you come back on day two, you’ll notice the brine might look slightly cloudy, and the beans will have lost that vibrant, raw green color. That means the pickling process is happily underway! Remember, because we skipped the pressure canning and deep heat processing, these are not shelf-stable forever. They need to live in the coldest part of your fridge.
For the best, snappiest experience, try to consume your **dilly beans** within about four weeks. After that, they start to soften up a bit, and while they are still safe longer, they lose that incredible crunch we worked so hard for. If you’re looking for other ways to maximize that fresh dill taste in your kitchen beyond these wonderful pickles, you absolutely have to check out my roundup of Dill Flavor Recipes. The way dill marries unexpected ingredients is just fantastic!
The longer they sit in that cold brine, the more concentrated the flavor gets. We call that depth, my friend. If you are making a huge batch from the garden harvest, try hiding a jar in the very back of the fridge—it might surprise you how complex they taste after three weeks!
Variations: Making Spicy Pickled Vegetables and Dilly Beans
So, while I insist that the classic version with just the hint of pepper flake is perfection, I know some of you out there are heat seekers! If you want to amp up the kick and turn your simple **dilly beans** into fully fledged **Spicy Pickled Vegetables**, it’s super easy to customize the brine.
The quickest way, which you probably noticed in the main recipe, is just dumping in more red pepper flakes. I usually double the original half teaspoon for a noticeable warmth that builds nicely as you eat them. But don’t stop there! Spice is all about layering those complex flavors, not just brute heat.
If you want real depth in your spicy batch, try adding a few whole coriander seeds along with the mustard seeds—it brings a citrusy, earthy note that pairs beautifully with the vinegar. Another winner is dropping in a whole dried chile pepper, like a small Arbol or Cayenne, right into the jar with the garlic. Just make sure if you use a whole dried pepper, you aren’t using too many, or you’ll end up with beans that are impossible to snack on!
I find that when I’m making a batch of purely spicy pickles, I need to slightly boost the dill to balance the heat. Think of it like this: the heat hits first, but the dill has to linger. You could even try throwing in a small, slivered piece of fresh ginger when you add the garlic. That warmth works magic with the vinegar! Seriously, once you start playing around with these extra aromatics, you’ll realize that every batch of **dilly beans** can taste totally different. It’s what keeps me busy during harvest season!
If you feel brave and want to pair incredible flavor like this with a main dish, you have to try my recipe for the Spicy Thai Basil Beef Stir-Fry. The bright acidity of these pickles cuts right through the richness of that dish perfectly!
Frequently Asked Questions About Pickled Green Beans Recipe
I get so many great questions every time I post this recipe, and that’s because everyone wants that perfect crunch! When you’re looking at **Homemade Pickles**, especially quick ones like these, you naturally wonder about variations and storage. I’ve gathered up the most common things folks ask me when they’re getting ready to transform their green beans into these tangy treats.
Can I use these dilly beans for traditional water bath canning?
This is a super important safety question! The short answer is no, not with this specific recipe as written. This recipe is designed entirely for **Refrigerator Pickles** because the brine ratio and the process are set up for cold storage, where they stay crisp but only last a few weeks. Shelf-stable food preservation—like actual water bath canning—requires very specific times, temperatures, and headspace measurements that are tested for safety. If you want to move this recipe to the shelf, you absolutely must consult tested guidelines from a reliable source, like your local agricultural extension office, to ensure your jars are safe for long-term storage. We follow those rules strictly if we want shelf stability!
What is the best way to serve these tangy side dishes?
Oh, this is fun! I honestly grab them right out of the jar, sometimes still crunchy from the cold, and call it a day—the perfect **Dill Pickle Snack**. But they are so much more versatile than that. These **tangy side dishes** are amazing alongside rich BBQ pulled pork or brisket, or cut up and mixed into tuna or chicken salad for an extra pop of flavor. They are fantastic on a cheese board too! Anytime you need a bright, acidic side dish to cut through richness, just reach for your **dilly beans**. If you’re planning a full summer spread, check out some other ideas on my Summer Garden Recipes page for more inspiration!
Another great tip: chop them up and put them on top of hot dogs or hamburgers. It’s an instant upgrade!
Do you have questions about using different kinds of vinegar, or maybe what salt to use? Keep reading, I cover those practical questions next!
Estimated Nutritional Profile for Dilly Beans
Now, I know a lot of you are looking at these magnificent **dilly beans** and thinking about how they fit into your weekly meals, right? Since these are essentially vegetables preserved in vinegar and salt, the nutritional values are usually pretty fantastic—low in calories and low in fat. That’s why they make such a great addition to any plate, whether you’re pairing them with a big meal or eating them straight as a light, crunchy snack.
Please remember that since this is a simple refrigerator pickle recipe that relies heavily on salt for preservation, the sodium content is what you’d expect from any good **Pickled Green Beans Recipe**. I ran these numbers through my system based on the ingredients list, but honestly, the exact count can float around a bit based on the specific brand of vinegar or salt you grab off the shelf.
- Serving Size: 5 beans
- Calories: 10
- Sugar: 1 gram
- Sodium: 290 mg (Watch this, folks!)
- Fat: 0 grams
- Carbohydrates: 2 grams
- Fiber: 1 gram
If you are watching your sodium intake, that’s totally understandable. That’s why I always suggest rinsing them quickly under cold water if you’re eating a huge bowl of them! We want flavor, but we also want to be smart about what we eat. For more detailed thoughts on how we calculate these numbers and why they can change, you can always check out my general info page here.
Overall, when you’re looking for **Tangy Side Dishes** that won’t derail your diet but will give you a huge burst of flavor, these low-calorie **dilly beans** are tough to beat!
Share Your Homemade Garden Goodness
That’s it, my friends! You now have my absolute favorite, go-to recipe for those crisp, garlicky, irresistible **dilly beans**. I hope you get a chance to make these next time you have an onslaught of green beans from the garden or just need that perfect crunchy snack to tide you over until dinner.
I truly want to hear how they turned out for you! Did you go spicy? Did you crush the crunch factor? Drop a comment below, give this recipe a star rating, and let me know if you tried any wild variations of your own. Sharing our **Homemade Garden Goodness** is half the fun of cooking, right?
If you have any questions about the process—maybe you’re wondering about scaling the recipe up for party prep—feel free to reach out to me directly via my contact page. Happy pickling, and enjoy that amazing snap!
PrintClassic Crunchy Dilly Beans (Refrigerator Method)
Make crisp, tangy dilly beans using this simple refrigerator pickle recipe. These pickled green beans require no canning and are ready to eat quickly.
- Prep Time: 20 min
- Cook Time: 5 min
- Total Time: 25 min
- Yield: Approximately 2 quarts
- Category: Side Dish
- Method: Refrigerator Pickling
- Cuisine: American
- Diet: Vegetarian
Ingredients
- 2 lbs fresh green beans, trimmed
- 4 cloves garlic, peeled and halved
- 1 teaspoon mustard seeds
- 1 teaspoon whole black peppercorns
- 1/2 teaspoon red pepper flakes (optional)
- 4 sprigs fresh dill (or 2 teaspoons dried dill seed)
- 2 cups white vinegar (5% acidity)
- 2 cups water
- 2 tablespoons pickling salt
Instructions
- Wash the green beans thoroughly. Trim the ends off the beans.
- Prepare your jars: Clean pint or quart jars and lids. Place one garlic half, mustard seeds, peppercorns, dill, and red pepper flakes (if using) into the bottom of each jar.
- Pack the trimmed green beans tightly into the jars vertically.
- In a saucepan, combine the vinegar, water, and pickling salt. Bring the mixture to a boil, stirring until the salt dissolves completely.
- Carefully pour the hot brine over the beans in the jars, leaving about 1/2 inch of headspace at the top. Ensure the beans are fully submerged.
- Tap the jars gently to release any trapped air bubbles. Wipe the rims clean.
- Seal the jars with the lids and rings. Let the jars cool to room temperature on the counter.
- Refrigerate the dilly beans for at least 24 hours before eating. They will continue to develop flavor. Store in the refrigerator and consume within 4 weeks for best crunch.
Notes
- For a crispier bean, you can soak the trimmed beans in ice water for 30 minutes before packing them into the jars.
- If you prefer a stronger dill flavor, substitute 1 teaspoon of dill seed for the fresh dill sprigs.
- If you want to can these for shelf storage, you must use a water bath canner and follow tested canning procedures for safety. This recipe is for refrigerator pickles only.
Nutrition
- Serving Size: 5 beans
- Calories: 10
- Sugar: 1
- Sodium: 290
- Fat: 0
- Saturated Fat: 0
- Unsaturated Fat: 0
- Trans Fat: 0
- Carbohydrates: 2
- Fiber: 1
- Protein: 0
- Cholesterol: 0