

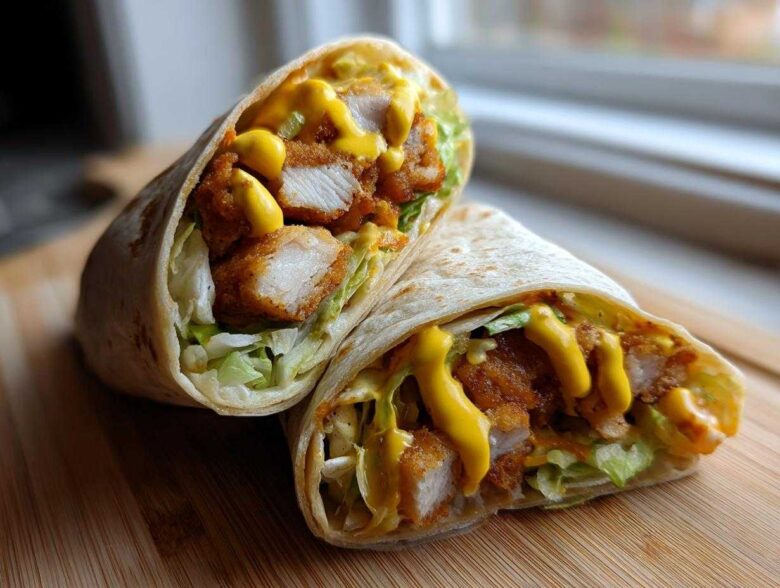
Listen, I don’t know about you, but when I order a chicken wrap out, half the experience is that glorious, shattering crunch when you bite through the tortilla. Too often, making it at home ends up soggy or just… sad. Well, I spent ages figuring out the secret to getting that perfect, restaurant-quality crispiness right here on my stovetop!
We aren’t messing around with excuses today; this is the path to the Ultimate Crispy Chicken Wrap with Honey Mustard Sauce. My breakthrough really came down to the breading—you simply have to treat those panko crumbs right. I’ve learned the exact dredging sequence to lock in flavor and guarantee crunch, even after it gets cozy with the lettuce and sauce. Trust me on this procedure; once you nail this breading, you’ll be using that technique everywhere!
For those seriously invested in crunch perfection, you absolutely have to check out some advanced crunch secrets here, but for this wrap, our simple three-step dredge is going to blow your mind.
Why This Crispy Chicken Wrap with Honey Mustard Sauce Recipe Works
Honestly, this recipe is my go-to for a reason. It hits every single craving without demanding you spend all afternoon in the kitchen. It’s fast, but it never tastes fast-food cheap.
- The texture is unbeatable: Panko breadcrumbs mean maximum crunch that actually lasts.
- Flavor explosion: That zesty homemade honey mustard sauce cuts through the richness perfectly.
- It’s built for speed: We get breaded, fried, and assembled in under 40 minutes—perfect for a weeknight!
Gathering Ingredients for Your Crispy Chicken Wrap with Honey Mustard Sauce
Okay, here’s where the magic starts to take shape. Don’t skim this part! Getting your ingredients prepped and laid out—what we chefs call mise en place—is the real secret to making sure this goes smoothly. Having everything measured and ready means you only focus on making that chicken perfectly golden brown.
We need four main groups of ingredients here: the chicken itself, the three-part breading station, the fresh bits for the wrap, and, of course, the absolutely essential honey mustard sauce. If you want to try whipping up your own mayo for the sauce, which I highly recommend for next-level flavor, you can find a great recipe right here.
Ingredients for the Crispy Chicken
We’re using two large boneless, skinless chicken breasts here, which we slice into nice, easy-to-manage strips. Make sure they are roughly the same thickness so they all cook at the same rate. No one wants one tender cooked and the other one needing five extra minutes!
- 2 large boneless, skinless chicken breasts, cut into strips
- 1 cup all-purpose flour
- 1 teaspoon salt
- 1/2 teaspoon black pepper
- 1/2 teaspoon paprika (this just adds color, mostly!)
- 2 large eggs, beaten
- 1 1/2 cups panko breadcrumbs (Panko is non-negotiable for crunch!)
- Vegetable oil, for frying (you’ll need about an inch deep in your skillet)
Components for Assembling the Crispy Chicken Wrap with Honey Mustard Sauce
These are the supporting actors that make the wrap truly satisfying. Don’t skimp on the quality of your tortilla!
- 4 large flour tortillas (I prefer the big burrito size)
- 1/2 cup shredded lettuce (Romaine works great if you like it extra crisp)
- 1/2 cup shredded cheddar cheese (sharp cheddar gives the best bite)
- 1/4 cup thinly sliced red onion (we want that sharpness!)
Making the Best Honey Mustard Sauce for Chicken
This sauce is the star pairing! It’s sweet, it’s tangy, and it comes together faster than you can clean up the cutting board. The balance between Dijon and honey is crucial here.
- 1/2 cup Dijon mustard
- 1/4 cup honey
- 2 tablespoons mayonnaise
- 1 teaspoon apple cider vinegar (this is what brings in that necessary tang!)
Step-by-Step Instructions for the Perfect Crispy Chicken Wrap with Honey Mustard Sauce
Alright, let’s get cooking! The key to this whole operation is organization. Set up your three dredging bowls right next to your stove so you can move fast once you start frying. If you are looking for a less hands-on crunch method, I’ve got some baking tips too, which you can see closer to the end of this guide, or just dive right into this baked chicken tutorial for inspiration.
Preparing and Breading the Chicken Strips
First, you need your dredging station ready. Mix your flour, salt, pepper, and paprika in dish one. Eggs go beaten in dish two. Panko breadcrumbs are dish three.
Take one chicken strip and give it a good shake in the flour mixture first—totally coat it! Then, dip it straight into the egg. Now, here’s critical: dredge it in the panko, and really press that breadcrumb coating onto the chicken with your fingers. You need that pressure so the panko sticks hard and doesn’t fall off in the hot oil.
Achieving Maximum Crispiness When Cooking the Chicken
You want your vegetable oil heated in a skillet to about 350 degrees Fahrenheit. If you don’t have a thermometer, wait until a tiny piece of breading sizzles instantly and floats beautifully. Fry your strips in batches—don’t overcrowd the pan, I beg you! Overcrowding drops the oil temperature and makes everything soggy.
Cook them for about 3 to 4 minutes per side until they hit a gorgeous golden brown and reach 165 degrees Fahrenheit inside. Once they look perfect, pull them out immediately and place them on a wire rack lined with paper towels. The rack lets the air circulate underneath, which keeps the bottom crisp! That’s a game-changer.
Whisking the Zesty Honey Mustard Sauce
While the chicken is draining and cooling just a touch, make the sauce. This is so easy it feels like cheating. Just grab a small bowl and whisk the Dijon mustard, honey, mayo, and that little splash of apple cider vinegar together. Keep whisking until it looks totally smooth and creamy.
Seriously, taste it right now! If you want it sweeter, add a tiny bit more honey. If you like more zing, add another dash of vinegar. It’s your sauce, make it scream!
Assembling Your Ultimate Crispy Chicken Wrap with Honey Mustard Sauce
Time for the grand finale! Lay out a large flour tortilla. I love starting with a thin layer of shredded lettuce right in the middle—this acts like a moisture barrier so the tortilla doesn’t get weird and soggy right away.
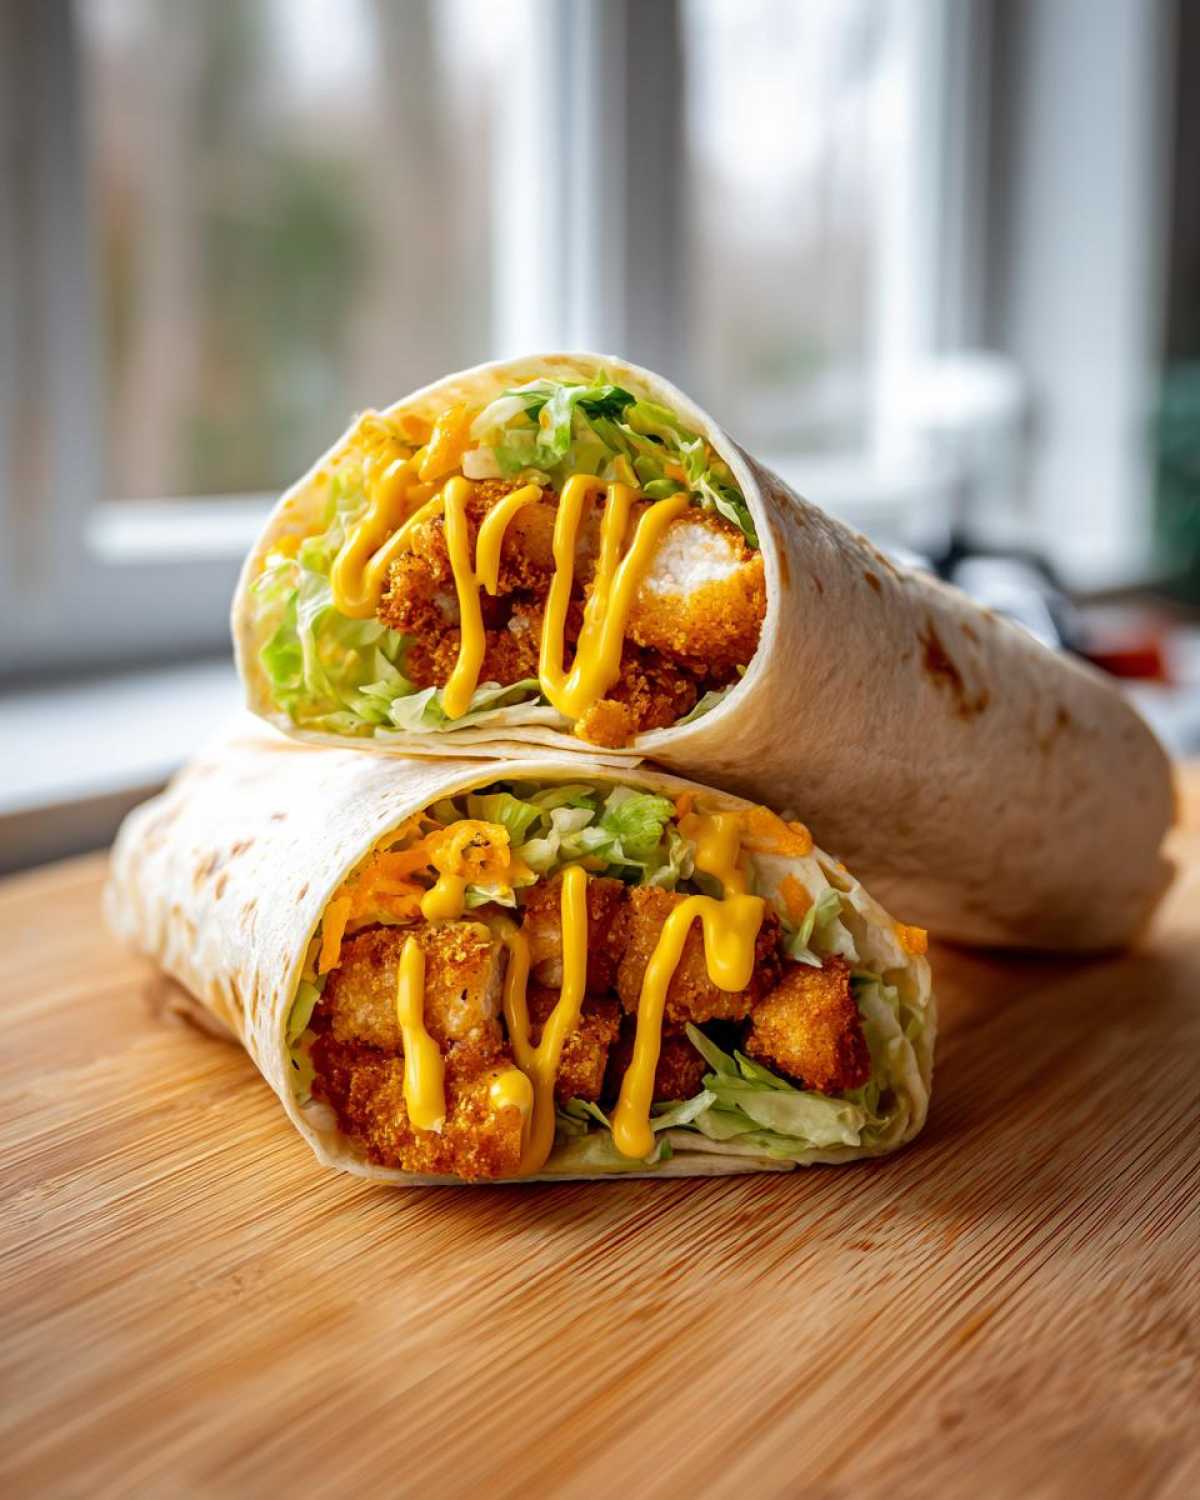
Layer on your warm, crispy chicken strips, sprinkle with cheese and those vibrant red onions. Now, drizzle the honey mustard sauce—be generous! Fold those sides in tightly, and then roll from the bottom up. Keep it snug. If you want, slice it diagonally and enjoy the crunch!
Tips for the Best Crispy Chicken Wrap with Honey Mustard Sauce
Okay, we talked about the breading, but since you are aiming for the absolute best Crispy Chicken Wrap with Honey Mustard Sauce, I want to share a couple of little tricks that separate good from great. Honestly, the oil temperature is everything here. If it’s too cool, the chicken drinks oil and gets greasy. If it’s too hot, the outside burns before the inside cooks, which is a major dinner fail.
Keep that oil hovering near 350°F. Also, while the panko coating is amazing, I always, always press it on firmly. Don’t just let the strips fall into the breading; really pat that coating onto the chicken!
One last thing: warm your tortillas! A cold tortilla cracks when you try to roll it tight. You can warm them quickly in a dry skillet for about 15 seconds per side until they are pliable. It makes rolling your wrap so much easier and prevents splitting. If you want the deep dive into how the pros fry, check out my deep dive on Southern frying techniques; a lot of those principles apply here!
Air Fryer Crispy Chicken Wrap with Honey Mustard Sauce Variation
I know, I know! Sometimes you want that amazing crunch but maybe you’re trying to cut back on the oil, or maybe you just don’t want to deal with a giant pan of hot oil cleanup after a long day. Don’t worry, because this recipe is totally adaptable for the air fryer, and you still get fantastic, crunchy results!
The gorgeous part about using the air fryer for your chicken strips is that it really locks in that exterior crunch we worked so hard to build with the panko breadcrumbs, while keeping the inside juicy. It’s a fantastic way to make these Quick Weeknight Chicken Wraps when you’re short on time or trying to keep things a little lighter.
If you’re getting into air frying in general, I’ve got a whole collection of tips on how to get everything perfectly crisp in that machine—start with my air fryer gnocchi guide for general technique pointers!
Here’s how you transition those breaded strips we prepped earlier:
- Prep the Chicken: Make sure your chicken strips are fully breaded, just like we did for frying.
- Spritz, Don’t Drown: Take your breaded strips and give them a very light, even spray or brush of cooking spray. You don’t want them swimming in oil, just lightly coated so the panko browns nicely.
- Load the Basket: Arrange the strips in a single layer in your air fryer basket. Yup, single layer—this is key! If they are stacked on top of each other, the hot air can’t circulate, and you’ll end up with soggy bottoms.
- Set the Temp: Set your air fryer to 400 degrees Fahrenheit. Start cooking for 10 minutes.
- Flip and Finish: After 10 minutes, pull the basket out and flip every strip over. Return it to the air fryer and cook for another 2 to 3 minutes, or until they are deep golden brown and hit that perfect 165°F internal temperature. They might cook faster depending on your machine, so watch them closely near the end!
Once those golden beauties are ready, you can move straight onto assembling your healthy Air Fryer Crispy Chicken Wrap with Honey Mustard Sauce exactly as we discussed in the previous section. It’s just that simple! The flavor of that zesty sauce is still front and center, but with less fuss!
Ingredient Notes and Substitutions for Your Wrap
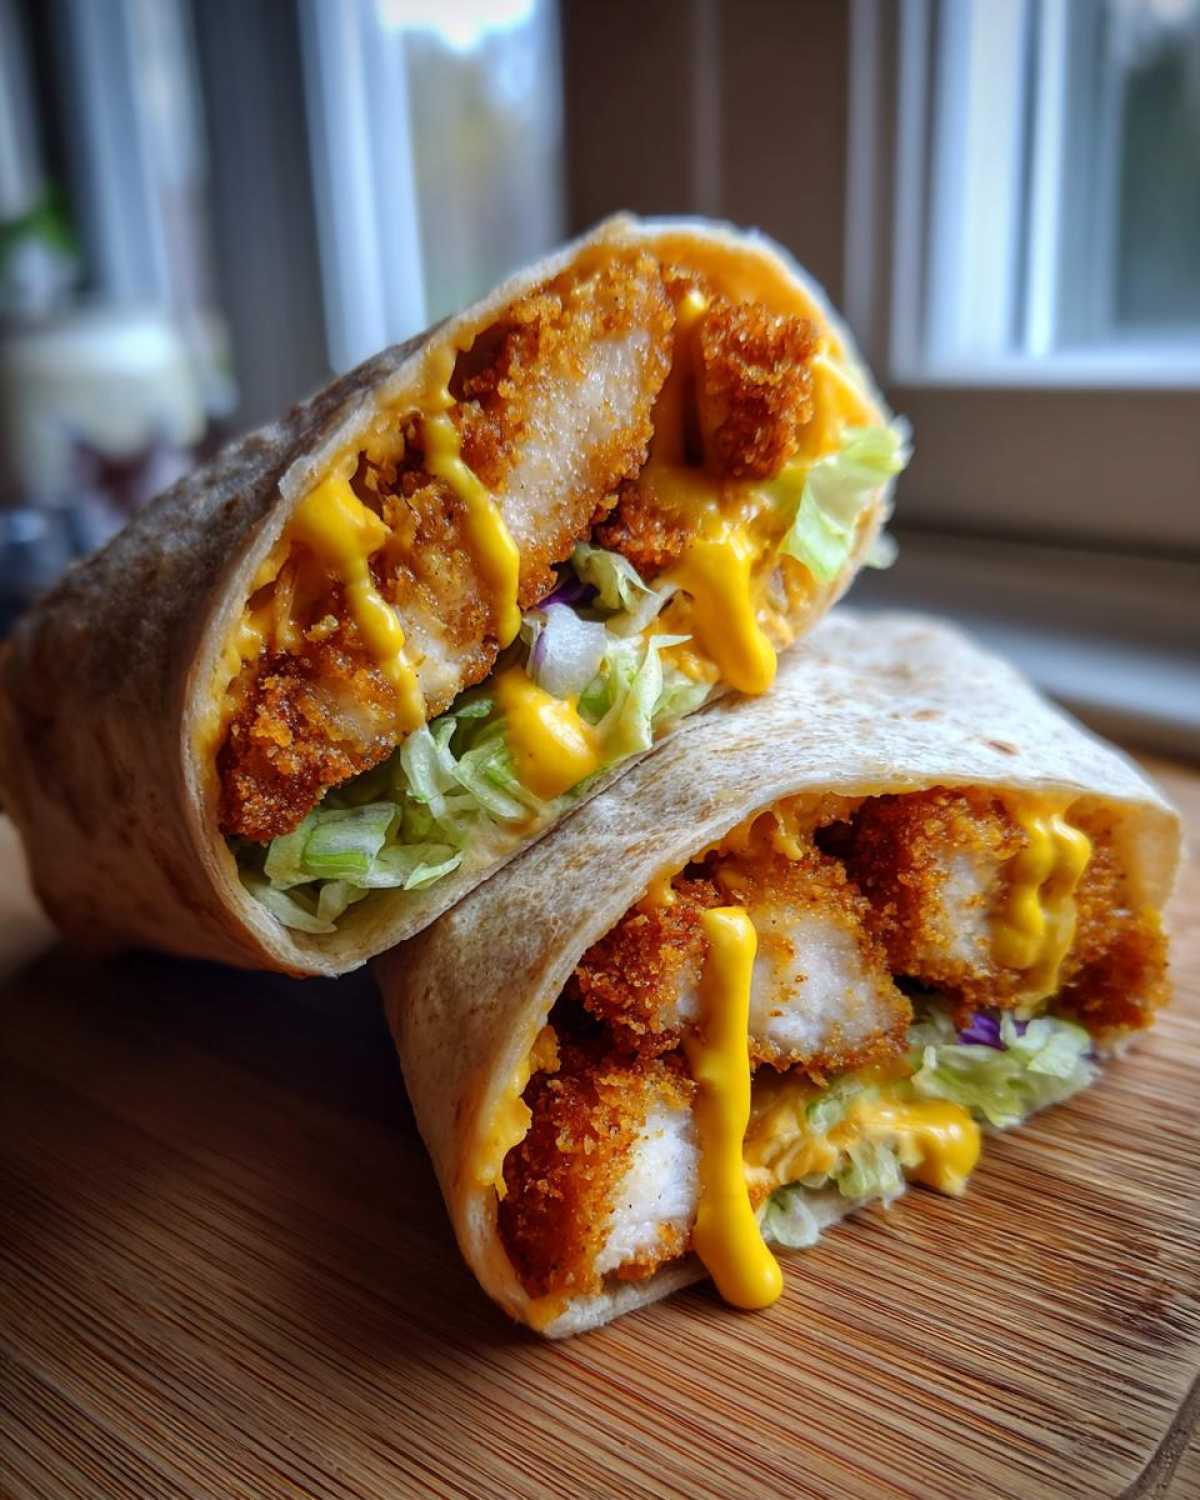
One of the things I love most about this Crispy Chicken Wrap Recipe is how flexible it is to fit what you have on hand. Cooking shouldn’t be stressful, and if you’re missing one tiny component, that shouldn’t stop dinner!
We used chicken breasts cut into strips, but honestly, that’s just the easiest starting point. If you happen to have boneless chicken tenders already trimmed, go ahead and use those! They are often more uniform in thickness, which is fantastic for even cooking. Just make sure you stick to that three-step breading process to keep that crunch locked in.
Now, let’s talk flour. We use regular all-purpose flour, but if you have family or friends who need to keep things gluten-free, you can absolutely swap that out. A good 1-to-1 gluten-free baking blend works like a charm in the dredging mixture. The key is that you still need a good coating, so if the GF flour seems a little light on adherence, give it an extra coating of egg before hitting the panko.
And hey, cheese is personal, right? Cheddar is my favorite because it gets nicely melty but still has a good flavor kick. If you prefer something creamier, Monterey Jack is a great substitution. For the lettuce, if you want a little less fluff and more crunch, skip the shredded iceberg and use finely chopped hearts of romaine instead. It holds up a bit better against that amazing honey mustard sauce we made!
If you ever want to dive deep into ingredient swaps, especially around baking substitutes, you might get a kick out of my testing notes over on the gluten-free biscuit page—the chemistry principles are surprisingly similar!
Serving Suggestions for Your Chicken Wrap Dinner
So you’ve got this incredible, crunchy, saucy masterpiece rolled up tight, and now you’re thinking, “What goes next to this perfect Crunchy Chicken Tortilla Wrap?” Since this is meant to be one of those fantastic Fast Food Style Chicken Wrap at Home dinners, we don’t want anything that takes forever, right?
The beauty of this wrap is that it’s rich and filling all on its own. If you want a side, keep it light and crisp to contrast that savory chicken and sweet sauce. Think palate cleansers!
My absolute favorite speedy side is a very simple, lightly dressed slaw. Not too heavy or creamy, just something bright. A shredded cabbage or broccoli slaw tossed with a tiny bit of olive oil, lemon juice, salt, and pepper wakes everything up. It’s fast, it’s healthy-ish, and it adds another layer of crunch!
If you are having a serious comfort food night, I won’t judge you for wanting fries. But try oven fries or air fryer sweet potato fries! They cook while you’re finishing the chicken, so you get that hot-out-of-the-oven experience simultaneously.
For something even faster, grab some crisp pickle spears or a few carrot sticks. Sometimes, simplicity is the best partner for a heavily loaded item like this wrap. If you’re feeling ambitious but still need speed, you might want to check out my recipe for a crunchy broccoli salad—just make sure you dress it right before serving so it stays crisp!
Remember, the goal here is Easy Chicken Wrap Dinner Ideas, so unless you’re planning leftovers for lunch the next day, let the wrap be the main event!
Storage and Reheating the Crispy Chicken Wrap with Honey Mustard Sauce
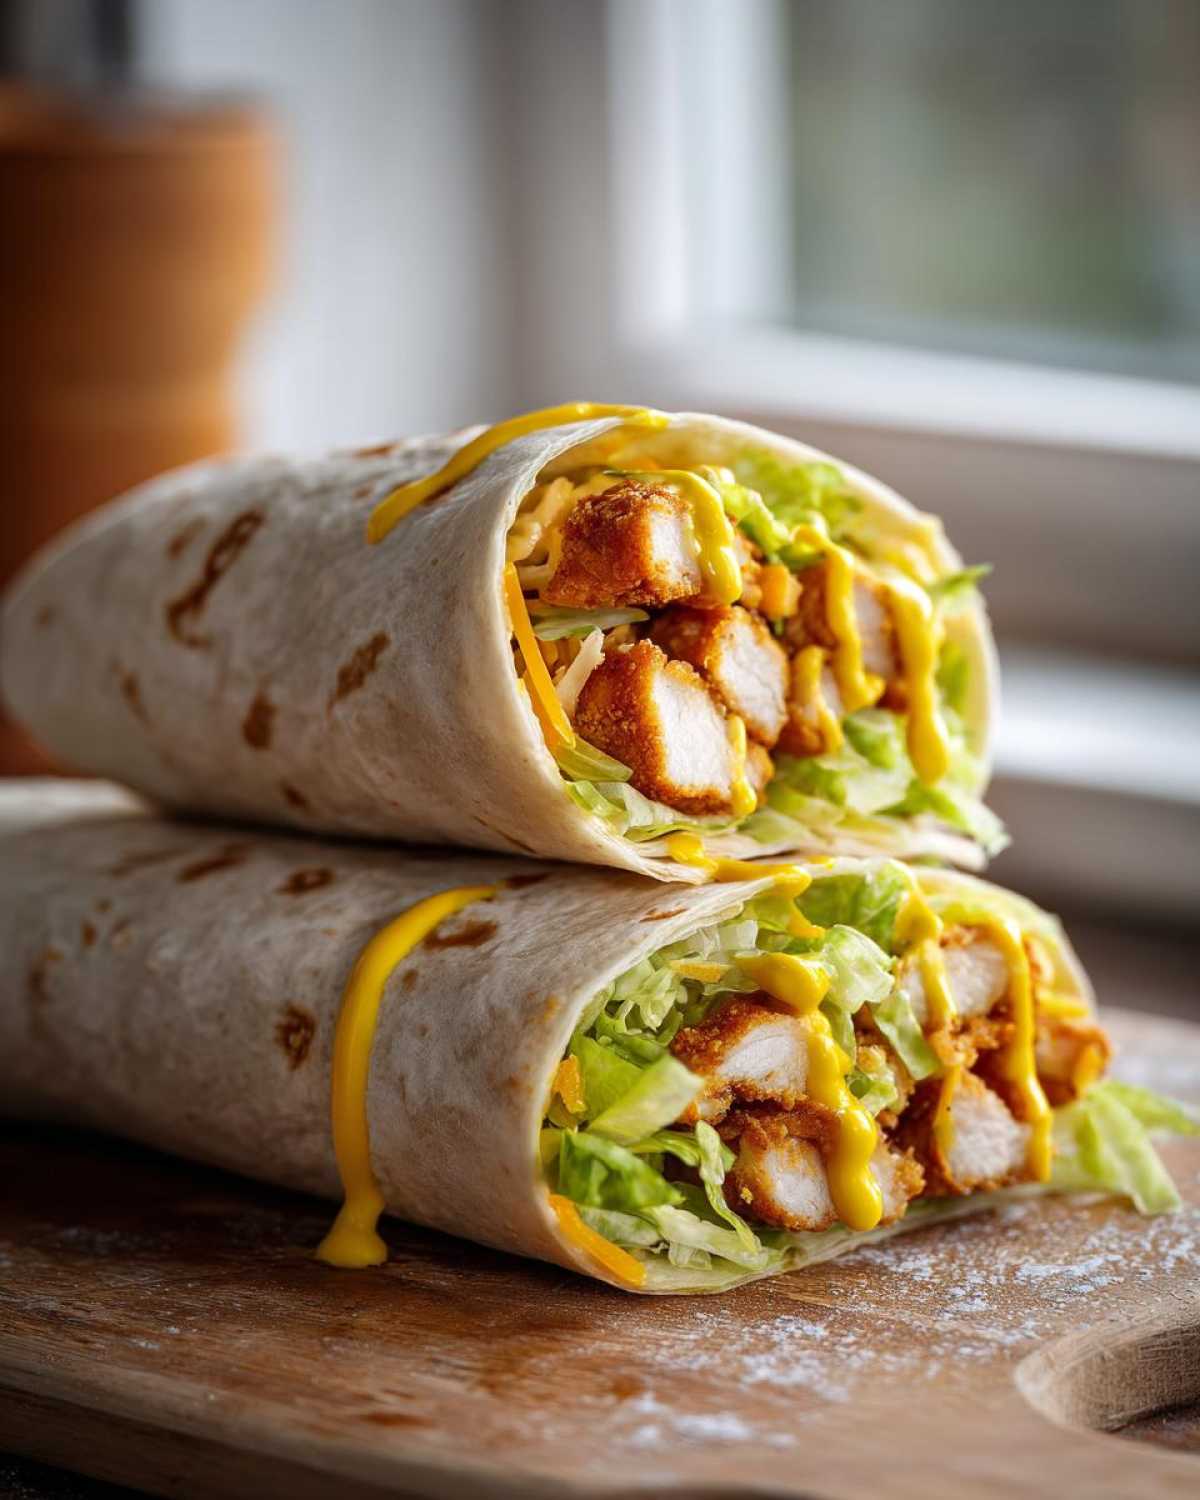
I never advocate planning to save these wraps, because frankly, they are miles better enjoyed immediately when that chicken is still screaming hot and crunchy, but life happens! Sometimes you just make too much, or maybe you want to prep lunch the night before. If you must store leftovers of your Homemade Crispy Chicken Sandwich Wrap, you have to handle the components separately—this is the golden rule!
If you assemble the whole thing—tortilla, lettuce, chicken, sauce—and then try to save it, you’ll open that up tomorrow to a sad, wet mess. The lettuce wilts, the tortilla gets sticky, and that beautiful Panko crust turns into a gummy shell. Nope! Doesn’t work.
For the best chance at success, slice everything up and store it in airtight containers in the fridge. Keep the crispy chicken strips totally separate from the fresh veggies and, crucially, keep the honey mustard sauce isolated in its own little deli container. You can even warm those tortillas slightly before you stick them in the fridge if you like, just let them cool completely first.
Now, for the reheating—this is where most people go wrong. DO NOT, I repeat, DO NOT microwave the leftover chicken. The microwave is the absolute enemy of crispiness; it steams the condensation right back into the crust. We want to bring that crunch back to life!
The best way to revive the texture of your chicken is either in a toaster oven or a conventional oven set to about 375 degrees Fahrenheit for about 5 to 7 minutes. If you’re feeling lazy, the air fryer is your friend here too—just a quick 3 minutes at 350°F will usually crisp it up nicely without overcooking the chicken.
Once the chicken is hot and crisp again, assemble the wrap fresh. Warm the tortilla slightly, add the cold veggies, top with the hot chicken, and generously drizzle on that delicious sauce. Since we are talking about making things ahead, if you are interested in freezing meals, check out some of my ideas for freezer-friendly items for other times of the week!
Frequently Asked Questions About This Recipe
I get so many questions about these wraps, and honestly, they are usually about keeping that crunch alive or adjusting the sauce sweetness—which tells me you’re all on the right track! Addressing these little snags upfront is how we perfect our Crispy Chicken Wrap with Honey Mustard Sauce.
If you’ve got tons of other questions about different dipping sauces, I’ve rounded up a few other ideas over on my sauce resource page, but here are the most common things people ask me!
Can I make the chicken ahead of time for this Crispy Chicken Wrap?
You absolutely can! Preparing the chicken ahead of time turns this into one of the best Quick Weeknight Chicken Wraps because assembly is the only thing left. However, I have to give you the tough love: the best crunch is achieved right when the chicken comes out of the oil or air fryer.
If you’re making it ahead, chill the cooked chicken strips in an airtight container. When you’re ready to eat, you must reheat them using dry heat—either a 375°F oven or the air fryer for about 3 to 5 minutes. This dries out the surface and brings back that satisfying texture. Never, ever microwave cooked fried leftovers!
How do I make the honey mustard sauce sweeter or tangier?
This sauce is totally subjective, and that’s the fun part! If you taste your initial batch and decide it needs more zip to balance that fried flavor, just whisk in another half teaspoon of apple cider vinegar at a time until you get the tanginess you love.
Now, for sweetness—this is easy. If you want it sweeter (maybe you’re making these for kids who love that classic sweet dip profile), add a little more honey, maybe a teaspoon at a time. Keep whisking until it hits that Sweet and Tangy Chicken Wrap spot you’re aiming for. It’s all about finding that perfect sweet spot between the Dijon mustard’s sharpness and the honey’s mellow sweetness.
What is the best way to get a truly crunchy chicken tortilla wrap?
If you focus on one thing in this whole recipe, make it the breading technique! The absolute best way to ensure a truly Crunchy Chicken Tortilla Wrap lies in two non-negotiables we covered. First, you simply must use Panko breadcrumbs. Standard breadcrumbs just don’t have the aeration and jagged texture needed to absorb less oil and stand up tall.
Second, heat regulation is key during frying. If your oil temperature drops below 340°F because you overcrowded the pan, your crust will absorb oil faster than it crisps, leading to oil-logged, heavy chicken. Keep that oil at a steady 350°F, and press that panko onto the chicken really firmly before it hits the heat. That solid coating makes all the difference!
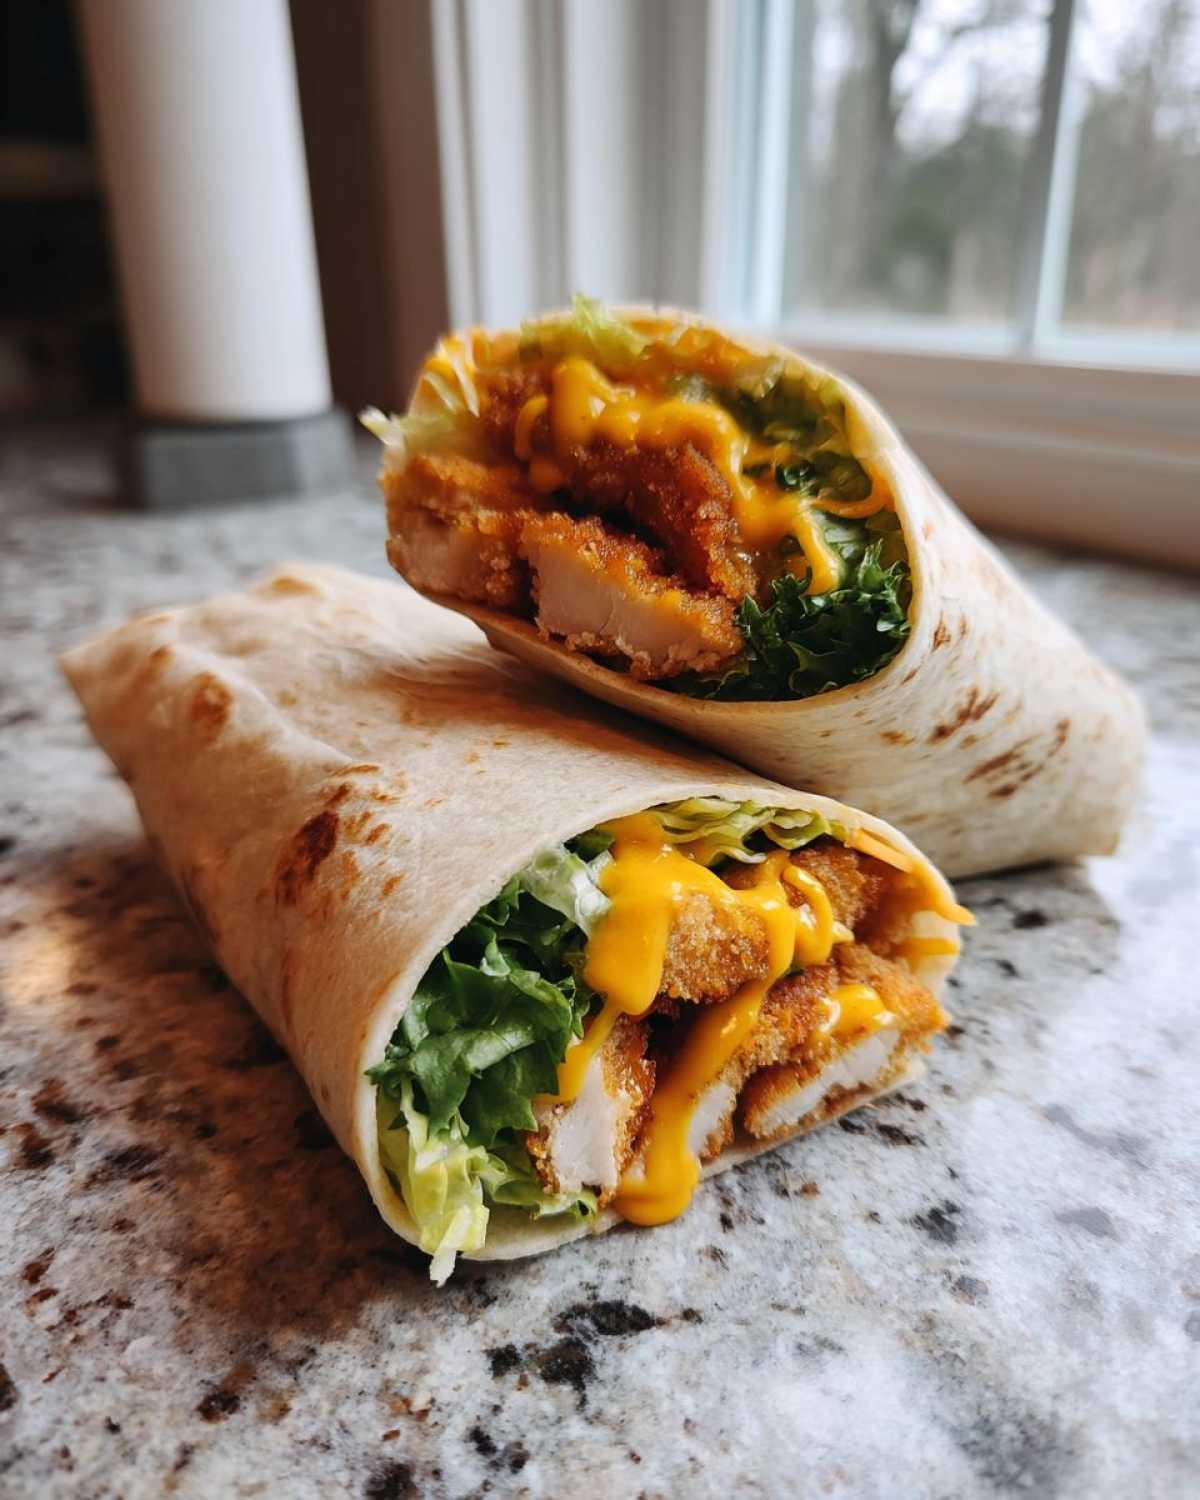
Crispy Chicken Wrap with Honey Mustard Sauce
Follow this recipe to make wraps featuring crunchy fried chicken strips and a zesty homemade honey mustard sauce.
- Prep Time: 20 min
- Cook Time: 15 min
- Total Time: 35 min
- Yield: 4 servings
- Category: Lunch
- Method: Frying
- Cuisine: American
- Diet: Vegetarian
Ingredients
- 2 large boneless, skinless chicken breasts, cut into strips
- 1 cup all-purpose flour
- 1 teaspoon salt
- 1/2 teaspoon black pepper
- 1/2 teaspoon paprika
- 2 large eggs, beaten
- 1 1/2 cups panko breadcrumbs
- Vegetable oil, for frying
- 4 large flour tortillas
- 1/2 cup shredded lettuce
- 1/2 cup shredded cheddar cheese
- 1/4 cup thinly sliced red onion
- For the Honey Mustard Sauce:
- 1/2 cup Dijon mustard
- 1/4 cup honey
- 2 tablespoons mayonnaise
- 1 teaspoon apple cider vinegar
Instructions
- Prepare the chicken: Mix flour, salt, pepper, and paprika in a shallow dish. Place beaten eggs in a second dish, and panko breadcrumbs in a third dish. Dredge each chicken strip first in the flour mixture, shaking off excess. Dip into the egg, then press firmly into the panko until fully coated.
- Cook the chicken: Heat about 1 inch of vegetable oil in a large skillet over medium-high heat to 350 degrees Fahrenheit. Fry the chicken strips in batches for 3 to 4 minutes per side, until golden brown and cooked through (internal temperature reaches 165 degrees Fahrenheit). Remove chicken and place on a wire rack lined with paper towels to drain excess oil.
- Make the sauce: In a small bowl, whisk together the Dijon mustard, honey, mayonnaise, and apple cider vinegar until smooth.
- Assemble the wraps: Lay a tortilla flat. Place lettuce, a portion of crispy chicken strips, shredded cheese, and red onion down the center. Drizzle generously with the honey mustard sauce.
- Fold the wrap: Fold in the sides of the tortilla, then tightly roll from the bottom up to enclose the filling. Slice in half if desired and serve immediately.
Notes
- For an air fryer option, spray the breaded chicken lightly with cooking spray and cook at 400 degrees Fahrenheit for 10 to 12 minutes, flipping halfway through.
- You can substitute romaine lettuce for shredded lettuce.
- Use whole wheat tortillas for a different texture.
Nutrition
- Serving Size: 1 wrap
- Calories: 550
- Sugar: 18
- Sodium: 750
- Fat: 25
- Saturated Fat: 6
- Unsaturated Fat: 19
- Trans Fat: 0
- Carbohydrates: 55
- Fiber: 3
- Protein: 35
- Cholesterol: 110