

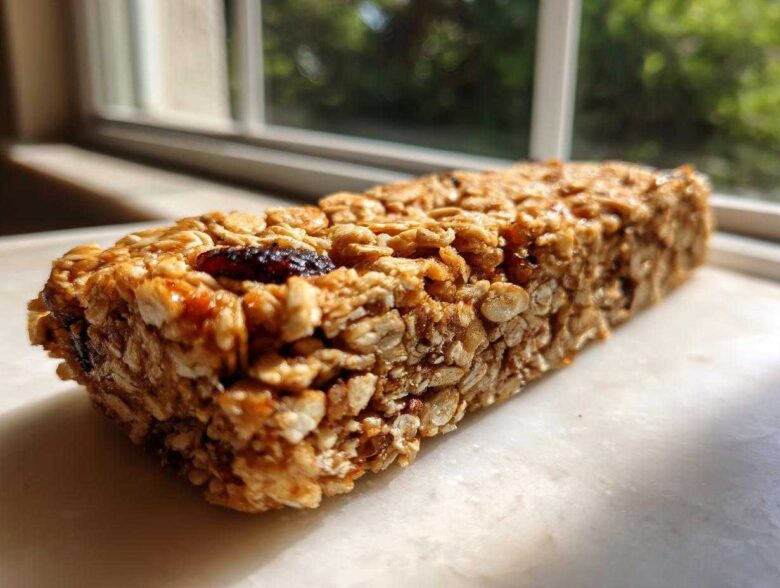
Oh my gosh, you know those store-bought bars? They’re fine, I guess, but they always leave me wanting more, or worse, wondering exactly what questionable syrup they used to hold it all together. That’s why I spent ages perfecting what I promise you is the best chewy, no-bake homemade granola bars recipe out there. This one is naturally sweetened—yes, truly!—which makes them the perfect grab-and-go snack we all desperately need.
I developed this version because, frankly, I got tired of reading ingredient lists a mile long that looked more like chemistry projects than food. I needed something fast, wholesome, and something I could trust my kids with. Over the years, I’ve tried baking them, cooling them, freezing them—you name it—but this specific no-bake method always wins for texture and speed. Trust me, after testing dozens of variations, this formula hits the sweet spot between being crispy enough to hold together but wonderfully, satisfyingly chewy.
If you’re looking to regain control over your snacking situation, you’ve come to the right place. Getting these mixed up takes less than 15 minutes, and then they just chill out in the fridge while you go about your day. You can read a little more about my philosophy in the kitchen over at my little corner of the internet, but for now, let’s get these incredible oatmeal snack bars started!
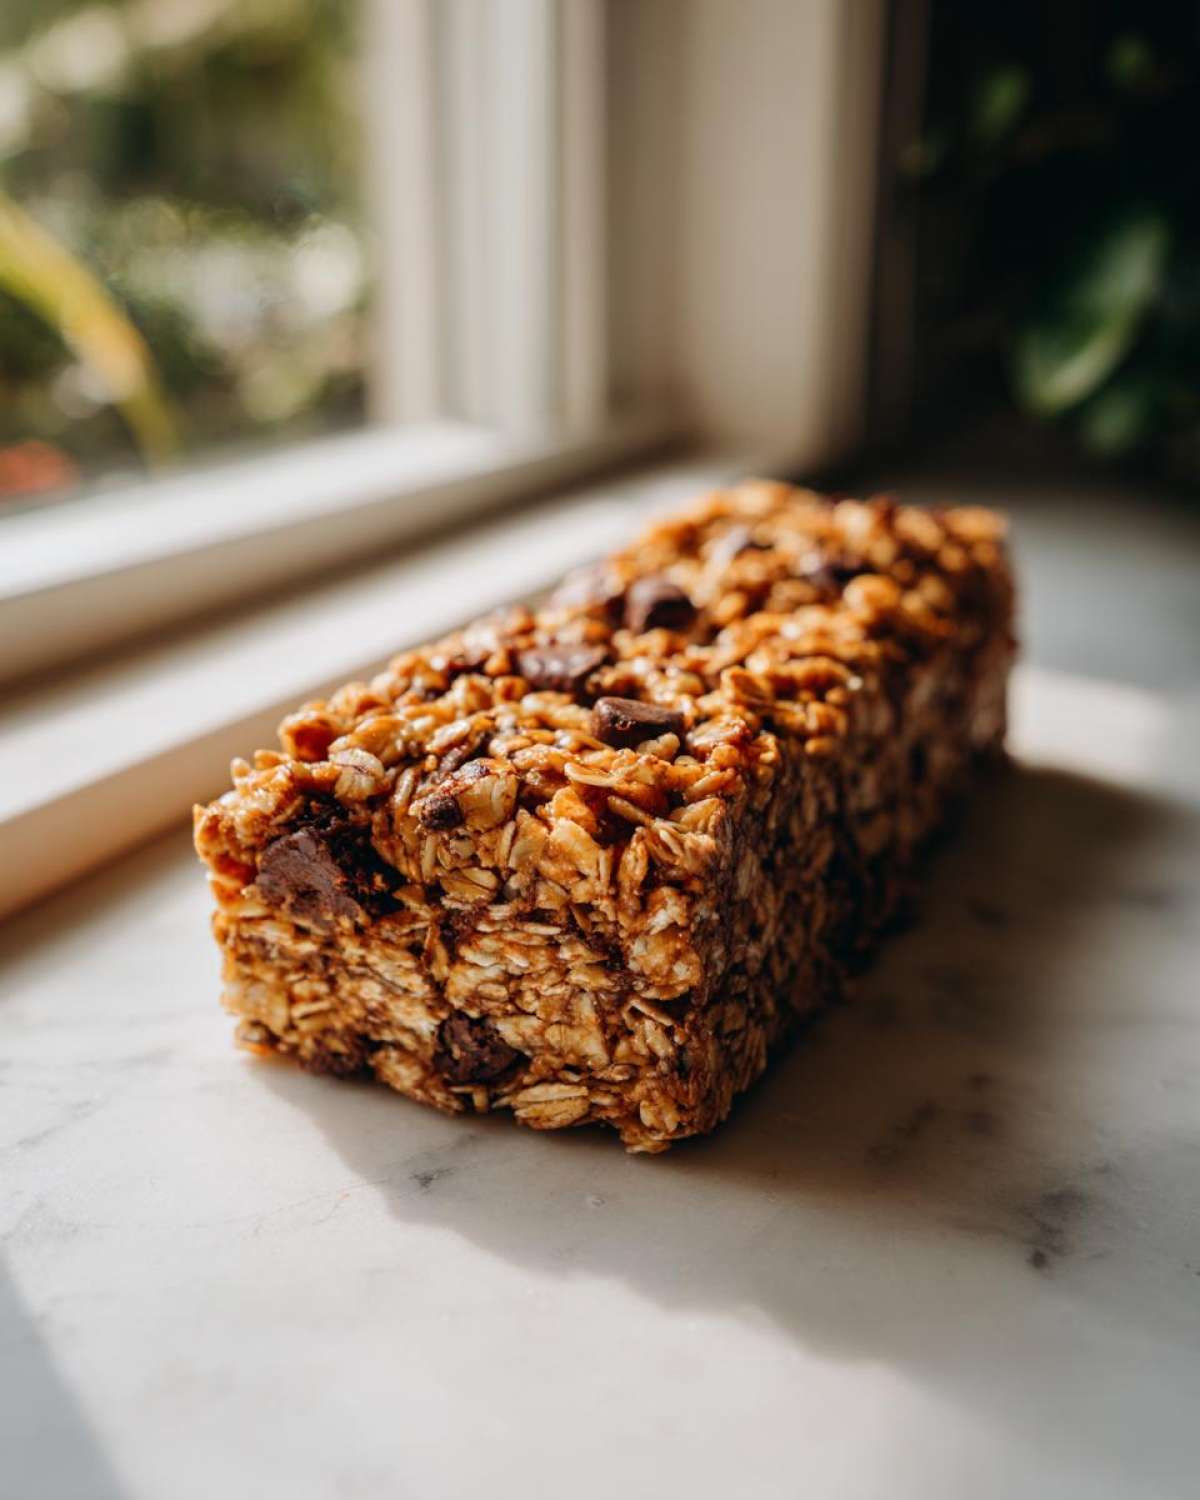
Why This Chewy Homemade Granola Bars Recipe Stands Out
What makes this recipe better than everything else in the pantry lineup? It all comes down to consistency and clean ingredients. These aren’t those brittle, crumbly things that shatter the second you look at them. These are satisfying, substantial healthy snack bars that actually taste like they needed some time and love, even though they didn’t!
They are fantastic for meal prepping too. Having a batch ready to go means I never have to panic when the kids ask for a snack after school or when I forget my breakfast on the way out the door. They are genuinely the best make ahead breakfast bars because they stay fresh and chewy all week long in the fridge.
Achieving the Perfect Chewy Granola Bar Recipe Texture
It’s the binder ratio! I learned the magic comes from ensuring the wet ingredients just barely coat the oats. We rely heavily on the creamy nut butter combined with a little bit of applesauce—that applesauce is the secret weapon for chewiness without adding excess fat. It locks everything together perfectly.
Simple Preparation for Easy Homemade Granola Bars
Since this is a no bake granola bars recipe, we skip the oven entirely. Seriously, we are combining, mixing, and pressing. That means no worrying about burning the edges or under-baking the middle! Active time is barely 15 minutes, making this the ultimate choice for easy recipe prep snacks when you’re running short on time. Check out more great snack ideas over at our snacks category for future inspiration!
Gathering Ingredients for Your Homemade Granola Bars
Okay, let’s talk about the star lineup! Since these are meant to be wholesome ingredient bars, feel free to substitute ingredients based on what you have, but I strongly suggest sticking to the proportions I’ve laid out. This recipe yields a nice, sturdy 12 bars, which is just the right amount for school lunches and a few days of mid-morning snacks. We’re focusing heavily on natural sweetener granola bars here, so the binders are everything!
You’ll need your standard 2 cups of rolled oats—make sure they are rolled oats, not instant, or the texture goes totally sideways on you. Then we mix in some crispy rice cereal just to lighten things up a tiny bit. Beyond that, get ready for the magic happens in the wet section!
Binder Components and Natural Sweetener Granola Bars
This is where the chewiness is locked in! You absolutely need 1/2 cup of creamy peanut butter—almond butter works too if that’s what you have, but make sure it’s creamy, not chunky! We pair that with 1/2 cup of your chosen sweetener. I usually go for maple syrup because I love that earthy flavor, but honey is excellent, too. Remember, don’t substitute with granulated sugar here; you need the liquid binder!
Now for my little secret weapon for that perfect soft texture: the unsweetened applesauce! It adds moisture and structure without adding extra sticky syrup or oil. It’s an absolute game-changer for making sure these stay soft. Finish those wet bits off with a teaspoon of vanilla extract and a pinch of salt to balance all that lovely sweetness.
Customizable Mix-Ins for Your Homemade Granola Bars
This is where the fun really starts! You get to tailor these to whatever your family loves. We need about 1/2 cup for the additions, and this is what turns a basic oatmeal bar into something exciting. If you’re making these kid friendly granola bars, I always default to mini chocolate chips.
But feel free to get wild! Chopped dried apricots or dried cherries are fantastic for bursts of chewiness, or if you want more crunch, toss in some chopped walnuts or pecans. If you want to try making some amazing maple candied pecans, you can chop those up and fold them right in for a gourmet touch!
Step-by-Step Instructions for No Bake Granola Bars
This is where we put it all together, and wow, is it fast! From start to finish, you’ll have these no bake granola bars mixed up in maybe 15 minutes of active time. Then, we just let the fridge do the hard work while they chill out for about 2 hours. The main thing you cannot skip is the pressing—that’s what guarantees that perfect dense, chewy texture!
If you’ve ever made any of my other no-bake treats, you know the routine, but these need just a little extra care when mixing up the wet and dry parts to make sure they set up right. For more ideas that skip the oven, you can check out some quick favorites over at our no-bake peanut butter bar recipe!
Preparing the Pan and Combining Dry Elements
First things first: you need a home for these beauties. Grab an 8×8 inch pan and line it with parchment paper. Pay careful attention here: you want that paper to hang over two of the sides by a good couple of inches. Those flaps are your handles later when you try to get the set bars out—trust me, you don’t want to try prying these out later!
Once the pan is comfy, grab a large bowl. Toss in your 2 cups of rolled oats and your cup of crispy rice cereal. Give those a quick stir just to introduce them to each other. That’s it for the dry stuff right now!
Creating the Binder for Chewy Granola Bars
Now for the liquid gold that holds this all together! Take a small saucepan—low heat is your friend here. Gently warm up your peanut butter and your honey or maple syrup until they are nice and smooth. They should be pourable, but seriously, **do not let this mixture boil!** If you boil the binder, you risk seizing it up, and then you won’t get those lovely, chewy bars we are aiming for.
Once smooth, pull that saucepan right off the heat! Now, stir in the applesauce and the vanilla extract. You need to whisk this until it’s completely uniform before pouring it over the oats mixture. Everything needs to be perfectly blended so every single oat gets coated evenly!
Tips for Success with Homemade Granola Bars
Even the easiest recipes can sometimes throw you a curveball, right? Since these homemade granola bars rely totally on that perfect wet-to-dry ratio, I wanted to share a few things I learned through trial and error. These little tricks ensure you get that ideal, satisfying chewiness every single time you make a batch. It’s all about dialing in the consistency before it hits the pan!
If you ever need fun things to toss in your bars, check out my ideas for pumpkin spice trail mix additions for seasonal flair!
Troubleshooting Texture in Your Chewy Granola Bar Recipe
What if your mixture looks way too dry once you pour the syrup over the oats? Don’t panic! This usually means your nut butter was slightly thicker than mine or your oats were packed too tightly. You can save it! Slowly drizzle in just another teaspoon or two of maple syrup or honey until it starts clinging together better. You want it sticky, not runny.
Now, if your mixture seems too wet or soupy—which happens if your applesauce was extra watery—I have a great fix for that. If the mix just won’t hold together after stirring, add a tablespoon of melted coconut oil to the wet ingredients *before* pouring them over the oats. Coconut oil solidifies beautifully in the fridge, helping to firm up those looser chewy granola bar recipe batches. Remember, pressing firmly in the pan is the second most important step after getting the mix right!
Nut-Free and Allergy Adjustments for Homemade Granola Bars
We all have friends or family members who need allergy-safe snacks, and these healthy snack bars are really easy to adjust! The biggest concern is usually the peanut butter, which is our main binder. If you are making strictly nut-free bars, swap the peanut butter out entirely for sunflower seed butter.
It has a slightly different flavor profile, but it works just as well in terms of binding power. Just make sure whatever seed butter you use is the creamy variety. Also, if you have a gluten intolerance, make sure you use certified gluten-free rolled oats! It’s an easy swap that keeps the spirit of this recipe completely intact.
Storage and Make Ahead Breakfast Bars
One of the main reasons this recipe is my all-time favorite is that they are just fantastic for making ahead. I usually whip up a batch on a Sunday afternoon, and they are ready to grab straight from the fridge all week long. Since these are no bake granola bars, they don’t have that baked-in structure, so they need the cold to keep everything firm and perfect.
You absolutely must store these in an airtight container, and I highly recommend keeping them in the refrigerator. If you leave them out on the counter, they can get a little sticky and soft pretty quickly, especially if your kitchen runs warm. Trust me on this one; cold equals chewy structure!
In the fridge, they keep beautifully for up to a full week. That stability makes them my go-to for packing into lunchboxes or keeping near the door for quick mornings. If you want to keep them even longer, you can absolutely freeze them! Just separate the bars with wax paper before wrapping the whole stack tightly in plastic wrap, and they’ll last for a couple of months. They thaw out perfectly fine on the counter in about 15 minutes.
If you’re looking for even more make-ahead options that are freezer-friendly, you should definitely check out my post on freezer-friendly breakfast sandwiches—sometimes you just need a grab-and-go savory option, too!
Serving Suggestions for These Customizable Granola Bars
While these oatmeal snack bars are honestly perfect just eaten straight over the sink while you’re washing up (don’t look at me like that, we all do it!), they are versatile enough for slightly fancier serving situations too.
Since they are already perfectly firm from the refrigeration, they stand up well to toppings. If you’re enjoying one with your morning coffee—maybe a cozy cinnamon maple latte on a crisp morning—try spreading just a whisper of extra nut butter on top. It melts slightly against the bar and tastes amazing.
For a textural boost, you can absolutely crumble one of these bars right over a bowl of Greek yogurt or cottage cheese! It adds chewiness, crunch from any nuts you included, and sweetness to your plain dairy base. It turns a perfectly fine snack into a full-on light breakfast or dessert, honestly. They are sturdy enough that they won’t instantly dissolve, which is key when you’re adding moisture!
Frequently Asked Questions About Homemade Granola Bars
I know you might have a few lingering questions once you see how simple this recipe is. We covered the big stuff, but sometimes specific texture questions creep up, or you just need to know how to adapt things for your dietary needs. These are the bits I get asked the most about my homemade granola bars!
If you need more ideas for make ahead breakfast bars that are a bit warmer, definitely check out my apple cinnamon French toast bake—it comes out of the oven smelling heavenly!
Can I bake these homemade granola bars instead of using the no bake method?
Honestly, you absolutely *can*, but you won’t get the same result, and that’s the trade-off. If you bake them, they will transform from wonderfully chewy granola bar recipe stars into something much more like traditional, crumbly cereal bars. Baking dries out the binder a bit more than the refrigeration method does. If you bake, you’ll definitely want to reduce your bake time significantly, maybe just 10-12 minutes at 350°F (175°C), just to set them, not roast them. But for ultimate chewiness, stick to the chilling method!
How do I make vegan natural sweetener granola bars?
This is super easy to adapt for vegan natural sweetener granola bars! The good news is that if you use maple syrup instead of honey as your binder, you’ve already taken the biggest step. Honey isn’t vegan, but maple syrup is totally plant-based!
The other detail to watch is your mix-ins. If you’re using chocolate chips, make sure they are dairy-free chips (most high-quality dark chocolate varieties are, but always double-check!). Nuts and dried fruit are naturally fine, so if you swap out the peanut butter for sunflower seed butter, you’ve got wonderful, kid friendly granola bars that everyone can enjoy!
Estimated Nutrition for These Healthy Snack Bars
I always hesitate a little bit putting nutrition facts up because, let’s be real, once you start tossing in extra chocolate chips or using different types of glorious dried mango, those numbers shift around! However, for transparency, I ran the basic batch (using the recipe exactly as written with no crazy additions) through a calculator. This helps give you a ballpark idea of what you’re putting into your body when you grab one of these healthy snack bars.
Here are the estimated macros for one bar, yielding 12 servings:
- Calories: 220
- Fat: 10g
- Carbohydrates: 32g
- Protein: 7g
- Sugar: 12g
If you’re wondering about those sugars—remember, a huge chunk of that comes from the natural goodness of the honey or maple syrup we used instead of processed white stuff! When you are making customizable granola bars, keep in mind that adding dried fruit will boost both the sugar count and the fiber, while adding nuts will increase the healthy fat content. It all depends on what you need for your energy levels!
Share Your Best Homemade Granola Bars Experience
Well, that’s it! We’ve officially unlocked the secret to stress-free, wonderfully chewy, and totally customizable homemade granola bars. I hope you love pulling these out of the fridge for a quick, guilt-free snack just as much as I do. They truly make life easier!
Now, I really, really want to know what you added to yours! The beauty of this recipe is the flexibility, so please don’t keep your brilliant combinations a secret. Did you go bold with dried cranberries and walnuts? Or maybe you stuck to the classic chocolate chip bars homemade style? Drop a comment down below and let me and everyone else know your favorite way to eat these!
If you make a batch, snap a photo! Seeing your creations truly makes my day. Tag me on social media so I can admire your handiwork. And if this recipe has saved your weekday sanity even once, please take a second to leave a quick rating on the recipe card above. High ratings help other busy home cooks find these simple, wonderful snacks. Happy baking—or in this case, happy *not* baking! Head over to the main blog page if you need more easy recipes!
PrintBest Chewy, No-Bake Homemade Granola Bars
Make simple, chewy granola bars at home using natural sweeteners. This no-bake recipe is easy to customize and great for make-ahead snacks.
- Prep Time: 15 min
- Cook Time: 0 min
- Total Time: 2 hr 15 min
- Yield: 12 bars
- Category: Snack
- Method: No-Bake
- Cuisine: American
- Diet: Vegetarian
Ingredients
- 2 cups rolled oats
- 1 cup crispy rice cereal
- 1/2 cup creamy peanut butter (or almond butter)
- 1/2 cup honey or maple syrup
- 1/4 cup unsweetened applesauce
- 1 teaspoon vanilla extract
- 1/2 cup mix-ins (e.g., chocolate chips, dried fruit, nuts)
- Pinch of salt
Instructions
- Line an 8×8 inch baking pan with parchment paper, leaving an overhang on two sides for easy removal.
- In a large bowl, combine the rolled oats and crispy rice cereal.
- In a small saucepan over low heat, gently warm the peanut butter and honey (or maple syrup) until smooth and easily pourable. Do not boil.
- Remove the saucepan from the heat. Stir in the applesauce and vanilla extract until fully mixed.
- Pour the wet mixture over the dry ingredients. Stir well until everything is evenly coated.
- Fold in your chosen mix-ins and the pinch of salt.
- Transfer the mixture to the prepared pan. Press the mixture down firmly and evenly into the pan using the back of a spatula or another piece of parchment paper. Pressing firmly is key for chewy bars.
- Refrigerate for at least 2 hours, or until completely set.
- Lift the bars out of the pan using the parchment paper overhang. Cut into 12 or 16 bars.
Notes
- For a firmer bar, reduce the applesauce slightly or add 1 tablespoon of coconut oil to the wet ingredients before heating.
- Store the finished bars in an airtight container in the refrigerator for up to one week.
- You can substitute peanut butter with sunflower seed butter for a nut-free version.
- If you prefer chocolate chip bars, use mini chocolate chips so they distribute better.
Nutrition
- Serving Size: 1 bar
- Calories: 220
- Sugar: 12
- Sodium: 85
- Fat: 10
- Saturated Fat: 2
- Unsaturated Fat: 8
- Trans Fat: 0
- Carbohydrates: 32
- Fiber: 3
- Protein: 7
- Cholesterol: 0