

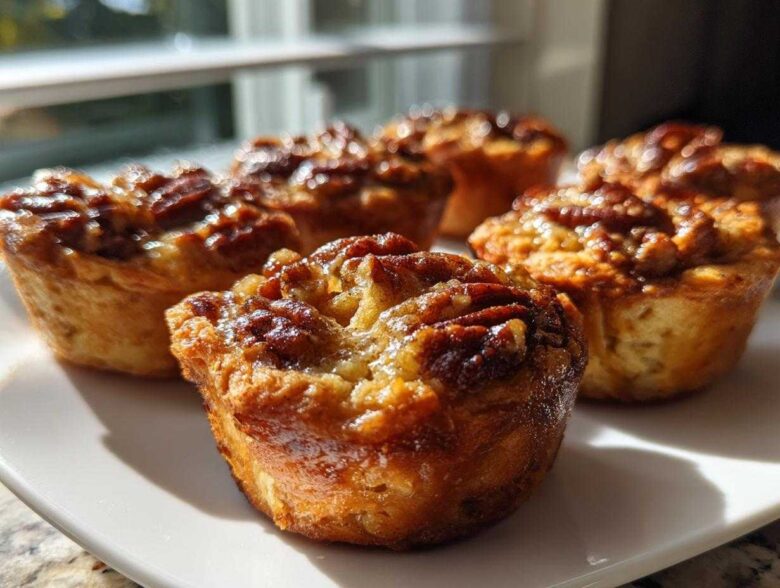
Oh my goodness, are you ready for the very best part of any holiday baking spree? Forget the giant pies that take up half your counter space! I’m talking about something tiny, irresistible, and absolutely perfect for sneaking bites while you wrap gifts: my famous pecan tassies. Seriously, these bite-sized pecan desserts are a showstopper, and they disappear faster than anything else on the tray. The secret, the whole marvelous reason these deserve the top spot, is the crust. It’s not some flimsy pastry; we’re using a rich, unbelievably tender cream cheese crust that melts in your mouth. I absolutely adore them because they bake up so beautifully but are incredibly easy to make in big batches. Trust me, once you try these, they’ll be a staple on your table every single year.
Why You Will Make The Best Pecan Tassies Every Time
I know everyone promises the “best” recipe, but these genuinely deliver on all fronts. They are fantastic because:
- The crust stays soft and never gets hard, thanks to that cream cheese magic.
- They are perfectly bite-sized—ideal for holiday parties and cookie exchanges!
- You can easily make the dough ahead of time, which is a lifesaver in December.
- That chewy filling is pure Southern comfort sealed in a buttery cup.
Ingredients for Cream Cheese Crust Pecan Tassies
When we talk about the best pecan tassies, the quality of the ingredients really matters. I keep my list short because there’s nothing fussy here, just good, solid baking staples. The success of that wonderful, melt-in-your-mouth dough really hinges on having everything at the right temperature, especially that butter and cream cheese. You’ll notice that we have two distinct parts to gather our things for: the cup that holds all the goodness, and the gooey center itself. Don’t skip the pecans, they are the star!
For the Buttery Crust
This is where the magic starts for our cream cheese pecan tassies. The cream cheese is what makes these cups so tender and easy to press into the muffin tin—no rolling required!
- 1 cup (2 sticks) unsalted butter, softened
- 8 ounces cream cheese, softened
- 2 cups all-purpose flour
For the Chewy Pecan Filling
We want that filling to be perfectly sweet and wonderfully chewy when it bakes up. Make sure you use pecans you really like the taste of, because their flavor really comes through here!
- 1 cup chopped pecans, plus extra for topping
- 1 cup packed light brown sugar
- 2 large eggs
- 1 teaspoon vanilla extract
- 1/4 teaspoon salt
Step-by-Step Instructions for Perfect Pecan Tassies
Okay, deep breath! This is the fun part where everything comes together and smells like heaven. We’re going to tackle this in three easy chunks so you don’t get overwhelmed. Remember, the goal is for those little cups to be sturdy enough to hold that glorious filling without slumping over. Always preheat your oven to 350 degrees Fahrenheit (that’s 175 Celsius) *before* you even start mixing the filling, just to make sure everything is piping hot when it needs to be.
Making the Cream Cheese Dough Cups
First things first: the crust! Grab your big mixer—or your strong arms if you’re mixing by hand—and beat the softened butter and that block of cream cheese until it’s completely smooth and creamy. Don’t leave any little lumps! Then, slowly add the flour and just mix until it *just* comes together into soft dough. You don’t want to overwork this! Next, grab a standard 24-cup mini muffin tin. Take about a teaspoon of dough and press it firmly into the bottom and all the way up the sides of each cup. Really push it in there so you create a nice, uniform wall. This firm base is what makes these pecan tassies so satisfying!
Mixing and Filling the Pecan Tassies
While the dough cups are waiting, we whip up that gooey center. In a separate bowl, take your whisk—I like to use a whisk here to make sure that sugar dissolves nicely—and beat the brown sugar, the eggs, the vanilla, and the salt until everything looks uniform. Make sure it’s smooth! Then, gently fold in your cup of chopped pecans. Do *not* pour the filling right up to the rim! I always fill mine about three-quarters of the way full. If you overfill them, they bubble up and make a sticky mess while baking. Finish each one with just a few extra chopped pecans sprinkled right on top for a nice visual pop.
Baking and Cooling Your Pecan Tassies
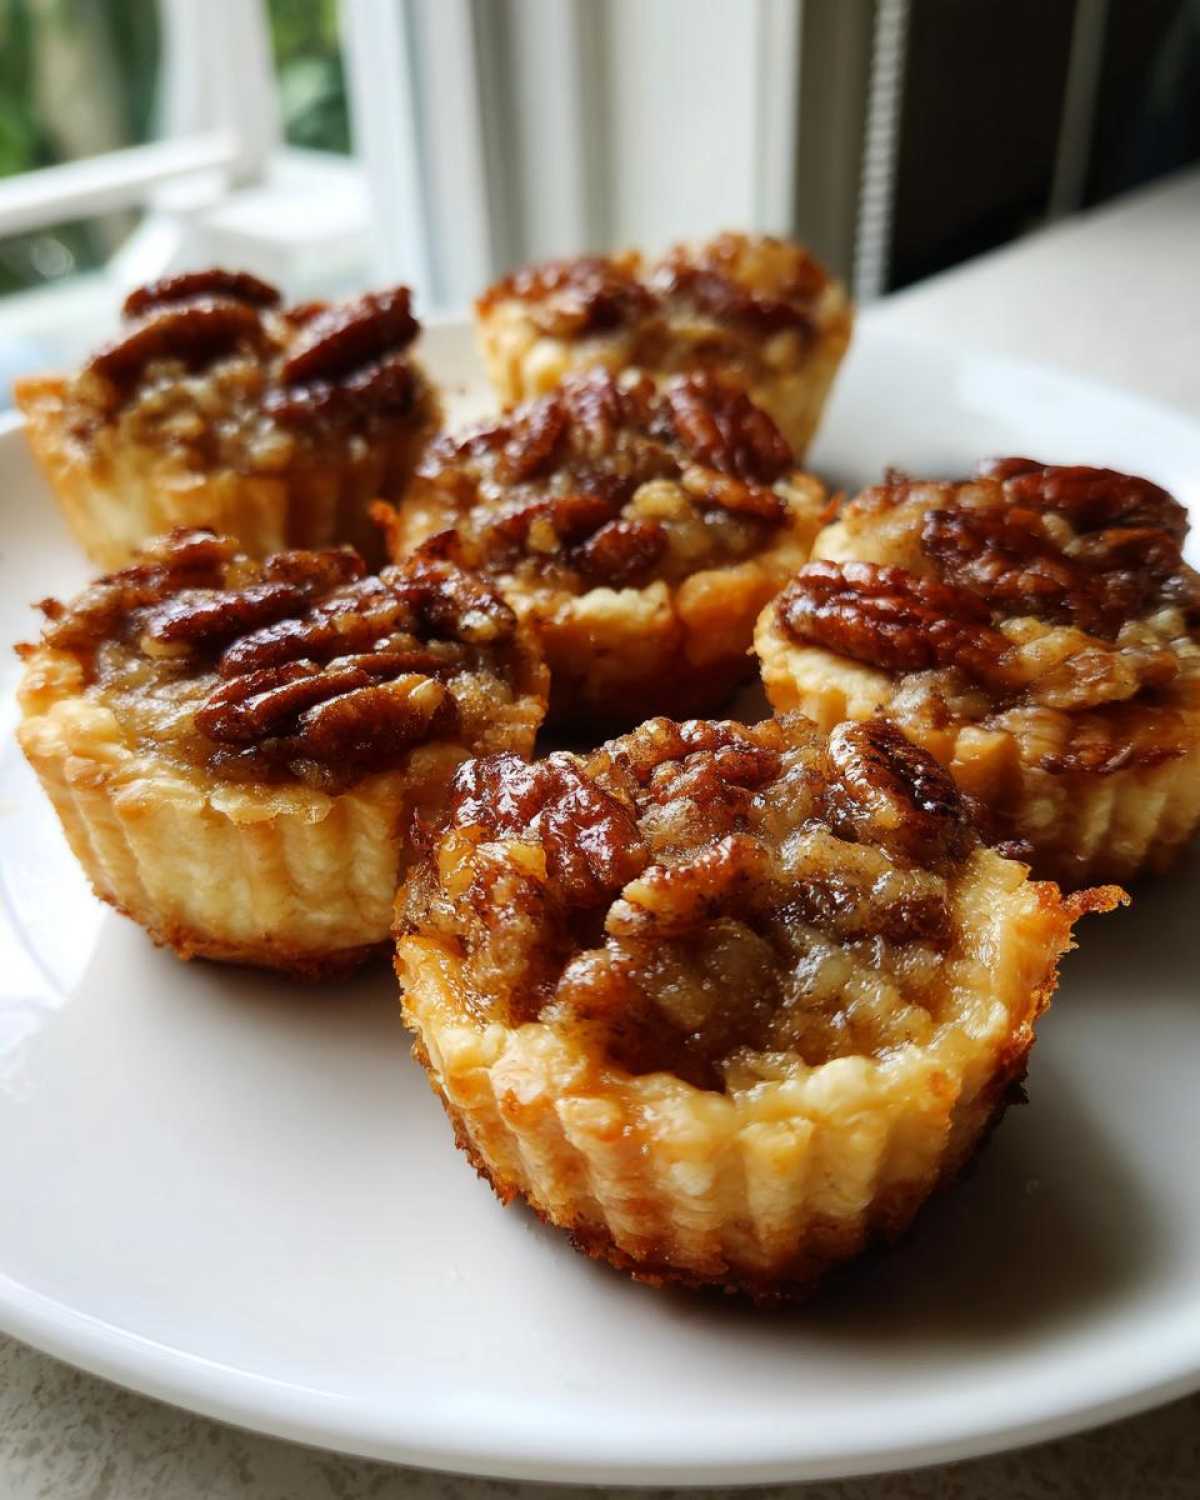
Pop that tray into your preheated oven and let them bake for about 20 to 25 minutes. You’ll know they’re done when the edges of that cream cheese crust look lightly golden brown, and the filling itself looks set—not wobbly in the middle. This is where you need patience! Let them cool right there in the muffin tin for a full ten minutes. If you try to pry them out immediately, the centers will likely stick or break where the crust is too soft. After those ten minutes, gently run a small, offset spatula around the edges and carefully transfer your beautiful pecan tassies onto a wire rack to cool completely!
Tips for Success When Making Pecan Tassies
I know sometimes these delicate little cups can seem intimidating, but honestly, it’s all about temperature control. If your cream cheese and butter are too cold when you mix the dough, the final result will be crumbly instead of pliable. You want them soft enough to press easily into those muffin cups!
Also, resist the urge to poke the filling while it bakes. If you peek too often or take the tray in and out of the oven, the temperature dips, and you’ll end up with a watery filling that won’t set right. We are aiming for those perfectly chewy pecan tassies, and heat consistency is key for that texture. Trust me on this one—don’t mess with the oven door!
If your dough starts cracking while you’re pressing it up the sides, it’s probably a little too cold. Take your fingertips and just warm them up over a warm cup of water, then gently smooth out those cracks. A little trick I learned from my Aunt Clara, who makes the best ones down South! You can read more about her other baking wisdom over at my recent post on maple pecans.
Storage and Make Ahead Tips for Your Pecan Tassies
This is why I love making these so much, especially when I know I have a busy hosting week ahead! These beautiful little pecan tassies are champions when it comes to making ahead. They actually taste fantastic the day after baking, as the filling has a chance to fully settle into that soft crust.
If you’re planning your menu weeks in advance, refrigeration is your friend. You can keep the baked tassies in an airtight container at room temperature for about three days. If you need them to last longer, or if your kitchen is too warm, pop them in the fridge. They stay wonderfully fresh in the cold container for up to a week, though I must admit, I always eat half of them before day four!
But honestly, if you’re looking for the ultimate make-ahead desserts for parties, you need to freeze them. Once they are completely cool—and I mean *completely* cool—layer them between sheets of parchment paper in a sturdy freezer bag or container. They freeze beautifully for up to three months! When you need them, just pull out as many as you need and let them thaw on the counter for an hour or two. They come out tasting almost perfectly fresh. It makes holiday mornings so much less stressful knowing these little treats are already done!
Variations on Classic Pecan Tassies
While this version with the cream cheese crust is my absolute favorite—it’s peak Southern baking, after all—you can have so much fun tweaking these little gems! Since they are so small, you can make a couple of different varieties for your cookie tray without taking up much extra time.
The easiest swap is playing with the nuts. If you have friends who aren’t fans of pecans, you can swap them out entirely for walnuts, though I always maintain that nothing beats the flavor of pecan in a tartlet like this! You can also add a little hint of citrus zest to the filling mixture, which brightens up the sweetness beautifully. A tablespoon of fresh orange zest goes a long way!
If you want to lean more toward a classic mini pecan pies recipe flavor but still keep the cream cheese base, you need to swap out that brown sugar for something richer. Try using maple syrup instead of the brown sugar, but you absolutely have to reduce the maple syrup—use about 3/4 cup of dark maple syrup for the same amount of sweetness. This gives you that deep, caramelized flavor that just screams holidays!
For something truly decadent—and this is just for special occasions—try drizzling a tiny bit of melted, salted caramel over the center of the pecans right before you bake. Don’t use too much, or it will run all over the place, but that salty-sweet combination turns these simple treats into something completely spectacular.
Serving Suggestions for Bite Sized Pecan Desserts
Now that you have a fresh batch of perfect little bite sized pecan desserts cooling on the racks, the fun part is deciding how to show them off! Since these are generally made for holidays or parties, presentation counts for a lot, even though they taste amazing just hanging out on a paper plate.
These pecan tassies are fantastic additions to any holiday cookie tray ideas setup. Because they are miniature, they pair wonderfully with contrasting shapes and colors. If you’re making shortbread or sugar cookies that are light in color, place these darker, glossy tassies next to them to create visual drama.
For a really elegant look at your next gathering, try lining a rectangular platter with large, crisp leaves—like deep green kale or ornamental cabbage, something you don’t intend to eat, just for presentation! Then, arrange your miniature pecan desserts in little clusters of three or five. It looks so intentional!
If you need an easy lift on your dessert bar, grab some small cupcake liners in holiday colors—think deep red, forest green, or even metallic gold. Place each cooled tassie into its own liner. This keeps them from sticking together and makes it super easy for guests to grab one without making a mess. They look so cute lined up like little soldiers of deliciousness!
I always serve them right alongside strong coffee or maybe a warm mug of mulled cider. The warm spices in the cider just complement the nutty, buttery flavor of the crust perfectly. Honestly, you just set them out, and people grab them, but a little bit of thought on the platter makes such a difference in how special the whole spread feels!
Frequently Asked Questions About Pecan Tassies
I always get loads of questions when people see these coming out of my oven! It’s totally understandable, because everyone wants to make sure their southern pecan tassies turn out perfectly golden and set. Baking is science, sure, but it’s also an art, and these little guys sometimes need a bit of coaxing. Here are the things folks ask me about the most frequently!
Can I use pre-made pie dough for my pecan tassies?
Oh, I know the temptation is strong when you’re rushing around the holidays! But here’s the thing: you really, really shouldn’t substitute the cream cheese dough here. Pre-made pastry dough is usually flaky, which cracks and dries out when you try to press it into the mini cups this way. Our special dough, made with that cream cheese and butter, is designed to be pressed, and it bakes up short and tender. It holds the filling beautifully without getting greasy. If you use store-bought pastry, you lose that signature melt-in-your-mouth texture that makes these the best, honestly.
How do I prevent my pecan tassies filling from sinking?
This is a classic problem, especially if you like that gooey center! The filling sinks most often because either the crust wasn’t fully baked when you added the filling, or you used too much liquid in your filling mixture. For my recipe, I make sure the crust edges are just barely golden before I even spoon in the filling. Then, when you bake them, don’t open the oven door until the very end! If you let the cool air rush in too early, the middle might collapse while it’s trying to set. You want that oven heat to stay steady so the sugars caramelize evenly from the outside in—that keeps the center beautifully chewy, not sunken and gooey in a bad way!
What is the difference between pecan tassies and pecan tartlets?
That’s a great question that always pops up when people see these on menus! Generally, a **pecan tartlet recipe** implies something made with a true shortcrust or sometimes a puff pastry, and often they are baked in smaller, individual tart molds with fluted edges. The key difference with my pecan tassies is that signature cream cheese press-in crust. Our crust is thicker, softer, and sweeter than a traditional tart shell. So while they are practically cousins—both are miniature pecan desserts—the crust composition is what sets the tassie apart from a standard tartlet. They are essentially the same size, but the texture experience is totally different!
Estimated Nutrition Facts for Pecan Tassies
Now, I’m certainly not a nutritionist—I’m a home cook who believes in butter and sugar! But I know some of you like to see the numbers, especially when these little treats are going out to a big party full of people watching their intake. Knowing what’s in these delicious pecan tassies is just good practice, even if we all know one bite turns into three!
These figures are based on the recipe yielding 24 servings, and they represent the approximate values for a single, perfect bite-sized dessert. Remember, these are estimates based on the ingredients listed, and if you substitute dark brown sugar for light, those numbers might shift just a tiny bit!
- Serving Size: 1 tassie
- Calories: 185
- Sugar: 14g
- Fat: 13g (Keep in mind most of this is that rich butter and cream cheese!)
- Saturated Fat: 7g
- Carbohydrates: 15g
- Protein: 2.5g
- Cholesterol: 40mg
They aren’t the lightest, I’ll admit it, but that’s what makes them so satisfying! When you’re making something for a special occasion, you want it to taste special, and these definitely do. Just enjoy them for what they are: a classic, rich, buttery bite of Southern goodness!
PrintCream Cheese Crust Pecan Tassies
Bite-sized pecan desserts featuring a rich, buttery cream cheese crust filled with a sweet, chewy pecan pie mixture. These are ideal for holiday cookie trays.
- Prep Time: 25 min
- Cook Time: 25 min
- Total Time: 50 min
- Yield: 24 tassies
- Category: Dessert
- Method: Baking
- Cuisine: American
- Diet: Vegetarian
Ingredients
- 1 cup (2 sticks) unsalted butter, softened
- 8 ounces cream cheese, softened
- 2 cups all-purpose flour
- 1 cup chopped pecans, plus extra for topping
- 1 cup packed light brown sugar
- 2 large eggs
- 1 teaspoon vanilla extract
- 1/4 teaspoon salt
Instructions
- Prepare the crust: In a large bowl, beat the softened butter and cream cheese together until smooth. Gradually add the flour and mix until just combined into a soft dough.
- Press the dough: Take small spoonfuls of dough and press them firmly into the bottom and up the sides of a standard 24-cup mini muffin tin to form small cups.
- Prepare the filling: In a separate bowl, whisk together the brown sugar, eggs, vanilla extract, and salt until smooth. Stir in the chopped pecans.
- Fill the cups: Spoon the pecan filling evenly into the prepared dough cups, filling each about three-quarters full. Sprinkle a few extra chopped pecans on top of each tassie.
- Bake: Bake in a preheated oven at 350 degrees F (175 degrees C) for 20 to 25 minutes, or until the crust edges are lightly golden and the filling is set.
- Cool: Let the pecan tassies cool in the muffin tin for 10 minutes before carefully removing them to a wire rack to cool completely.
Notes
- You can make the dough up to two days ahead and keep it refrigerated. Press the dough into the tins just before filling and baking.
- These freeze well once cooled. Store them in an airtight container between layers of parchment paper.
- For a more Southern flavor, use dark brown sugar instead of light brown sugar in the filling.
Nutrition
- Serving Size: 1 tassie
- Calories: 185
- Sugar: 14
- Sodium: 65
- Fat: 13
- Saturated Fat: 7
- Unsaturated Fat: 6
- Trans Fat: 0
- Carbohydrates: 15
- Fiber: 0.5
- Protein: 2.5
- Cholesterol: 40