

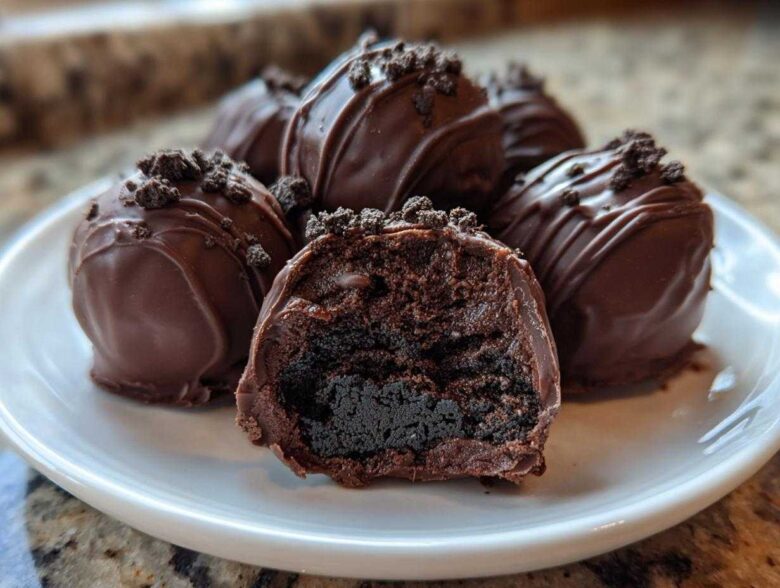
You know those times when you need a killer dessert but the thought of turning on the oven makes you tired? Me too! That’s why I live for absolutely no-bake recipes, and trust me, these oreo balls are my go-to when company shows up unexpectedly. I first started making these back in college because they were the ultimate cheat code—ridiculously delicious but required zero baking skill. Forget complicated steps; this is truly the easiest recipe for classic oreo balls, which everyone eventually just starts calling Easy Oreo Truffles.
Seriously, with just three main players—cookies, cheese, and chocolate—you get a fudgy, decadent bite that tastes like you spent all day in the kitchen. If you loved my recipe for No Bake Peanut Butter Bars, then you are going to lose your mind over how simple these are! You absolutely have to try this simple cookie upgrade!
Why These Are the Best No Bake Oreo Balls You Will Ever Make
I’m telling you, when it comes to parties or last-minute desserts, nothing beats these. They are genuinely the best No Bake Oreo Balls because everyone loves them, and you can whip them up faster than I can decide what movie to put on. It’s ridiculously easy, trust me.
Here’s why I keep coming back to this specific formula for my Easy Oreo Truffles:
- You don’t need an oven! This is my top selling point, especially when it’s too hot to bake in the summer. If you need other oven-free ideas, you should check out my post on No Bake Peanut Butter Pie.
- They come together incredibly fast. We are talking about minimal actual effort here.
- Everyone always asks for the recipe because they taste so decadent, like a rich chocolate truffle.
If you’re looking for real winners, these fit the bill perfectly.
Quick Oreo Desserts Ready in Under 30 Minutes
Hands-on time is practically nothing. You crush the cookies, mix in the cream cheese, roll them, chill them for a bit, and then dip them. It’s such a Simple Oreo Dessert that you can easily get this done while watching your favorite show. The hardest part is waiting for them to chill!
The Magic of 3 Ingredient Oreo Balls
This is the beauty of the recipe—it’s all about quality without quantity when it comes to stuff you need to buy. We are focusing on the core flavors here. The cream cheese is the unsung hero; it’s what turns dry cookie crumbs into a perfect, firm dough that holds its shape once you roll it. Who needs complicated steps when you have the magic combination of 3 Ingredient Oreo Balls?
Essential Ingredients for Classic Oreo Balls Recipe
Okay, let’s talk about what you need to officially make these Oreo Balls. Remember, simplicity is key here, and using the right stuff makes all the difference in achieving that perfect fudgy texture. Here’s the rundown: you need one whole package of those classic Oreos—and yes, filling and all, don’t ditch the good stuff! Then you need 8 ounces of cream cheese, and this is important, it simply must be softened so it mixes in smoothly. Finally, you’ll need 16 ounces of semi-sweet chocolate melting wafers or chips for that beautiful coating.
If I’m making these for giving away, I always check out my tips on cinnamon sugar donut holes for decoration ideas, but for the base, these three items are essential!
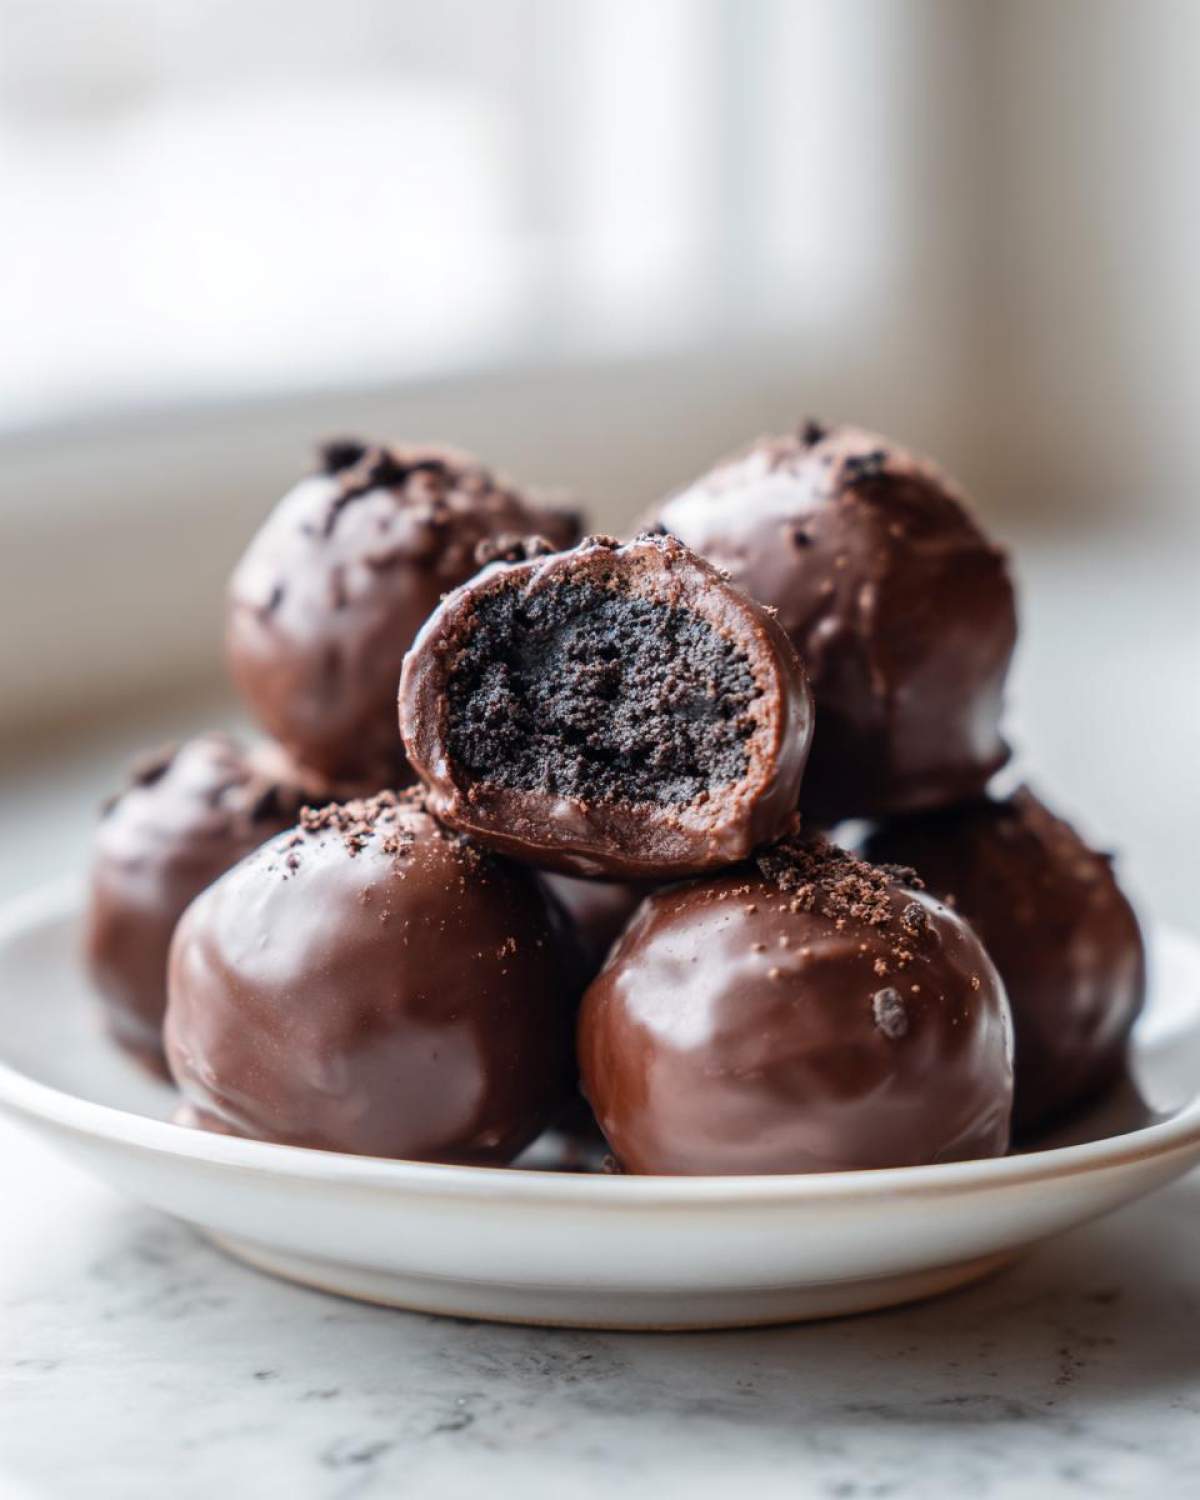
Ingredient Notes and Substitutions for Cream Cheese Oreo Balls
The temperature of your cream cheese is super important for making smooth Cream Cheese Oreo Balls. If it’s cold, you’ll end up with lumps you can’t mix out, so leave it on the counter for an hour before you start! If you want that coating to glide on like silk, here’s a little trick: melt about one teaspoon of vegetable shortening or coconut oil right in with your chocolate. It keeps the coating from getting too thick too fast.
Also, don’t feel stuck on the classic black-and-white cookie. You can absolutely use Golden Oreos or even mint ones if you want a fun twist on your Chocolate Oreo Bites!
Step-by-Step Guide to Making Perfect Oreo Balls
Alright, buckle up, because this is where the magic really happens! Even though this is incredibly easy, these steps make the difference between a sad, mushy ball and a perfect, rollable treat. The goal is texture, kiddo. We want everything to mix together seamlessly so we can move onto the best part: the chocolate dip!
Don’t worry about rushing the steps; especially the chilling part. If you need more ideas on quick treats that don’t involve standing over a stovetop, you should definitely see my recipe for Cinnamon Roll Pancakes—it’s another one that pulls together fast!
Preparing the Oreo Cookie Balls Base
First things first, you need crumbs! If you have a food processor, toss the whole Oreos—yes, filling and all, don’t ditch the good stuff—and pulse until they look like wet sand. That’s the perfect texture. If you’re doing it the old-fashioned way, grab a big zip-top bag and a reliable rolling pin and just smash them until they are fine. Once you have those fine crumbs, dump them in a bowl and add your softened cream cheese. Mix it, mix it, mix it! Keep going even if you think it won’t combine; eventually, it turns into a solid, slightly sticky dough ready for rolling. That dense dough is the secret to perfect Oreo Balls.
Chilling and Coating Your Oreo Balls
This step is non-negotiable for me, seriously. Once you roll that dough into nice 1-inch balls—use a small cookie scoop if you have one, it’s amazing for consistency—you MUST chill them for 30 minutes. If you skip this, the balls will melt right off your fork when you try to dip them! While they are chilling, get your chocolate ready. Melt your chocolate wafers according to the package directions. I usually zap mine in 30-second bursts in the microwave, stirring in between, until it’s smooth. When you dip, use a fork and let all that extra chocolate fall back into the bowl before placing it on parchment paper. That way, you avoid big puddles around the bottom of your gorgeous Chocolate Oreo Bites! I shared my tips for avoiding thick chocolate in the Peanut Butter Bars recipe, and they work here too!
Tips for the Best Oreo Truffles Results
I’ve made these so many times that I consider myself officially qualified to give you the insider scoop on achieving truly perfect Oreo Truffles every single time. Listen, even with a recipe this simple, sometimes things go a little sideways. But don’t worry! I’ve got the fixes built right in so you can be confident when you’re working with that rich filling.
When I’m making something sweet like my Maple Candied Pecans or these chocolate delights, I always remember that temperature is half the battle.
Troubleshooting Common Oreo Balls Issues
Sometimes the dough fights back, right? If your initial mixture feels way too soft after you mix in the cream cheese, it means your cookies weren’t quite as packed as mine were, or maybe your cream cheese was a little too warm. Don’t panic! Just grind up another quarter of a cookie sleeve and mix that in slowly until it firms up enough to roll. If it’s too crumbly when you try to roll it, you just need a little more moisture, usually a teaspoon of milk or a touch more cream cheese does the trick.
Now, let’s talk about the dreaded seized chocolate. If your melted chocolate starts looking thick and grainy while you are trying to dip your beautiful Oreo Balls, stop stirring frantically! That usually means water or steam got into it. The solution is simple: stir in just a single teaspoon of coconut oil or regular vegetable shortening. It loosens everything right back up, and you’ll be back to dipping smoothly with no fuss. See? Easy fixes for all your little hiccups!
Making Holiday Oreo Treats: Variations and Decorations
Listen, while the classic dark chocolate coating is absolutely divine, you are definitely missing out if you only make standard Oreo Balls, especially around the holidays! Since we’ve mastered the base, it’s time to have some fun decorating these guys. Think of them as little blank canvases for edible art. If you’re already making other fun holiday snacks, like my recipe for Reindeer Chow Mix, you can pull the same fun colors and sprinkles to decorate these.
If you’re looking for a festive look, try swapping out the semi-sweet chocolate for melted white chocolate. Then, you can drizzle red or green melted chocolate over the tops. Or, if you’re aiming for a spooky vibe like in my Halloween Monster Munch, use orange or purple colored melts!
For the easiest holiday glamour, just sprinkle finely crushed candy canes or colorful nonpareils onto the balls immediately after dipping, while the chocolate is still wet. These look so fancy sitting on a platter, and nobody needs to know that these Fudgy Oreo Truffles took you maybe fifteen minutes of active work!
Storage and Serving Suggestions for Party Treats No Bake
Once you’ve dipped and decorated your incredible chocolate bites, the hard part is over! Now we just need to make sure these Party Treats No Bake stay perfect until serving time. Because these Oreo Balls rely on cream cheese, we definitely have to keep them cool. They last beautifully in the refrigerator, and honestly, they taste even better the next day once all those flavors have really settled in.
Keep them in an airtight container—I usually use Tupperware—and they will stay fresh and firm for about a week. If your kitchen is really warm, or if you made a huge batch for the holidays and need them to last longer, the freezer is your best friend! You can freeze them for up to three months. Just wrap the whole container tightly in plastic wrap, then aluminum foil.
When you want to serve them, take them out of the freezer about 30 minutes before the guests arrive, or take them out of the fridge about 15 minutes before you plan to eat them. They are fantastic all on their own, but if you’re having an afternoon party, they pair perfectly with a strong cup of black coffee or a creamy latte. The slight tanginess of the cream cheese cuts right through the richness of the chocolate—it’s the best!
Frequently Asked Questions About Oreo Cookie Balls
I totally get it—when you find an awesome recipe like these Oreo Cookie Balls, you start wondering about all the little tweaks you can make or how long they’ll actually stick around in the fridge. I’ve pulled together the questions I get asked most often, especially when people are trying to make up a big batch of these Quick Oreo Desserts for a gathering!
Can I make Oreo Balls without Cream Cheese?
That’s a big question! I have to be honest, the cream cheese is really key to the classic texture of my Cream Cheese Oreo Balls because it provides moisture and fat that binds everything into that perfect dough consistency. If you absolutely cannot use dairy cream cheese, you can substitute it with an equal amount of room-temperature vegan cream cheese or even softened nut butter in a pinch, but just know the flavor and texture will change slightly. For the best results, though, stick to the original!
Are these Easy Dessert Recipes suitable for freezing?
Yes, absolutely! These are some of the best Easy Dessert Recipes to make ahead because they freeze like a dream. If you’ve already dipped them in chocolate, make sure the coating is totally set first. Then, place the Oreo Balls in a single layer on a baking sheet and freeze them until they are hard—maybe an hour. Once solid, transfer them to a heavy-duty freezer bag or an airtight container, putting wax paper between the layers so they don’t stick. They last great for months!
Estimated Nutritional Data for Oreo Balls
Now, I know that none of us are making these incredible Chocolate Oreo Bites because we’re counting calories, right? Let’s be real, these are treats, and they are worth every single decadent bite! But, since I always get asked about the specifics, I ran the numbers based on the exact ratio of cookies, cream cheese, and chocolate that I used in my recipe.
Keep in mind this is just an estimate, because let’s face it, brands of Oreos and chocolate change all the time! This calculation assumes you’re using the standard semi-sweet coating and that you get about 30 perfect little balls out of the batch. If you stick to my advice and you’re making these for the blog, feel free to link back to my main post on dessert recipes!
Here is the breakdown for one single serving:
- Calories: Around 150 – Yep, that’s pretty standard for such a dense, fudgy dessert!
- Total Fat: About 9 grams (and 5 of those are saturated, so enjoy responsibly!).
- Carbohydrates: 16 grams.
- Protein: A tiny boost at 2 grams, thanks to that cream cheese!
The sugar count comes in around 15 grams, which is why these are perfect with a bitter cup of coffee or a homemade latte—the bitterness balances out the sweetness perfectly. Enjoy them! You made them, and they are amazing!
Share Your Decadent Chocolate Bites Experience
Now that you’ve created your own batch of these rich Decadent Chocolate Bites, I really want to see what you came up with! Did you go classic? Did you try white chocolate or maybe roll yours in crushed nuts instead of leaving them plain?
Please leave a rating below so I know how they turned out for you. And if you snapped a photo, tag me! I love seeing your gorgeous homemade treats. Happy baking—or, well, happy no-baking!
PrintEasy 3-Ingredient No-Bake Oreo Balls

Make simple, no-bake Oreo balls using only three ingredients. These chocolate truffles are quick to prepare and perfect for parties or holidays.
- Prep Time: 20 min
- Cook Time: 5 min
- Total Time: 25 min
- Yield: About 30 balls
- Category: Dessert
- Method: No Bake
- Cuisine: American
- Diet: Vegetarian
Ingredients
- 1 package (14.3 oz) Oreo cookies
- 8 oz cream cheese, softened
- 16 oz semi-sweet chocolate melting wafers or chips
Instructions
- Place all Oreo cookies, filling included, into a food processor. Pulse until you have fine crumbs.
- Transfer the crumbs to a medium bowl. Add the softened cream cheese. Mix with a hand mixer or sturdy spoon until fully combined and a dough forms.
- Roll the mixture into 1-inch balls. Place the balls on a baking sheet lined with parchment paper.
- Chill the Oreo balls in the refrigerator for at least 30 minutes to firm them up.
- Melt the chocolate according to package directions. You can use a microwave or a double boiler.
- Dip each chilled ball into the melted chocolate, ensuring it is fully coated. Use a fork to lift it out, allowing excess chocolate to drip off.
- Place the coated balls back onto the parchment-lined sheet.
- Refrigerate the finished Oreo balls until the chocolate coating is set, about 15 minutes.
Notes
- For a smoother coating, add 1 teaspoon of vegetable shortening or coconut oil to the melted chocolate.
- If you do not have a food processor, place the cookies in a large zip-top bag and crush them thoroughly with a rolling pin.
- You can substitute semi-sweet chocolate with milk chocolate or white chocolate for different flavors.
Nutrition
- Serving Size: 1 ball
- Calories: 150
- Sugar: 15
- Sodium: 75
- Fat: 9
- Saturated Fat: 5
- Unsaturated Fat: 4
- Trans Fat: 0
- Carbohydrates: 16
- Fiber: 0
- Protein: 2
- Cholesterol: 15