

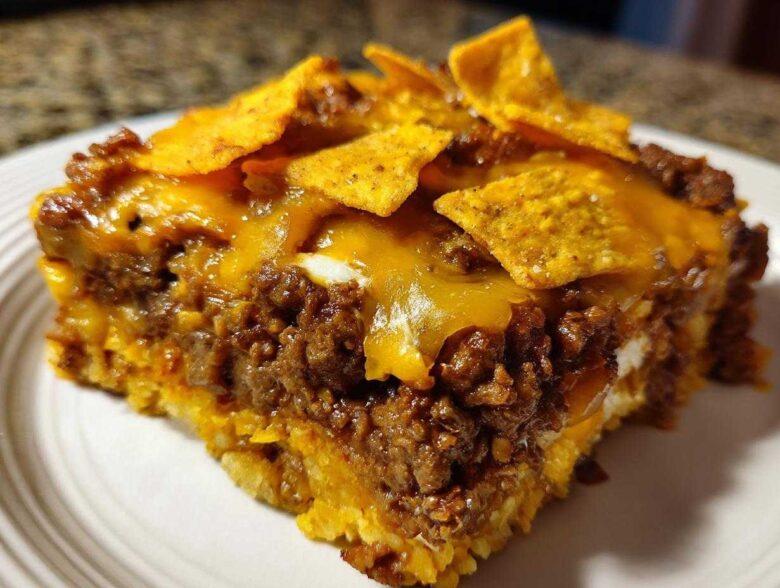
Some nights, you just need a warm hug in a dish, right? Forget fussy soufflés or recipes with ingredients you have to special order. When I was still stuck in perfectionist mode, Simon (my Chief Morale Officer, bless his heart) would point to my cookbook and say, “Alice, sometimes the best meals are the simplest ones that bring the most smiles.” I had to learn to relax, and dishes like this incredible Dorito Casserole taught me how! It’s the ultimate weeknight win, turning humble chips and pantry staples into the most satisfying Comfort Food Casserole you can imagine. Want to see how we got this relaxed philosophy down on paper? You can read more about our journey over on the About Us page. We’re aiming for zero stress and maximum deliciousness here, so crank up the music, and let’s get this simple bake together!
Why This Easy Dorito Casserole Recipe Deserves a Round of Kudos
When I look at this recipe now, I don’t see a list of instructions; I see instant relief after a long day! This isn’t just another baked dish; it’s a high-five straight from the oven. Simon always praises this one because it proves you don’t need hours in the kitchen to create something truly satisfying for the whole family. It’s loaded with flavor but remarkably simple. You absolutely deserve to pat yourself on the back just for deciding to make it!
Here’s why this simple bake is one of our absolute go-to comfort meals:
- It’s a fantastic, flexible base for whatever meat or veggies you have on hand. It’s hearty and filling—a true Comfort Food Casserole!
- You just can’t beat the texture contrast. We nail the balance so that the filling is creamy while the top layer stays wonderfully crunchy.
- It ticks all the boxes for busy parents looking for an easy backup plan.
Quick Weeknight Dinner Casseroles Ready in Under an Hour
Seriously, look at the timing. With only a 15-minute prep time and about 30 minutes in the oven, this entire event is finished, resting, and ready to eat usually before the kids even finish their homework. When you need Quick Weeknight Dinner Casseroles that taste like a treat but feel like zero effort, this is your champion. Simon always says, “If it takes less than an hour, it’s a win!”
The Ultimate Family Friendly Casserole
You know how some nights you’re cooking, and you’re bracing yourself for the complaints? Not with this one. It’s packed with cheese, familiar flavors, and—hello!—Doritos! It turns into the most reliable Family Friendly Casserole that disappears every single time. It’s the kind of no-fuss meal where everyone at the table actually gets seconds. You can check out some of my other go-to stress-free dinner ideas on the blog!
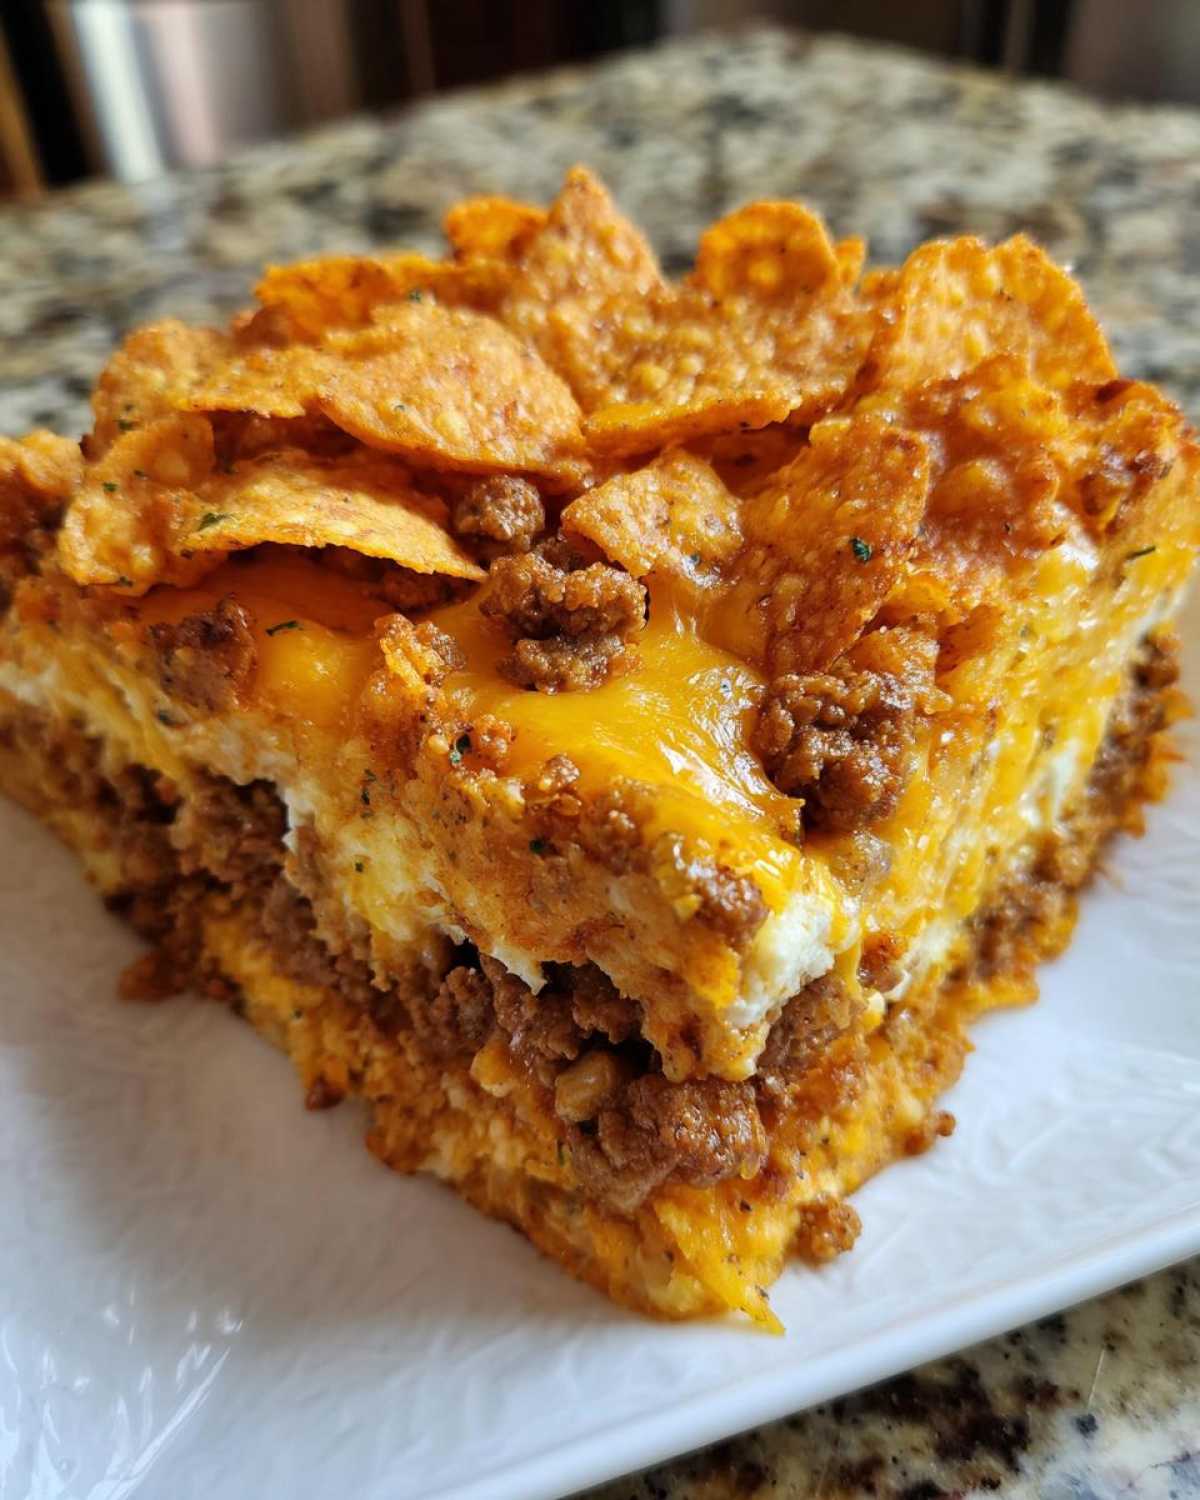
Gather Your Ingredients for the Best Dorito Bake Dinner Idea
Okay, this is where the magic starts, and I want you to feel completely confident that you have everything you need! Simon reminds me constantly that preparation makes the process fun, not stressful. For this ultimate Best Dorito Bake Dinner Idea, we usually keep the ingredient list short, meaning less time shopping and more time dancing in the kitchen while it bakes! Make sure you check your measurements—that’s how we keep this recipe consistent every time we make it over in our section for Dinner Recipes.
Meat and Base Ingredients
We are keeping this classic ground beef tonight, but you can totally swap it out later! You’ll need one whole pound of ground beef and one medium onion, chopped up nice and small. The most important part here, and I mean it, is draining that grease once it’s browned! If you leave fat in there, you risk a watery filling, and we want creamy, not swampy. Have your skillet ready for action!
The Creamy Sauce Components
This is the binder that holds all the taco magic together. You need two cans of soup here—don’t mix them up! That’s one 10.75 ounce can of cream of chicken soup and one 10 ounce can of cream of mushroom soup. Next, grab 1 cup of milk and 1 cup of water. For that perfect savory flavor, make sure you have 1 teaspoon of chili powder, 1/2 teaspoon of cumin, and 1/4 teaspoon of garlic powder ready to go in.
The Crunchy Element and Cheese for this Dorito Casserole
The star of the show! Make sure you buy the Nacho Cheese Flavored Tortilla Chips—that orange dust is non-negotiable for the authentic taste we’re going for (the whole 4-ounce bag). Now, for the cheese, which is totally key for managing that crunch: you need 2 cups of shredded cheddar total. You’ll mix 1 1/2 cups into the soup mixture to make it gloriously gooey inside, and you must save that last 1/2 cup for sprinkling right before the final bake. Don’t skip saving some for the top—that’s essential for a perfect Dorito Casserole!
Homemade Dorito Casserole Instructions: Achieving Perfect Crunch
Alright, this is the part where we stop prepping and start baking! Since we are trying to avoid that dreaded soggy bottom—a true kitchen tragedy—I’m going to walk you through exactly how Simon taught me to layer this for maximum crunch. If you follow these Homemade Dorito Casserole Instructions perfectly, you’ll get that satisfying crunch in every single bite! We’re aiming for a true masterpiece here, not a mush pile, so pay attention to which chips we crush now and which ones we save for later. You can see what other great casserole inspiration we have over at this link!
Step 1: Prepping the Base and Aromatics
First things first, get your oven temperature set to 375 degrees Fahrenheit. While it heats up, grab that 9×13 baking dish and give it a light grease coating. Doesn’t need to be perfect, just enough so nothing sticks to the sides! Now, get that beef and onion sizzling in your skillet over medium heat. Cook until the meat is brown and the onions are soft—you want them translucent, not crunchy. When it’s done, tilt that skillet and drain off every bit of excess grease you can possibly manage. Trust me, draining thoroughly now prevents a watery casserole later. Great job listening to your internal cook; that’s major kudos!
Step 2: Building the Creamy Filling
Now, pour in all those creamy components we gathered! That means dump in both condensed soups, the milk, and the water. Toss in your spice mix: chili, cumin, and garlic powder. Stir everything really well and bring that mixture up to a gentle simmer on the stove. Let it bubble along quietly for about five minutes, stirring now and then so the bottom doesn’t scorch. Once it’s settled, pull it off the heat and stir in 1 1/2 cups of that gorgeous cheddar cheese. Keep stirring until it’s all melted down into one smooth, thick, totally decadent sauce.
Step 3: Integrating Chips and Initial Bake
Ready for the crucial texture step? Take half of your Doritos—roughly half!—and crush them up. I just like putting them in a Ziploc bag and gently crushing them with my fist. Don’t pulverize them into dust; we want some texture left! Fold those roughly crushed chips right into your creamy meat mixture. Carefully spoon this whole thing evenly into your prepared baking dish. Now, pop it in the 375°F oven for 20 minutes. This initial bake sets the filling so it holds its shape.
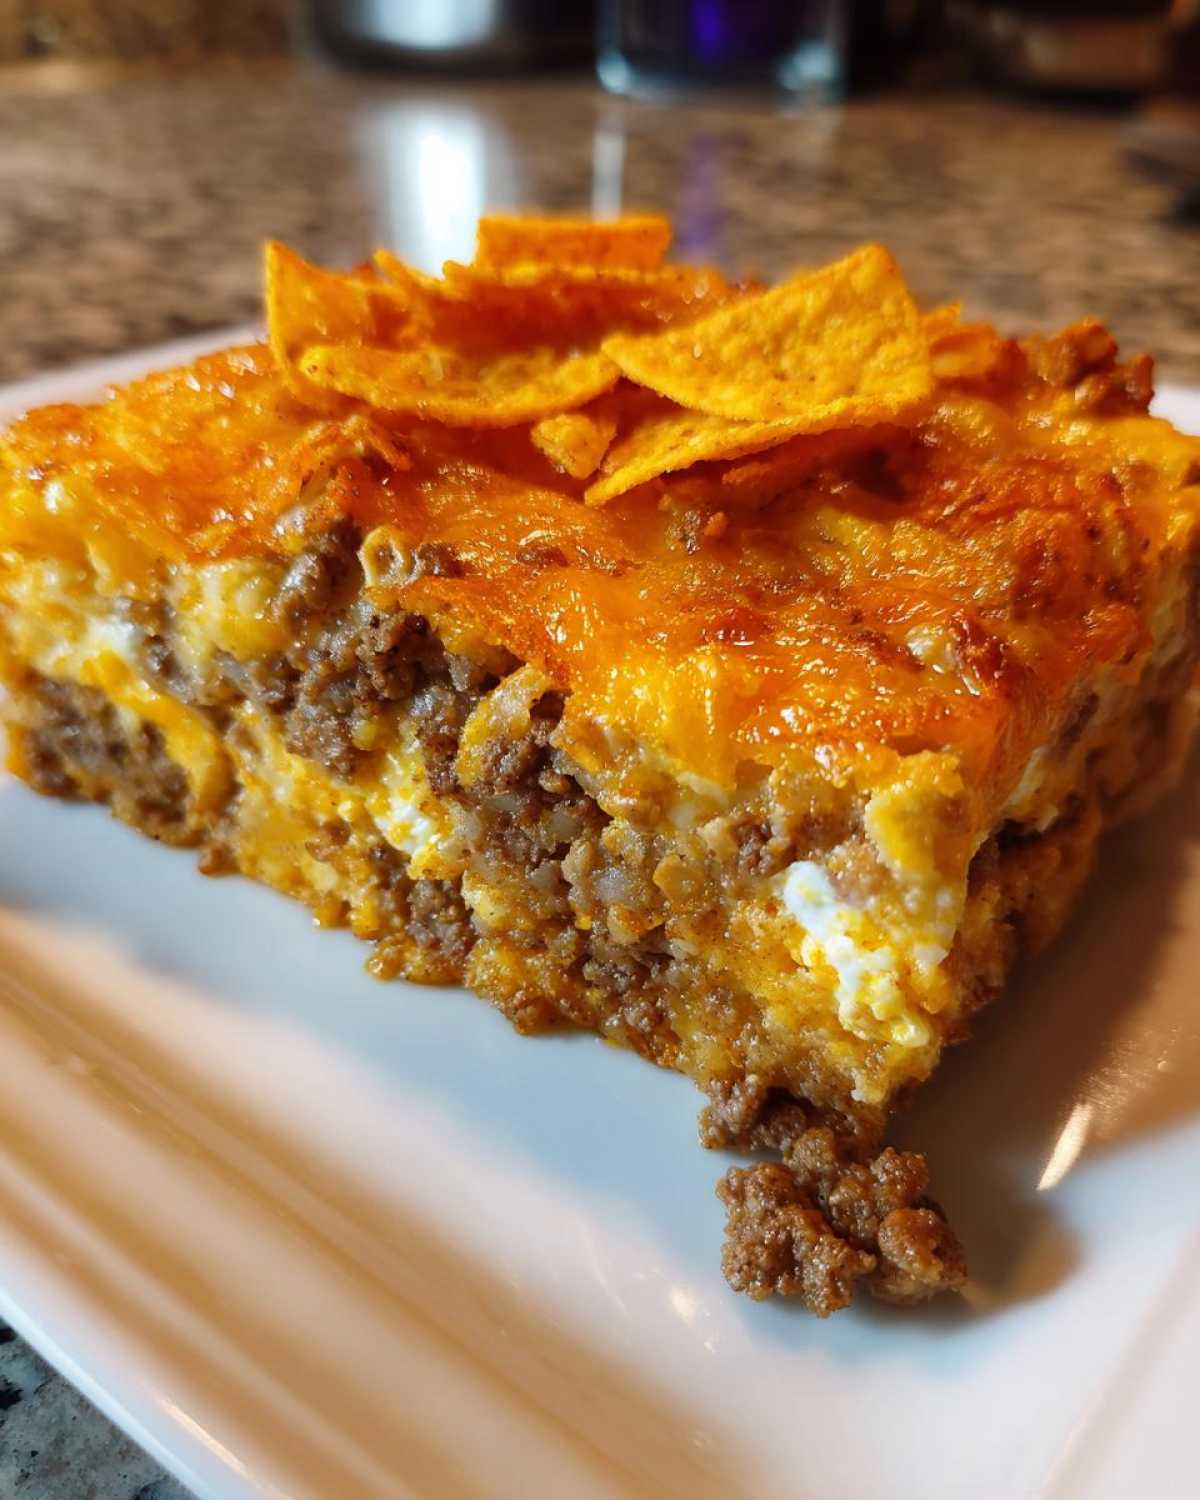
Step 4: The Topping and Final Crunchy Taco Casserole Baking
When that 20 minutes is up, pull the dish out—careful, it’s hot! It should look mostly set. Take the remaining 1/2 cup of cheese you saved and sprinkle it right over the top. This is the second absolutely critical step for crunch: take those remaining *whole* Doritos and arrange them on top of the cheese layer. Try to cover the surface evenly. Put it back in the oven for just another 5 to 10 minutes. You are waiting for that cheese to get bubbly and golden, and for those top chips to get hot and crunchy. And boom! You nailed the Crunchy Taco Casserole Baking part beautifully!
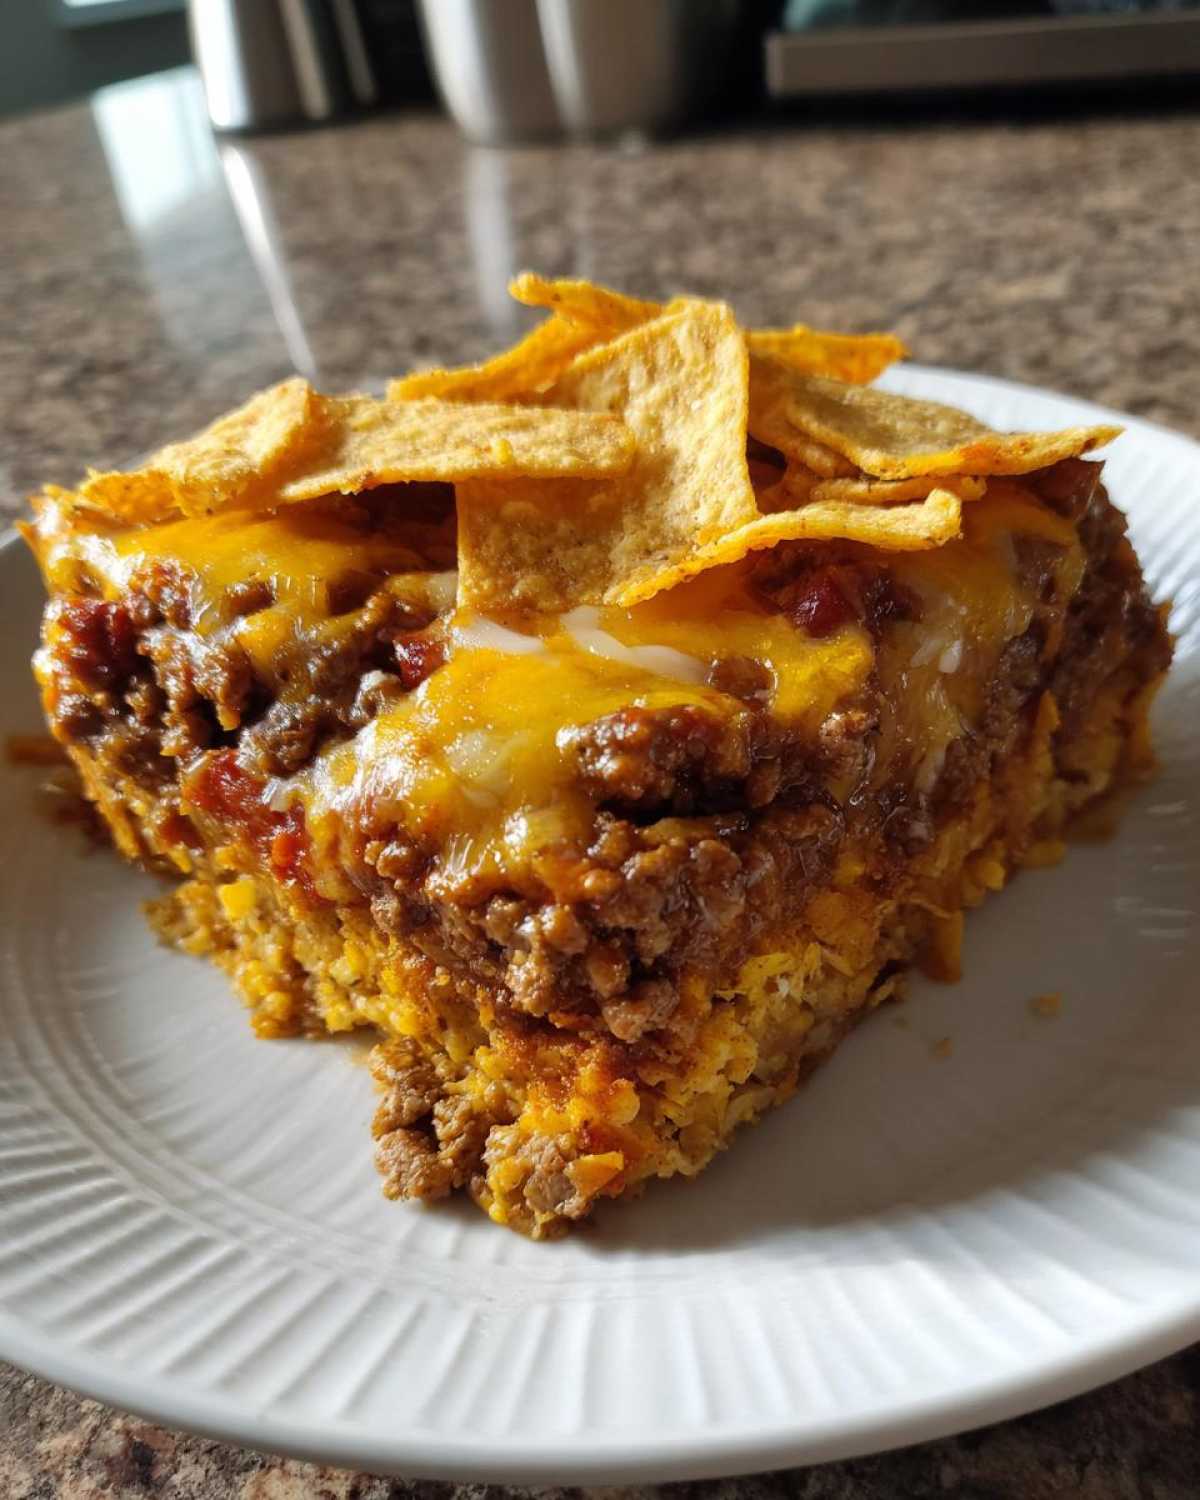
Ingredient Notes and Substitutions for this Comfort Food Bake
Even though we love sticking to the original blueprint, Simon always says that the true kitchen win is adapting something to fit your pantry and your family’s taste! We aren’t strict dictators here; we’re just sharing the best way we’ve found to make this a reliable, stress-free success every time. That’s where great E-E-A-T comes in—trustworthy advice for variations! If you’re tired of the same old routine, check out some of our other great ideas, like this comfort bake recipe for chicken and wild rice when you need a change of pace.
Making a Cheesy Chicken Casserole with Tortilla Chips
What if you don’t have ground beef, or maybe you just prefer something a little lighter for a Tuesday night? You can absolutely pivot to chicken! This works fantastic when you substitute the beef with about 2 to 3 cups of cooked, shredded chicken. Just make sure that chicken is already seasoned or plain—it’s going to soak up all that creamy soup flavor anyway. Switching to chicken keeps this dish incredibly satisfying while feeling just a touch lighter. It’s such an easy way to turn it into a wonderful Cheesy Chicken Casserole with Tortilla Chips!
Spice Level Adjustments
My taste buds have definitely evolved since I first met Simon; I like a little bit of fire in my food now! If you felt like the original recipe might be a bit too tame for your liking, don’t reach for the chili powder again. Instead, add a good dash or two of your favorite hot sauce directly into that soup mixture on the stovetop. That gives you that immediate kick without changing the savory balance of the spices. Another trick that Simon loves is swapping out half or all of the cheddar cheese for Pepper Jack. That sharp heat woven into the creamy sauce makes a huge difference and gives you a wonderful little surprise!
Serving Suggestions for Your Layered Chip Casserole
After all that hard work—and trust me, making a great casserole deserves praise whether you needed 15 minutes or an hour of prep—you deserve to serve it up looking and tasting amazing! This Layered Chip Casserole is rich, it’s cheesy, and it’s incredibly comforting on its own. But Simon and I have found that serving it with something cool and fresh on the side really makes the whole meal sing. You don’t want to overcomplicate this after such an easy bake, so just grab a couple of simple extras to balance out all that satisfying, warm goodness. If you’re looking for something fresh, maybe try pairing it with this lovely sweet potato salad next time!
Cool Toppings for Contrast
First off, if you didn’t put salsa on it before it went into the oven, I highly recommend having a bowl of cool salsa ready right next to the dish. That little bit of bright acid cuts through the richness of the soup and cheese perfectly. But don’t stop there! I always have a container of sour cream (or plain Greek yogurt for a tangier feel) to dollop right on top of each helping. It melts down just beautifully.
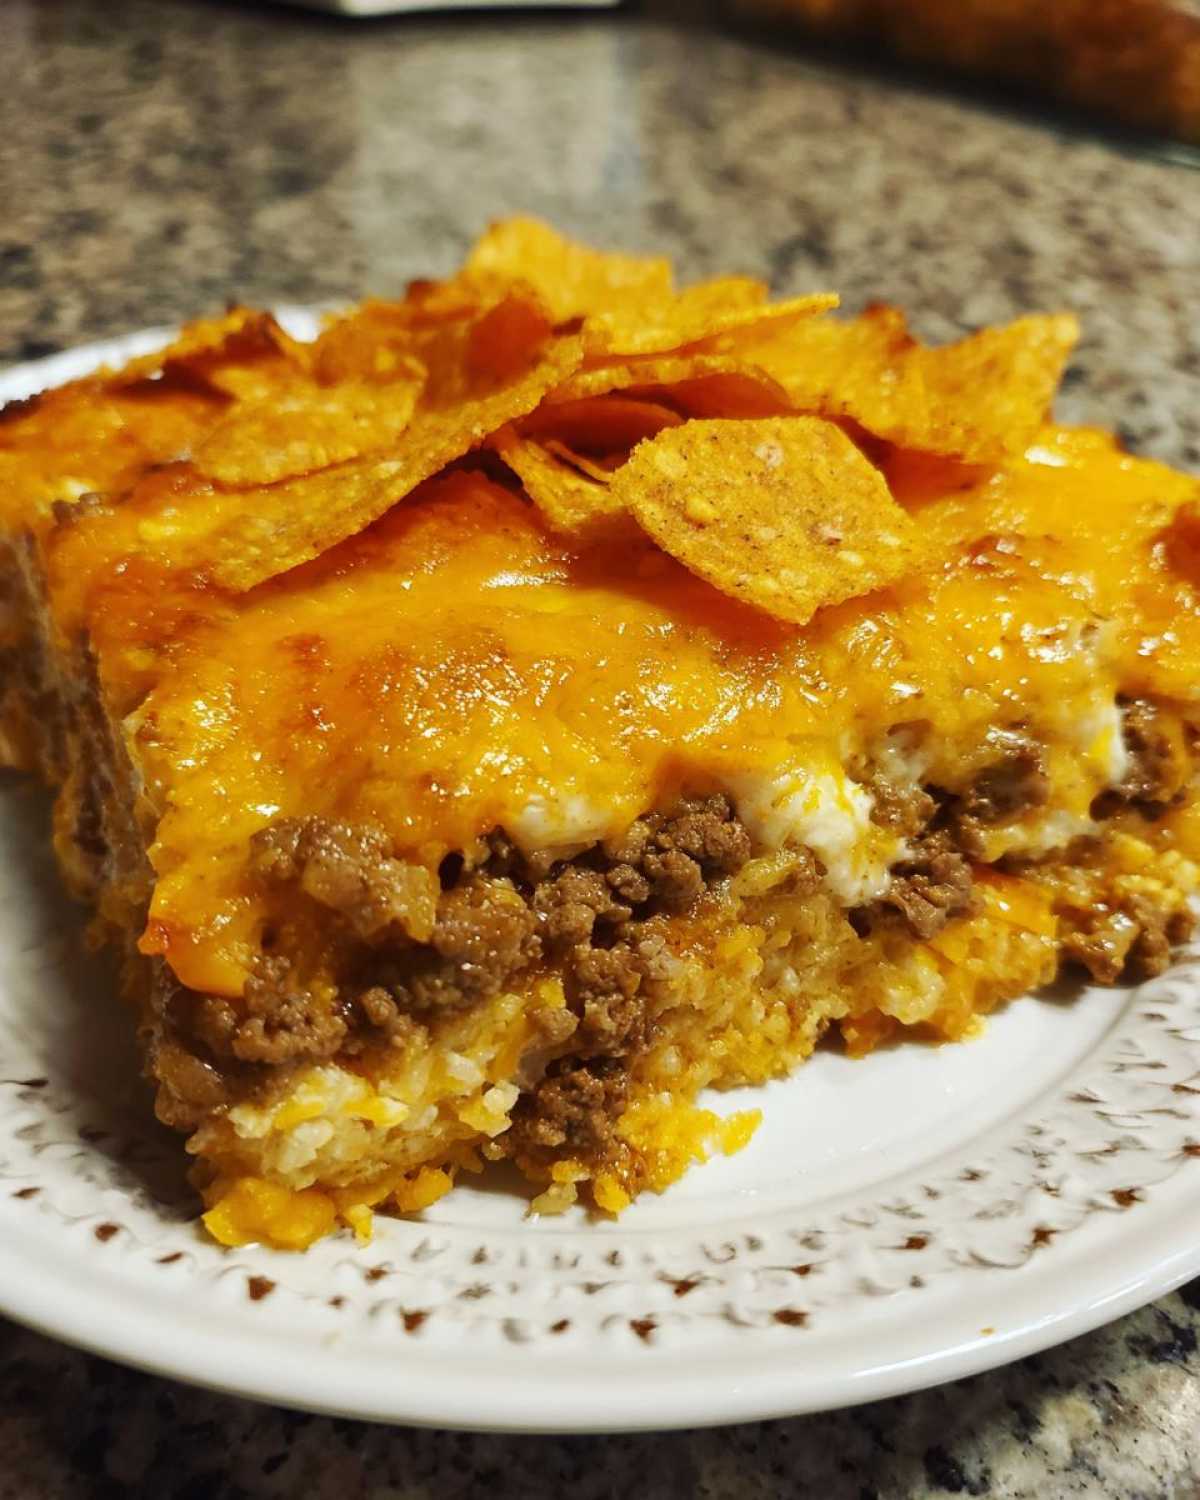
To add color and that fresh, sharp snap, sprinkle some chopped green onions over the top right before you serve. If you’re feeling extra fancy, a tiny shower of fresh cilantro really ties into that nacho-flavored profile. These simple additions honestly take a great, easy dinner and make it feel like a true feast. You totally earned giving yourself kudos on this presentation!
Storage and Reheating Instructions
We’ve all been there—you make this amazing, hearty casserole, and suddenly you’re staring at leftovers, wondering how to keep that cheesy filling tasting just as good tomorrow. The biggest challenge with any chip-based bake is keeping those Doritos from turning into sad, soggy mush overnight! Simon insists that we save the best leftovers for lunch the next day, so I’ve figured out the best way to handle this for our Simple Baked Casserole Dishes.
Here’s how you manage storage to keep the spirit of this comfort food alive:
- Once the casserole has cooled completely—and I mean completely—cover it tightly with plastic wrap or foil. You want a good seal to keep the air out.
- Store it in the refrigerator for up to three days. If you try to keep it longer, the texture starts to suffer, and nobody wants sad leftovers!
If you want to keep the top chips crunchy, I give you permission to pull the topping layer off before you cover the dish! Keep those crunchier chips in a separate small baggie on the counter. You can easily crisp them up again in a 300°F oven for about five minutes if they’ve softened a bit.
Reheating That Cheesy Goodness
When it’s time to reheat, the oven is always your best friend for casseroles, even if it takes a little longer than the microwave. For a full dish or a large portion, cover the casserole loosely with foil. Pop it back into a 350°F oven. If you covered it well during storage, it should only take about 20 to 25 minutes to get piping hot throughout. The foil keeps the edges from drying out while the center warms up.
If you’re just scooping out a single serving—because let’s be honest, we all steal from the fridge the minute we can—the microwave works fine. Just use a microwave-safe plate and heat it in 45-second bursts, stirring halfway through, until it’s steaming. Don’t blast it for too long, or the great creamy sauce we worked so hard on can get a little rubbery!
If you want to jazz up those leftovers, consider revisiting those great serving suggestions we talked about earlier! A dollop of sour cream or some fresh salsa on your reheat definitely earns you extra kudos for making leftovers taste brand new. If you’re looking for more reliable oven timing guides, you might find some useful tips over at this roast recipe post!
Troubleshooting Common Issues with Nacho Flavored Casserole
Listen, even when you are aiming for joy and praise, sometimes things don’t go exactly as planned in the kitchen. That’s okay! Simon thinks troubleshooting is just another opportunity to cheer for your effort. When making a layered chip recipe like this Nacho Flavored Casserole, there are only a few common hiccups that trip people up. Most of them come down to one thing: moisture control! If your bake didn’t turn out exactly picture-perfect, don’t worry—we can fix the technique next time, and that effort deserves a huge round of applause right now!
Don’t forget to check out our guide on easy pierogi casserole if you need another simple comfort bake for next week!
Why Is My Casserole Filling Soggy?
This is the number one complaint I hear about layered chip bakes, and it almost always boils down to liquid content. If your filling is swimming instead of creamy, go back to Step 1 of those instructions. Did you drain off every bit of excess grease after browning the beef? Even a little pool of fat or water sitting at the bottom of the skillet will seep into the sauce and make everything limp!
The second big reason for sogginess is crunch management. Remember how Alice stressed crushing *only half* the chips to mix in? If you folded all the chips into the filling immediately, they started absorbing liquid way too early. They break down into mush before they even get to the oven. Next time, save the crushed chips for the very last minute before that initial 20-minute bake. Treat those chips like they are precious cargo!
Why Did My Top Doritos Burn Before the Center Was Hot?
This usually happens when you put the crunchy topping on too soon! If you toss the whole chips on at the beginning (Step 1), they have 30 or more minutes in high heat and they’ll definitely turn black and taste bitter before the inside is bubbly. My method introduces them late for a reason!
If you followed the instructions and they *still* burnt a little, here’s the fix: you need to shield them! Next time, after you put that final layer of cheese down and arrange the whole chips on top (right before that final 5-10 minute blast), grab a sheet of aluminum foil. Lay it loosely over the entire casserole dish. This acts like a warm blanket, trapping heat down onto the cheese and filling to warm them through, while physically blocking the direct oven heat from scorching your beautiful chip topping. You’re problem-solving like a pro!
The Cheese Isn’t Melting Properly
If your cheese looks stringy or won’t blend smoothly into the soup base, chances are your base mixture was too hot or too cold when you added it. If the soup base is boiling vigorously when you add the 1 1/2 cups of cheddar, the cheese can break or get oily rather than smooth. If the base has cooled too much, the cheese takes forever to melt and might just sit there in clumps. You’re aiming for just off the heat—hot enough to melt, cool enough not to seize up. When it melts into that gorgeous, thick sauce, that’s when you know you hit the sweet spot. That smooth melt is definitely worth a high-five!
Estimated Nutritional Data for This Hearty Casserole Meal
When we are sharing recipes that are pure, delicious comfort, we always like to include some estimated numbers just so you know what you’re dealing with. Simon always reminds me that while these numbers aren’t the *point* of cooking—the joy and the memories are the point!—they are helpful information for planning your week. This section is all about acknowledging the hard work you put into making this filling meal, and we celebrate you for that effort!
Please remember that these figures are just estimates based on the standard ingredients listed above. Ingredients change brands, portion sizes fluctuate, and if you add extra sour cream, well, the numbers change! For the most accurate data, always check your packaging. You can read our full philosophy on sharing this kind of information on our Disclaimer Page.
Here is the breakdown for one serving of this wonderful Hearty Casserole Meal:
| Nutritional Component | Amount Per Serving |
|---|---|
| Calories | 550 |
| Fat | 32g |
| Saturated Fat | 14g |
| Trans Fat | 1g |
| Cholesterol | 75mg |
| Sodium | 950mg |
| Carbohydrates | 40g |
| Fiber | 3g |
| Sugar | 5g |
| Protein | 28g |
See? It’s a solid meal that packs a punch in flavor and satisfaction without being overly complicated. You deserve a delicious, filling dinner that doesn’t require you to use your fancy measuring cups—just the spirit of fun! That effort deserves kudos today!
Share Your Kitchen Kudos
And there we have it! You’ve conquered the steps, managed the moisture, and successfully created an absolutely phenomenal Simple Baked Casserole Dish. Doesn’t that feel great? I really hope you didn’t feel any pressure while making it, because here at Kitchn Kudos, our goal isn’t cookie-cutter perfection; it’s celebrating that you showed up and made something tasty for the people you love.
Simon would be right here beside me right now, probably doing a little victory shuffle, encouraging you to shout your success from the rooftops! Did it come out looking exactly like the picture? Maybe, maybe not. Did it smell incredible? Absolutely! Did it taste like a warm, cheesy hug? I sure hope so!
We want to hear all about your experience. Please, please leave a comment below and tell us how it went! Did you swap the beef for chicken? Did you sneak in extra garlic powder? Tell us your little deviations!
Sharing your results—even just telling us you tried it—is the highest form of praise we can give ourselves, and we want to celebrate you doing that! You can also connect with us directly if you have questions or just want to send a quick hello over on our Contact Page. Thank you so much for letting us share our joy in the kitchen with you today. Go on—give yourself a major pat on the back for a meal well done!
PrintEasy Dorito Casserole: A Family Friendly Comfort Food Bake

Make this simple, crunchy taco casserole for a quick weeknight dinner. It is a hearty casserole meal that everyone will love.
- Prep Time: 15 min
- Cook Time: 30 min
- Total Time: 45 min
- Yield: 6 servings
- Category: Dinner
- Method: Baking
- Cuisine: American
- Diet: Vegetarian
Ingredients
- 1 pound ground beef
- 1 medium onion, chopped
- 1 (10.75 ounce) can condensed cream of chicken soup
- 1 (10 ounce) can condensed cream of mushroom soup
- 1 cup milk
- 1 teaspoon chili powder
- 1/2 teaspoon cumin
- 1/4 teaspoon garlic powder
- 1 cup water
- 2 cups shredded cheddar cheese, divided
- 1 (4 ounce) bag Nacho Cheese Flavored Tortilla Chips (Doritos)
- 1 cup salsa (optional topping)
Instructions
- Preheat your oven to 375 degrees Fahrenheit. Lightly grease a 9×13 inch baking dish.
- Brown the ground beef and chopped onion in a large skillet over medium heat. Drain off any excess grease.
- Stir in the cream of chicken soup, cream of mushroom soup, milk, chili powder, cumin, and garlic powder. Add the water and mix well.
- Bring the mixture to a simmer and cook for 5 minutes, stirring occasionally. Remove from heat.
- Stir in 1 1/2 cups of the shredded cheddar cheese until melted and combined.
- Roughly crush about half of the tortilla chips and fold them into the meat mixture.
- Spread the mixture evenly into your prepared baking dish.
- Bake for 20 minutes.
- Remove the casserole from the oven. Sprinkle the remaining 1/2 cup of cheese over the top.
- Arrange the remaining whole tortilla chips on top of the cheese layer.
- Return the casserole to the oven and bake for another 5 to 10 minutes, or until the cheese is melted and bubbly and the chips on top are heated through.
- Let the casserole rest for 5 minutes before serving. Serve with salsa, if desired.
Notes
- To keep the chips on top crunchy, only crush half of the chips to mix into the filling. The other half goes on top right before the final bake.
- For a chicken version, substitute cooked, shredded chicken for the ground beef.
- If you prefer a spicier flavor, add a dash of hot sauce to the soup mixture.
- This recipe makes a great kid approved dinner recipe.
Nutrition
- Serving Size: 1 serving
- Calories: 550
- Sugar: 5
- Sodium: 950
- Fat: 32
- Saturated Fat: 14
- Unsaturated Fat: 18
- Trans Fat: 1
- Carbohydrates: 40
- Fiber: 3
- Protein: 28
- Cholesterol: 75