

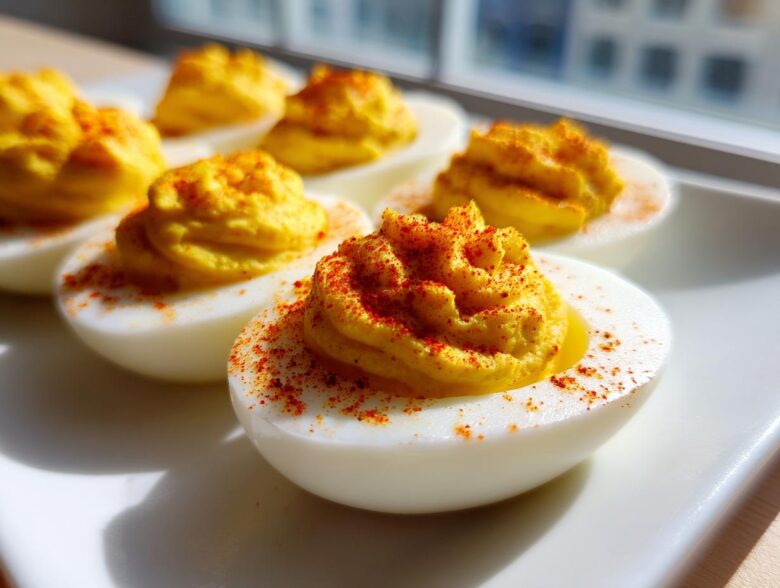
If you’re anything like me, the moment a party invitation lands in your inbox—be it Thanksgiving, Easter brunch, or just a casual game night—half of your brain immediately starts calculating the appetizer list. And honestly, nothing gets inhaled faster than perfectly made **deviled eggs**. I’m not talking about those dry, crumbly ones that taste vaguely of vinegar, either. Trust me, I’ve made these for nearly every family event for a decade now, and this is *the* one. This is the Ultimate Classic & Creamy Deviled Eggs Recipe, and I promise, it guarantees a creamy texture that makes people beg for the recipe.
I’ve tried all the fancy tricks, but when it comes to a crowd-pleasing favorite, you just can’t beat the classic approach, handled just right. If you’re looking for the best party food ideas with eggs, stick with me. We’re going to nail the boiling, peeling, and the filling ratio perfectly so you never have a sad, runny yolk mixture again. If you need a savory dip to go alongside these stunners, have you checked out my recipe for Buffalo Chicken Dip yet?
Why This Classic Deviled Eggs Recipe Works Every Time
When you’re aiming for that coveted appetizer spot on the holiday table, you need reliability, and that’s what this recipe gives you. Forget complicated steps—this is an incredibly Easy Deviled Egg Recipe that consistently turns out the best. People always ask me how mine are so reliably smooth and never watery. The secret isn’t a fancy ingredient; it’s the small, intentional steps we take before we even start mixing the filling.
If you manage the hard-boiling and peeling right (we’ll get to that!), the assembly is frankly idiot-proof. The ratios here are spot on for that rich, luxurious mouthfeel that people expect from truly great Creamy Deviled Eggs.
Perfect Texture: Achieving the Creamy Yolk Filling Recipe
The number one criminal in a bad batch of stuffed eggs is chunky yolks. You absolutely must mash those yolks until they feel like flour dust before you even think about adding any of the wet ingredients. I use a sturdy fork, just like my mom did, and use the side of the bowl to press them down repeatedly. That thorough initial mash means when you add the mayonnaise and vinegar, everything emulsifies beautifully. This technique locks in flavor and guarantees that signature velvety finish for your Creamy Yolk Filling Recipe.
Essential Ingredients for Perfect Deviled Eggs
Look, you can’t make award-winning **deviled eggs** with flimsy ingredients, right? Even though this is a simple recipe, every component plays a distinct role in achieving that famous creamy texture and perfect tang. We aren’t trying to hide any flavor deficits here; we’re celebrating the classic combination. If you’re looking for a great way to use up those yolks in a different format, check out my Savory Cheddar Egg Oatmeal—it’s surprisingly good!
The quality of your staple items really shines through when you have such few components taking center stage. Remember, you need exactly 12 large eggs to get a full platter ready for your guests, and the balance of acid to richness is what makes people keep sneaking one (or three!) off the platter before dinner.
Ingredient Breakdown and Preparation Notes
Here’s exactly what you need to have ready to go. Don’t try to eyeball these amounts; precision is key for the perfect filling! You’ll need 12 large eggs, of course, and then we build the filling base with 1/2 cup mayonnaise—use the good stuff, please! For that necessary punch, grab 2 tablespoons of yellow mustard and 1 tablespoon of white vinegar. We balance that out with 1/4 teaspoon salt and 1/4 teaspoon black pepper. Finally, you’ll need paprika for the presentation garnish.
Now, a quick note on the eggs themselves: if you use eggs straight from the carton that are super fresh, you’re going to fight with the shells later. Trust me on this one! Use eggs that have been in your fridge for about a week; they release much easier after boiling. That little bit of age is the first step toward foolproof peeling!
Foolproof Hard Boiled Eggs for Deviled Eggs
If I hear one more person complain about throwing away half an egg white because the shell was stuck on like glue, I might scream! Peeling is honestly the most frustrating part of making any kind of stuffed egg appetizer, but I’ve cracked the code—literally. This method guarantees you clean, beautiful egg halves every single time, making these Foolproof Hard Boiled Eggs for Deviled Eggs so easy to assemble.
Forget shaking the pot violently! We start cold. Place your 12 large eggs in a saucepan and cover them with about an inch of cold water. Bring that water up to a true, rolling boil over high heat. The second it reaches that fierce boil, you pull the pan right off the burner, slap a lid on it tight, and just walk away. Don’t peek! Let them sit completely untouched for exactly 12 minutes. This resting period cooks them perfectly through without making the yolks get that ugly green ring around them.
Now for the most important step: the shock treatment! As soon as those 12 minutes are up—don’t wait a second—you have to transfer those hot eggs immediately into a massive ice bath. I mean *ice*. Lots of water, lots of ice cubes. Let them sit there and chill out for a solid 15 minutes until they are completely cool to the touch. Peeling warm eggs results in tearing, but chilling them rapidly separates the membrane from the white. Once they’re cold, the shells practically slide right off with almost no effort. You’ll actually look forward to peeling next time!
Step-by-Step Instructions for Classic Deviled Eggs
Okay friends, now that your eggs are perfectly cooked and peeled—which, seriously, felt like magic, right?—it’s time for the fun part: making the filling! Once you have your clean egg white halves ready on your serving platter, the assembly goes super fast. Remember that chilling step for peeling? It keeps everything structured, which means we can move quickly here without tearing up our beautiful whites. Before you start mixing, make sure you have your 12 whites ready, since we are making exactly 24 halves!
Take all those gorgeous yolks you scooped out and drop them right into a medium bowl. You want to start by getting them absolutely demolished. Keep mashing them with a fork until there are no lumps left; we’re talking fine crumbs here. If you have a few specks of yolk left, the final mixture won’t be as smooth or pretty as we want it to be. This thorough mashing guarantees the best texture for our **deviled eggs**.
Once the yolks are powder-fine, it’s time to introduce the wet ingredients. Add in that mayonnaise, the yellow mustard (that’s where the classic tang comes from!), the tablespoon of bright white vinegar for zest, and your salt and pepper. Mix this entire combination with intent until everything comes together into one beautifully smooth, uniform cloud. It shouldn’t look spotted or separated at all; that’s the sign of a successful, creamy filling!
Creating the Creamy Yolk Filling Recipe
This mixing process really is the heart of creating that luxurious Creamy Yolk Filling Recipe. If you add the mayo and vinegar while there are large yolk chunks still floating around, the liquid just coats those lumps instead of fully incorporating. You end up with dry spots right next to overly wet spots—and nobody wants that! Keep working it with that fork or switch to a mini whisk if you prefer. When I see the mixture look like rich, pale yellow frosting, I know I’m minutes away from finishing these amazing **deviled eggs**.
The vinegar is important, too! It cuts through the richness of the mayo and yolk perfectly. If you want to see another amazing way eggs shine in a savory dish, you should check out my instructions for Shakshuka. It’s completely different, but showcases how eggs soak up bold flavors!
Filling and Garnishing Your Deviled Eggs
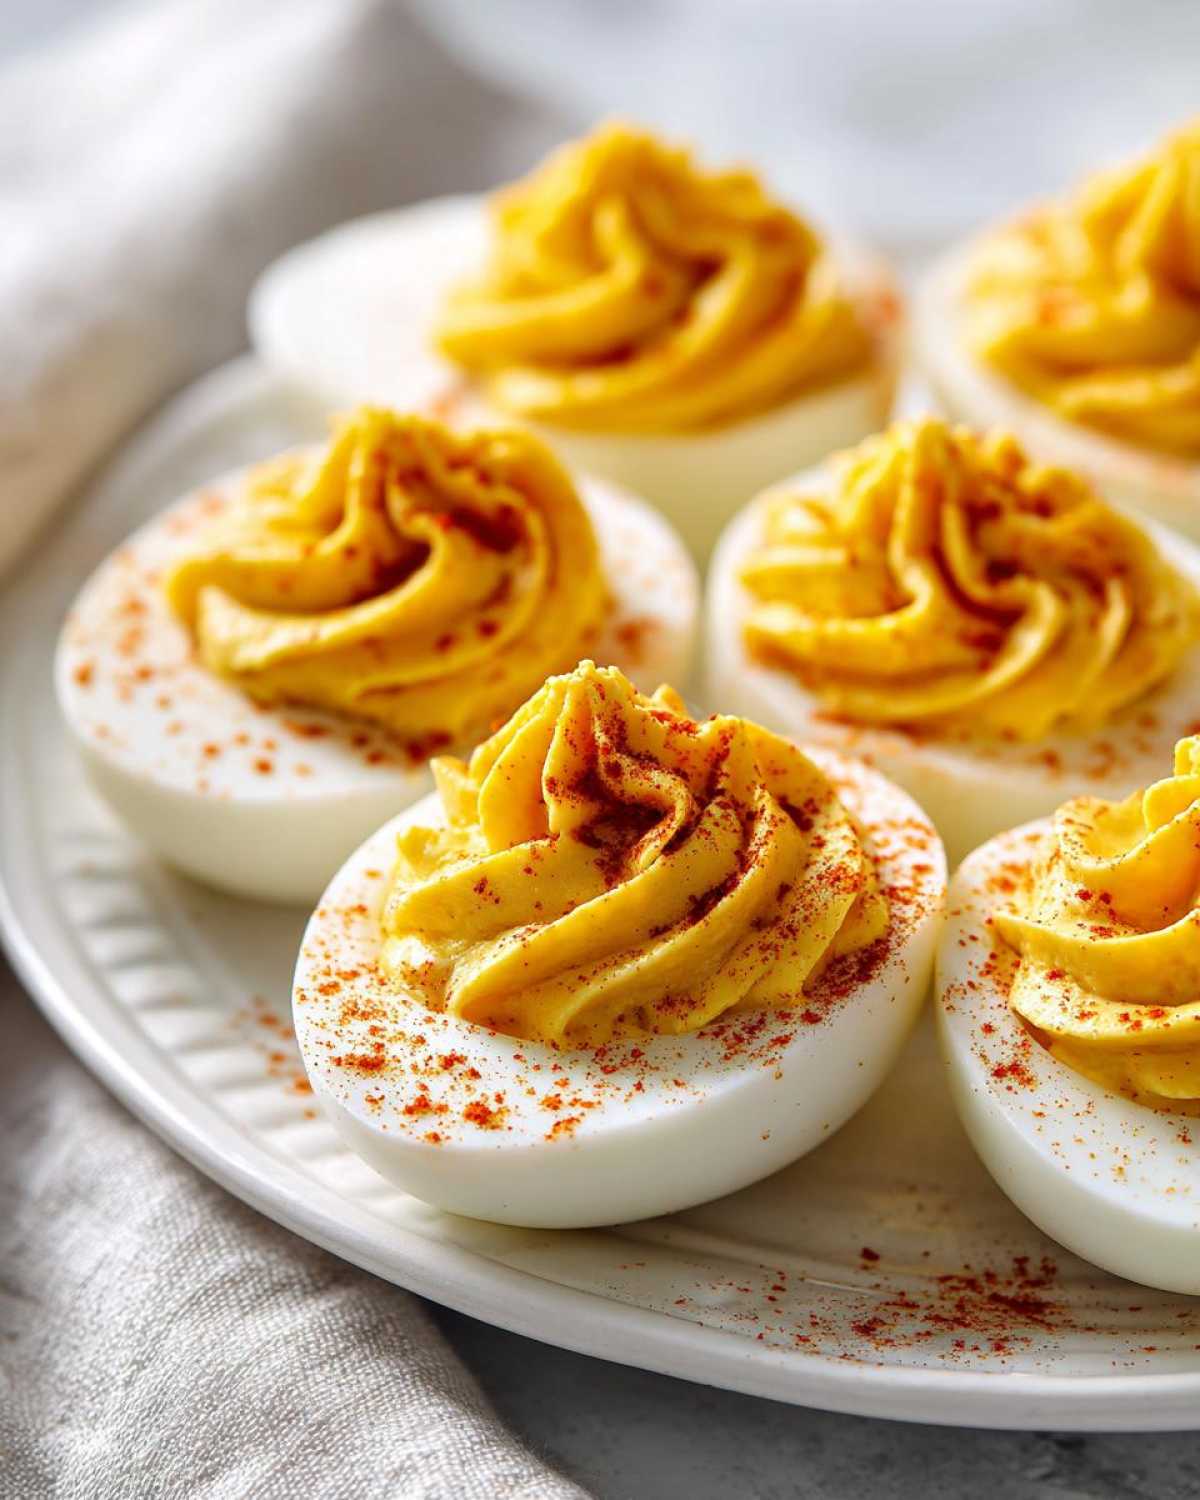
Now for the grand finale presentation! Take your creamy yolk mixture and get it back into those hollowed-out egg whites. You can absolutely use a spoon, but if you want those pretty swirls, put the filling into a piping bag fitted with a star tip. It makes these look instantly professional, like something you’d pay too much for at a catering event! Fill those cups generously right up to the top.
Once they’re all filled up and looking gorgeous, we need that final touch. A quick dash of paprika right over the top of each one gives you that classic contrast in color. Don’t skip it, even if you think it’s just for looks—it adds a tiny, smoky top note! At this point, they are technically done and ready to be served as the ultimate **Party Food Ideas with Eggs**.
Variations: Making Southern Style Deviled Eggs and More
While I stand by our classic filling—it’s tried and true—sometimes you need to spice things up a bit, especially if you have leftovers the next day and want something totally new! This recipe base is just begging for personalization, making it perfect for different holiday crowds. For anyone who grew up with a little extra zing in their appetizer plate, leaning into the regional favorites is a must. If you’re looking for a great savory morning dish featuring eggs and bacon, you have to check out my Bacon and Egg Quesadillas, too!
If you’re aiming for that quintessential tangy, slightly sweet bite, then we absolutely need to talk about making Southern Style Deviled Eggs. It’s honestly just one tiny ingredient swap away from perfection!
Deviled Egg Topping Ideas for Flair
Beyond the standard dash of bright red paprika, there are so many easy ways to elevate the final presentation of your deviled eggs. Think about what flavors you want to hit next! For a fresher look, a light scattering of finely minced chives or parsley makes the green pop against the yellow filling. If you like a little heat, a tiny drop of your favorite hot sauce (Sriracha, Cholula, whatever!), piped right on top, offers a nice kick.
And for those who truly want to go over the top? Crumbled crispy bacon is always a winner. It adds salt and crunch, which is fantastic against the smooth filling. If you’re making the “Million Dollar” variation we talked about, leaving a few crumbles right on top is the perfect visual clue to what’s hiding inside!
Tips for Success with Holiday Appetizer Eggs
You’ve made the perfect batch of **deviled eggs**, they’re creamy, they’re tangy—now we have to get them from your kitchen to the party without disaster striking! Presentation and timing are everything when you’re dealing with delicate appetizers like these. I’ve learned a few tricks over the years specifically for keeping them looking magazine-worthy, even after sitting out for an hour or two.
First, structure is your friend. Once the filling is piped or spooned back into the white halves, resist the urge to serve them immediately, even if you’re starving. Pop the whole platter into the refrigerator and let them chill, uncovered, for *at least* 30 minutes. This lets the filling firm up just enough so that when people start picking them up, the yolk doesn’t squish out the sides on its own. It just sets it perfectly!
Next up, transport! If you’re moving these to a potluck, don’t just stack them on a flat tray. You need something that keeps them secure without crushing the tops. I highly recommend picking up one of those plastic containers specifically designed for carrying deviled eggs. They have little indentations for each half, which keeps them from sliding around in the car. If you don’t have one, use a muffin tin; you can nestle each egg half right into a cup! It makes a huge difference.
Also, think about temperature control. Since these are mayo-based, they should stay chilled for as long as possible before serving. If you’re taking these to an outdoor barbecue, set the serving plate on top of a larger tray filled with ice. The cold radiating up keeps your mayonnaise fresh and your **deviled eggs** structurally sound much longer. For other make-ahead sides that travel well, check out my recipe for Caprese Pasta Salad Jars—they are fantastic carriers!
Finally, for any leftovers—though I rarely have any!—remember that presentation is lost, but the flavor holds up well. If you end up with filling left over, you can mix it gently and store it in a sealed container in the fridge for up to two days. Just whip up a fresh batch of hard-boiled egg whites when you’re ready to serve!
Storage & Make Ahead Appetizers Instructions
One of the biggest prayers I have when planning a big party menu is figuring out what I can get done ahead of time. Honestly, dealing with 12 eggs the day of the party is stress I don’t need! The good news about these **deviled eggs** is that they are absolutely fantastic Make Ahead Appetizers, provided you follow my two-step advance assembly plan. You can separate the work, which feels like cheating but is actually just smart planning, right?
For the yolk filling: you can mix everything—the mashed yolks, the mayo, the mustard, the vinegar—completely, making that beautiful, Creamy Deviled Eggs mixture, up to a full day ahead of time. Store that mixture in an airtight container in the fridge. It actually lets the flavors marry together a little bit more, which I love! If you have other freezer-friendly recipes you like to prep ahead, you might want to check out my guide on Freezer-Friendly Breakfast Sandwiches.
However, for the final assembly, you don’t want to fill the egg whites more than about four hours before you plan to serve them. If they sit overnight filled, the mayo and vinegar start to interact with the egg white, and the filling can sometimes weep or become a little bit soupy. So, cook the eggs, cool them, peel them, and store them covered tightly in the fridge. Then, about three to four hours before your guests arrive, whip out that filling and pipe it back in. Sprinkle your paprika, and boom! Freshly made appetizers without the last-minute stress. They look and taste like they were made seconds ago.
If you have any leftovers (which, if you followed my tips, might be a small possibility!), store the finished product in an airtight container in the fridge. They stay good for about two days, though they certainly don’t last that long in my house! The structure might soften a tiny bit overnight, but they still taste delicious.
Frequently Asked Questions About Deviled Eggs
I always get a ton of questions when people try this recipe. Honestly, it’s usually because they finally figured out the secret to those perfectly peeled eggs and now they want to know how to maximize their appetizer game! Here are the questions I tackle the most often, especially as the holidays approach.
Can I make the filling for my deviled eggs a day ahead?
Yes, and I highly recommend it, but you have to store the components separately! You can absolutely complete the entire yolk mixture—make it as smooth and creamy as possible—and store that filling in a sealed container for up to 24 hours in the fridge. It actually deepens the flavor a little bit. However, do not fill the egg white halves until about four hours before you plan to serve them. If you assemble them too early, the moisture from the yolks will start to pull away from the egg white, and they get a little watery on the platter.
What is the secret to making the best Party Food Ideas with Eggs?
The true secret to making these the best of all the Party Food Ideas with Eggs comes down to two things: the initial mash and the acid balance. First, you have to mash those yolks until they literally feel like powdered sugar before anything else goes in—no lumps allowed! Second, don’t skimp on the vinegar. That tablespoon of white vinegar is crucial because it cuts through the richness of the mayonnaise and yolks, keeping the entire bite bright and addictive rather than heavy. If you nail that smoothness and that tangy pop, you’ve won!
Are these deviled eggs suitable for a Thanksgiving Side Dish?
Oh, absolutely! While we often think of them as an appetizer to tide people over, a platter of these beautiful, perfectly seasoned eggs makes a phenomenal addition to any Thanksgiving spread. They offer a rich, cool, protein-packed bite that contrasts so nicely with heavy starches and gravies. They make wonderful Thanksgiving Side Dish Eggs because they only take up a small amount of table space but they are always the first thing to disappear. Just remember to keep them chilled!
Nutritional Estimate for Simple Stuffed Eggs
Now, I know some of you are thinking about macros while you’re loading up on these delicious little morsels, and I get it! While these **deviled eggs** are totally irresistible, they do pack a little somethin’-somethin’, mostly from that creamy mayo base. I always keep a general estimate on hand, just so folks know what they are reaching for when they grab another one off the platter. If you’re ever wondering about the breakdown of any of my recipes, you can always check out the full site disclaimer here, since ingredient brands can really change things up!
Based on the standard amounts of mayo and mustard used in this Creamy Deviled Eggs recipe serving 24 halves, here’s what you can generally expect per serving (one egg half). These numbers are just guidelines, mind you, because I use the fancy brand of Duke’s mayo, and I bet if you use a lighter mayo, your numbers will drop!).
Here is the breakdown:
- Serving Size: 1 half
- Calories: Roughly 70
- Total Fat: About 6 grams (watch that saturated fat, it’s usually about 1.5g)
- Protein: A solid 3 grams per half, which is great for an appetizer!
- Carbohydrates: Keep it low here, usually just half a gram.
Because we aren’t adding any sugar to the filling itself (just relying on the tang of the vinegar and mustard), these **Simple Stuffed Eggs** are super low on the carb scale. The cholesterol content is higher, naturally, since we aren’t removing the yolk!
The important thing to remember is that these are homemade, honest-to-goodness **deviled eggs**, not ultra-light restaurant fare. They are made with love, full of the good stuff, and totally worth every single calorie when they are the star of your holiday table!
Share Your Perfect Deviled Eggs Creations
Well, there you have it! You’ve got the secrets to perfectly boiled and foolproof eggs, the ultimate Creamy Deviled Eggs filling formula, and all the tips you need to transport these beauties safely to your next party. Honestly, making a batch of these **deviled eggs** always makes me feel like I nailed the appetizer game for the whole event.
Now, I really, really want to know how they turned out for you! Did you stick to the classic paprika finish, or did you go wild with the bacon crumble? Did your family notice the difference when you used slightly older eggs for easy peeling?
Take a moment, snap a picture of your gorgeous platter—especially if you managed those lovely piped swirls!—and share your success below in the comments. Rate this recipe based on the simplicity of the 20 minutes prep time and the incredible payoff. If you managed to get them cooled and assembled in under 40 minutes total, let me know!
If you’re looking for more party-ready inspiration or maybe need to get in touch with me for any follow-up questions, you can always find my contact page right here. Please share this recipe with anyone who needs a guaranteed win for their next gathering. Happy cooking, and enjoy watching those platters empty!
PrintThe Ultimate Classic & Creamy Deviled Eggs Recipe
Make perfect, creamy deviled eggs every time with this straightforward recipe. This classic appetizer is ideal for holidays and gatherings.
- Prep Time: 20 min
- Cook Time: 15 min
- Total Time: 35 min
- Yield: 24 halves
- Category: Appetizer
- Method: Boiling and Mixing
- Cuisine: American
- Diet: Vegetarian
Ingredients
- 12 large eggs
- 1/2 cup mayonnaise
- 2 tablespoons yellow mustard
- 1 tablespoon white vinegar
- 1/4 teaspoon salt
- 1/4 teaspoon black pepper
- Paprika, for garnish
Instructions
- Place eggs in a large saucepan and cover with cold water by about one inch.
- Bring the water to a rolling boil over high heat. Once boiling, remove the pan from the heat, cover it, and let the eggs stand for 12 minutes.
- Immediately transfer the eggs to an ice bath (a bowl filled with ice and water) and let them cool completely for at least 15 minutes.
- Peel the cooled eggs. Slice each egg in half lengthwise.
- Carefully scoop the yolks into a medium bowl. Place the egg white halves on a serving platter.
- Mash the yolks thoroughly with a fork until they are fine crumbs.
- Add the mayonnaise, mustard, vinegar, salt, and pepper to the mashed yolks. Mix until the filling is completely smooth and creamy.
- Spoon or pipe the yolk mixture back into the hollows of the egg white halves.
- Sprinkle paprika over the top of each filled egg half before serving.
Notes
- For easier peeling, use eggs that are at least one week old rather than very fresh eggs.
- If you want a Southern Style variation, add 2 tablespoons of sweet pickle relish to the yolk mixture.
- For a Million Dollar variation, mix 2 ounces of softened cream cheese and 2 slices of cooked, crumbled bacon into the filling.
Nutrition
- Serving Size: 1 half
- Calories: 70
- Sugar: 0.5
- Sodium: 95
- Fat: 6
- Saturated Fat: 1.5
- Unsaturated Fat: 4.5
- Trans Fat: 0
- Carbohydrates: 0.5
- Fiber: 0
- Protein: 3
- Cholesterol: 75