

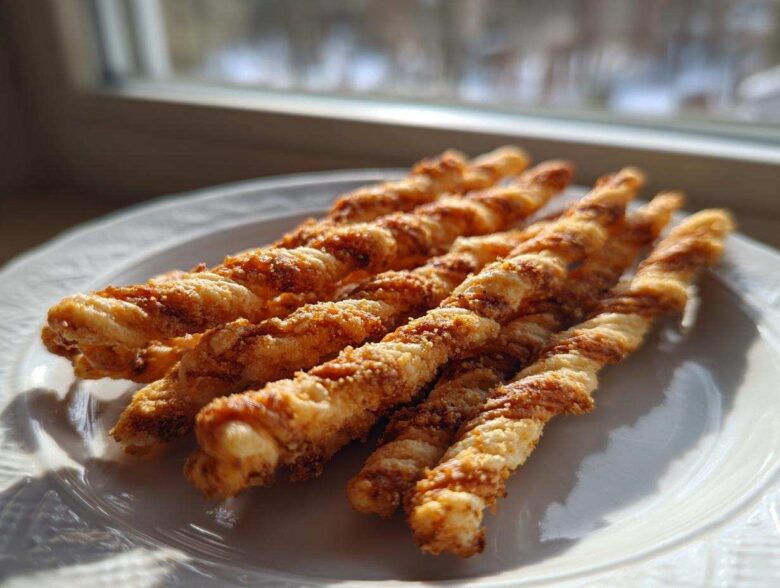
Oh my goodness, are you looking for the snack that steals the show? Forget those boring little crackers; we are diving headfirst into the world of truly magnificent, buttery, savory heaven. I’m sharing my absolute favorite recipe for Southern Spicy Cheddar Cheese Straws. Trust me, these homemade cheese straws are legendary at every gathering—they snap, they crunch, and they have that perfect little kick of spice that keeps everyone reaching back into the bowl! Getting that crispiness just right is my personal mission, and I finally nailed the technique.
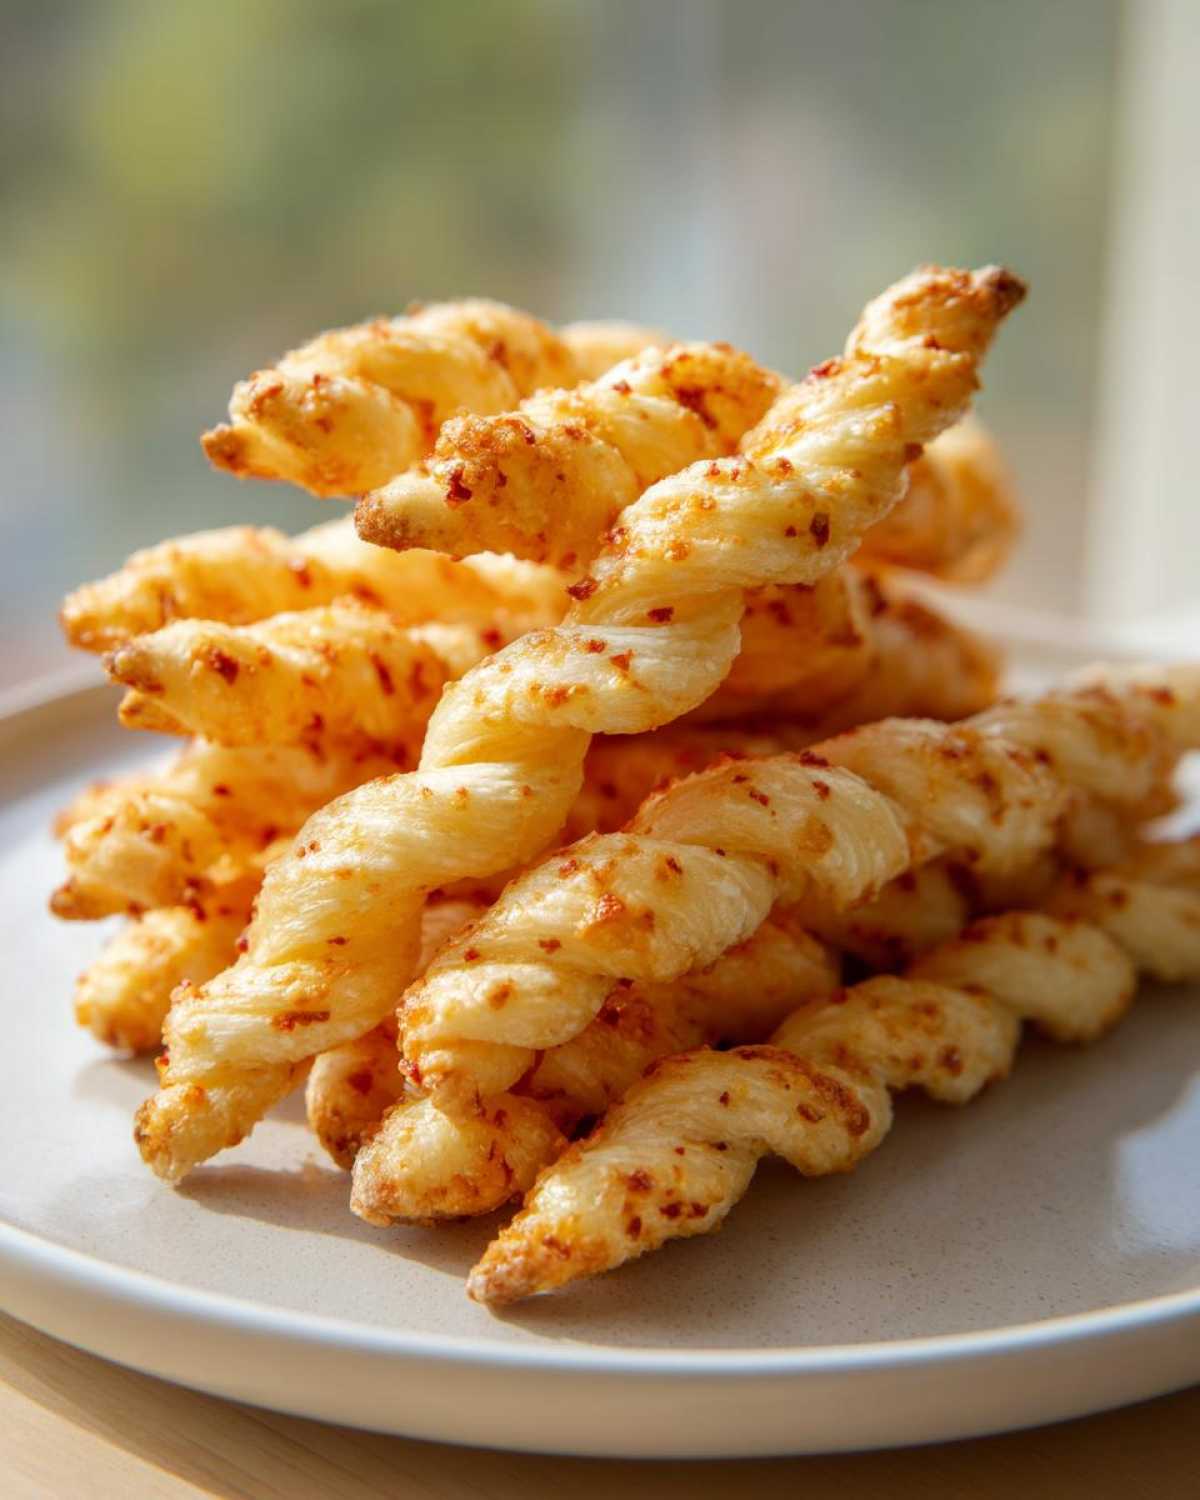
Why You Will Love These Southern Cheese Straws
Honestly, these aren’t just snacks; they are an experience. When you pull these out of the oven, the entire house smells like sharp cheese and butter. You’ll find yourself hiding them from guests! Here’s why I think you’ll make these Southern Cheese Straws your new holiday staple:
- Incredible Crunch: We aren’t messing around with soft crackers here; these have a definite, satisfying snap that comes from using cold butter and rolling them thin.
- Authentic Flavor: That sharp cheddar mixed with just a whisper of cayenne gives you true Southern character. It’s savory bliss!
- Perfect Party Snacks: They travel wonderfully and hold up for days, making them ideal for holidays or Game Day Snacks.
- Versatile and Simple: Once the dough chills, they come together in minutes—just twist and bake!
- They Make Beautiful Edible Gifts: Wrap a stack up with a pretty ribbon, and you’ve got an instant, thoughtful present!
If you’re looking for more easy bites, check out my collection of awesome savory snacks!
Ingredients for Authentic Cheese Straws
When we talk about authentic cheese straws, we are talking about quality ingredients, folks. You can’t skimp here! My grandmother always used the highest quality sharp cheddar she could find, and that’s non-negotiable for the flavor pop we are looking for. Remember, we need that cheese to be finely grated—don’t even think about using that pre-shredded stuff that comes coated in starches!
Also, pay attention to the butter. It absolutely has to be cold unsalted butter cut into small cubes. Keeping everything cold is half the battle for that flaky, crispy texture. Here is exactly what you need to gather before you start mixing up this incredible dough:
- 1 cup all-purpose flour
- 1/2 teaspoon salt
- 1/4 teaspoon cayenne pepper (You can dial this down if you like things milder, but I love the little surprise heat!)
- 1/2 cup (1 stick) cold unsalted butter, cut into small pieces
- 1 cup sharp cheddar cheese, finely grated
- 1 large egg yolk
- 1 tablespoon ice water
See? Simple stuff, right? But the way we treat these ingredients is what makes them sing!
Expert Tips for Perfect Homemade Cheese Straws
Getting truly amazing, shatteringly crisp homemade cheese straws takes a little patience, but it’s all about respecting the process. The biggest secret? Don’t rush the chilling! That hour the dough spends chilling isn’t just to look pretty in the fridge; it lets the flour relax and ensures the butter stays rock-solid until it hits that hot oven. This temperature control is key for those flaky layers. Also, please, please grate your cheese fresh. If you use pre-shredded, you get dust, not flavor!
We want these to look professional, like those beautiful Savory Pastry Twists you see in bakeries. A little effort in presentation goes a long way when serving your favorite cheese straws as an appetizer.
The Importance of Cold Ingredients in Cheese Straws
Cold butter means steam! When those little frozen bits of butter melt in the 375-degree oven, they create pockets of steam that push the dough up and apart slightly. That’s what guarantees that airy, flaky texture instead of just a hard, dense cracker. If your butter starts getting soft while cutting it in, just pop the whole bowl back into the fridge for ten minutes. Trust me, it’s worth the pause.
Achieving the Ideal Twist for Savory Pastry Twists
Once you’ve cut your strips, give each one a gentle twist—just one full rotation is plenty! This little action opens up the dough layers, allowing hot air to circulate inside while baking. It also makes them look incredibly intentional and fancy on the serving platter. Don’t twist too hard or you’ll smear the edges together, which stops that lovely separation we are aiming for in these savory treats.
Step-by-Step Instructions for Making Spicy Cheese Straws
Okay, time to stop admiring the dough and get baking! This is the fun part, and it moves fast once the chilling is done. Remember to preheat that oven to 375°F (190°C) while you’re giving the dough its final roll-out. Lining your baking sheets with parchment paper saves cleanup time later, which is always a win in my book. If you haven’t checked out my recipe for spicy roasted chickpeas, maybe do that while you wait?
First, we combine all our dry ingredients in a big bowl—that’s your flour, salt, and cayenne. Then, we cut in that cold butter until the mix looks like coarse, sandy crumbs. Next, the star: toss in that finely grated sharp cheddar. Mix it gently! Then, whisk your egg yolk and ice water together, pour it in, and mix just until it starts to come together into a shaggy mess. Don’t work it too much!
- Wrap that dough disk tightly in plastic wrap and let it chill out in the fridge for at least one full hour. Patience pays off here!
- Once chilled, roll it out on a lightly floured surface until it’s thin—I aim for about 1/8 of an inch thick—and use a pizza cutter to slice it into strips, about 1/2 inch wide and 5 or 6 inches long.
- Gently twist each strip a time or two. This is what transforms them into real cheese straws!
- Lay them on your lined sheets and bake for about 12 to 15 minutes. Keep an eye on them right at the end!
They will still feel a little soft when they come out, but they crisp up perfectly as they cool down completely on the pan. You absolutely must let them cool before trying to move them!
Variations on Classic Cheese Straws
While this classic dough recipe yields the best buttery snap, I know life gets busy! We all need options when company pops over unexpectedly. You can absolutely play around with these savory delights. For instance, if you skip the cayenne and add a teaspoon of dried rosemary and maybe some finely grated Parmesan along with your cheddar, you get these amazing Rosemary Parmesan cheese straws!
If you want less heat, just drop the cayenne to a tiny pinch or skip it entirely. But for sweet treats later, don’t forget to check out my maple pecan pie bars! These cheese straws are the perfect savory counterbalance.
Making Puff Pastry Cheese Straws (Quick Alternative)
If you are desperate for crispy cheese bites right now and don’t have time to chill dough, don’t sweat it! You can use store-bought puff pastry for super easy cheese straws. Just brush the pastry sheets (still slightly frozen is best) with an egg wash, sprinkle generously with your favorite cheese and spices, and slice them into strips. They bake up faster, usually in about 10 to 12 minutes. They are flakier and puffier than our classic dough version, which makes them wonderful, but they don’t have that dense, old-fashioned snap. They are definitely my go-to when I need “Easy Cheese Straws” in a hurry!
Serving Suggestions for Your Cheese Straw Recipe
Now that you have these glorious, crunchy cheese straws, what in the world do you serve them with? Honestly, they are perfect all by themselves! But for a real spread, especially if you’re hosting a crowd for the big game—talk about amazing Game Day Snacks—try serving them alongside a creamy, cool dip. A classic chunky guacamole or even a simple sour cream and onion dip works wonders to balance out the spice.
For holiday parties, these savory little bites look stunning next to a cranberry relish or maybe even a sweet fruit chutney. And don’t forget drinks! They pair beautifully with something bubbly, like a crisp white wine or even a fun, spiced punch like my Witches’ Brew Punch if you’re in the seasonal mood. These cheese straws disappear fast, so make sure you have plenty!
Storage and Making Ahead for Party Snacks
These are fantastic for making ahead because they keep so well, which truly takes the pressure off when you’re getting ready for a big gathering. Once your cheese straws are completely cool—and I mean completely cool, that’s important!—you want to store them in a truly airtight container. I find that keeping them on the counter at room temperature is best. Seriously, they stay super crisp for nearly a full week!
If you happen to have any dough leftover from rolling, you can wrap that disk tightly and pop it in the freezer for up to a month. When you’re ready to bake them later, just thaw it overnight in the fridge, and you’re practically ready to go! For more great recipes you can freeze or make ahead, you should check out my thoughts on freezer-friendly breakfast sandwiches—the principle of planning ahead is the same!
Frequently Asked Questions About Cheese Straws
I know you might have a few lingering questions before you dive into making these amazing snacks. It took me ages to figure out mine, so I want to make it easy for you! Dealing with dough and cheese can be tricky, but these tips should set your mind at ease. If you have other questions, feel free to reach out via my contact page!
Can I substitute the cheddar in this Cheese Straw Recipe?
You sure can adjust the cheese, but remember, sharp cheddar is king here for that intense savory flavor! If you want to mix things up, try using half sharp cheddar and half Gruyère. Gruyère melts beautifully and adds a gorgeous nutty depth. Or, for something tangier, a good aged Monterey Jack works well. Just make sure whatever cheese you choose is firm enough to be finely grated; soft cheeses get too oily when baked.
What is the best way to ensure Crispy Cheese Wafers?
Crispiness is the whole point, right? The two non-negotiable steps for achieving perfect Crispy Cheese Wafers are rolling the dough thin—seriously thin, like 1/8 of an inch!—and cooling them completely on the baking sheet. They come out soft and look pale, but give them a good 20 minutes untouched on that hot metal surface. They firm up like little savory bricks! Don’t be tempted to move them early, or you risk them breaking.
Can I use pre-shredded cheese for these homemade cheese straws?
Oh, honey, please don’t! That’s when you turn your lovely cheese straws into sad, greasy things. Pre-shredded cheese is coated with anti-caking agents that prevent it from melting nicely and melding into the dough. For the best texture and that deep flavor you expect from homemade cheese straws, you must grate the sharp cheddar yourself right before mixing. It’s a quick step that makes a world of difference!
How long do I need to chill the dough? Is longer always better?
The recipe calls for at least one hour, and that’s the minimum to get the butter cold enough for those flaky layers. If you chill it longer, say 2 to 3 hours, the dough is actually easier to roll out without sticking everywhere. You can even chill it overnight! Just make sure you let it sit on the counter for about ten minutes before you try to roll it, or it will just snap apart.
Estimated Nutritional Data for These Savory Appetizers
Now, I always tell people not to stress the numbers when you’re making something this delicious and fun—these are party snacks, not health food! But I know some of you like to keep track, so I ran the estimates for these fantastic Savory Appetizers. Remember, since we are using homemade dough and sharp cheddar, these numbers can shift a bit depending on the exact brand of cheese or butter you choose!
This information is based on a serving size of 3 straws, which is roughly what you get out of the entire batch divided down. It’s good to have a general idea, but the real measure of success is how quickly they disappear from the platter!
- Serving Size: 3 straws
- Calories: 95
- Fat: 7g (including 4g Saturated Fat)
- Carbohydrates: 5g
- Protein: 4g
- Sodium: 150mg
- Sugar: 0.2g
We aren’t racking up much sugar here, which I love—it keeps these savory! If you want to see all the fine print on how I calculate these figures, you can read up on my general guidelines over at the site disclaimer page. Enjoy those buttery, spicy bites guilt-free!
PrintClassic Southern Spicy Cheddar Cheese Straws

Make crisp, buttery, and slightly spicy cheese straws using a classic dough method. These are perfect for appetizers or holiday gatherings.
- Prep Time: 20 min
- Cook Time: 15 min
- Total Time: 1 hour 35 min
- Yield: About 3 dozen
- Category: Appetizer
- Method: Baking
- Cuisine: American
- Diet: Vegetarian
Ingredients
- 1 cup all-purpose flour
- 1/2 teaspoon salt
- 1/4 teaspoon cayenne pepper (adjust for spice level)
- 1/2 cup (1 stick) cold unsalted butter, cut into small pieces
- 1 cup sharp cheddar cheese, finely grated
- 1 large egg yolk
- 1 tablespoon ice water
Instructions
- In a large bowl, whisk together the flour, salt, and cayenne pepper.
- Cut in the cold butter using a pastry blender or your fingers until the mixture resembles coarse crumbs.
- Stir in the grated cheddar cheese until evenly distributed.
- In a small bowl, whisk the egg yolk and ice water together. Add this liquid mixture to the flour mixture. Mix until a shaggy dough forms. Do not overmix.
- Turn the dough out onto plastic wrap, form it into a flat disk, wrap tightly, and refrigerate for at least 1 hour.
- Preheat your oven to 375°F (190°C). Line baking sheets with parchment paper.
- On a lightly floured surface, roll the chilled dough out to about 1/8 inch thickness.
- Use a sharp knife or pizza cutter to cut the dough into strips, about 1/2 inch wide and 5 to 6 inches long.
- Gently twist each strip once or twice to form a straw shape. Place the twists onto the prepared baking sheets.
- Bake for 12 to 15 minutes, or until the straws are golden brown and crisp.
- Let the cheese straws cool completely on the baking sheet before serving; they will crisp up as they cool.
Notes
- Use the sharpest cheddar cheese you can find for the best flavor.
- For extra crispiness, bake them for an additional 2-3 minutes until they are deeply golden.
- Store cooled cheese straws in an airtight container at room temperature for up to one week.
Nutrition
- Serving Size: 3 straws
- Calories: 95
- Sugar: 0.2
- Sodium: 150
- Fat: 7
- Saturated Fat: 4
- Unsaturated Fat: 3
- Trans Fat: 0.1
- Carbohydrates: 5
- Fiber: 0.3
- Protein: 4
- Cholesterol: 25