

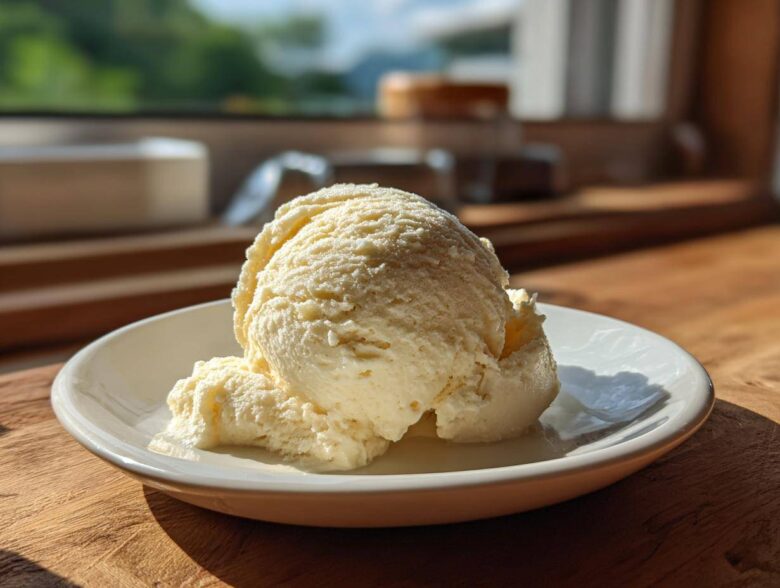
Oh my gosh, when the summer heat hits and you desperately need something cold but you don’t want to drag out the big machines? I have the answer. Seriously, forget those complicated recipes that have five different kinds of cream. We are making the ultimate banana ice cream, and I mean the *easiest* version possible—it’s my famous **banana ice cream** mashup that everyone calls ‘Nice Cream.’ This recipe requires practically nothing, just frozen bananas! If you want to know a little more about why I love sharing these simple kitchen secrets, you can always peek at our story here. This is the one that saved my sanity last August when the A/C decided to take a vacation. It’s my go-to healthy frozen dessert because I know exactly what’s going into it. If you’re looking for something incredibly fast, that’s naturally sweet, and beats the heat instantly, you’ve come to the right place. Trust me on this one, okay?
Why This Easy Banana Ice Cream Recipe Works So Well
I get asked all the time, “How is this actually ice cream if there’s zero cream?” That’s the magic of the banana, my friend! This easy banana nice cream recipe seriously delivers when you need a satisfying, cool treat without any fuss. It ticks every box for me, especially when I’m trying to keep things light.
- It’s truly a one ingredient ice cream base—which is wild!
- It fits nearly every diet; it’s naturally sweet, dairy-free, and vegan.
- You don’t need that big, messy ice cream maker! Check out some of my other healthy frozen dessert ideas if you need more inspiration.
Achieving Creamy Banana Ice Cream Texture
The secret is that ripe frozen banana has just the right blend of sugars and natural starches, which act like little internal emulsifiers. When you blast those frozen pieces in a strong machine, the friction turns the structure into something incredibly smooth. That’s basically natural pectin doing the heavy lifting so you don’t have to churn for hours! It’s why we get that amazing creamy banana ice cream texture right away.
The Quick Five Minute Ice Cream Advantage
This recipe is my go-to because it’s nearly instant gratification! We’re talking about turning frozen fruit into dessert in less time than it takes to preheat an oven. Forget overnight soaking or waiting for custard bases to chill—this is ready faster than running to the store. It’s the definition of a quick five minute ice cream solution for those sudden sweet cravings. If you’re tired of traditional churning, read up on no churn banana ice cream methods, but honestly, this one beats them all for speed!
Ingredients for Perfect One Ingredient Banana Ice Cream
I want you to see just how simple this gets. When we talk about the best base for banana ice cream, we are really only talking about one mandatory item: bananas! But you can’t just grab one off the counter, oh no. The success of this recipe—especially if you want that gorgeous, naturally sweet flavor—hinges on using bananas that are beautifully ripe before they hit the freezer. Seriously, they should have little brown specks all over them!
Here is literally everything you need to get started. It’s such a wonderful natural sugar ice cream base:
- 3 large ripe bananas, peeled, sliced, and frozen solid
Make sure those slices are fully hard—like little frozen hockey pucks! That’s key for getting the right blend, I promise.
How to Make Banana Ice Cream Without a Machine: Step-by-Step
Okay, let’s talk about turning those frozen chunks into actual, legitimate, creamy banana ice cream. This is where the real action happens, and it’s the best way to learn exactly how to make banana ice cream without a machine. You need a sturdy food processor or a really good, high-speed blender for this. Don’t worry if you don’t have the fanciest one; it just means you have to be a little more patient with it!
First, toss those hard, frozen banana slices right into your appliance bowl. Then, you blend! But here’s the catch: you can’t just set it and forget it. You need to stop it every 30 seconds or so. Don’t skip this part!
- Place the frozen banana slices into a high-powered food processor or blender.
- Process the bananas, stopping frequently to scrape down the sides.
- Keep going until the mixture transforms from looking like frozen crumbs into this thick, dreamy soft-serve. It takes work, often 3 to 5 minutes!
- When it looks perfect—smooth and light—serve it right away for a fantastic soft-serve! If you want it firmer, put it into a sealed container and stick it in the freezer for about an hour or two.
If you want my absolute favorite tips on getting this method perfect every time, check out my full guide to the easy banana nice cream recipe!
Processing Tips for Smooth Banana Ice Cream
Listen, the blending stage is sacred. If you have one of those super-powerful food processors, you’ll probably hit that perfect, scoopable banana ice cream texture around the 4-minute mark. If you’re using a standard blender, you might need to pulse aggressively and scrape down the sides constantly—sometimes stopping to let the motor rest for a minute. Remember: soft-serve consistency is achieved right when it comes out of the blender. If you freeze it longer, you need to let it warm up on the counter for about 10 minutes before it’s easy to scoop again. Patience here is key to avoiding a chunky mess!
Ingredient Notes and Substitutions for Your Banana Ice Cream
I want to talk seriously for a minute about the bananas themselves. This is where people go wrong when they try this dairy free banana ice cream and end up with something icy instead of creamy. You absolutely must use overripe bananas. I mean, the ones where the peel is mostly brown and you’re thinking, “Okay, these are definitely going bad.” Those brown spots equal maximum sugar and the perfect soft texture when frozen. If you use a hard, yellow banana, you’ll get frozen banana shards, not ice cream!
If you find yourself just shy of the creamy texture, don’t get discouraged! You are allowed one tiny cheat. For a richer result that’s still vegan, try adding a tablespoon of full-fat coconut milk or almond milk right at the end of blending—just enough to help the blades move. This little addition boosts the smoothness factor beautifully. For more tips on keeping this recipe totally dairy-free, check out my detailed guide on dairy free banana ice cream!
Flavor Variations for Homemade Banana Ice Cream
Now that you’ve mastered the pure, simple version of banana ice cream, let’s get creative! Sometimes you need a little something extra, right? This base is so cooperative, meaning you can mix in all sorts of goodness right at the very end of the blending process. It makes creating an entirely new banana dessert idea so easy.
If you are looking for that classic, comforting combination, you absolutely have to try the peanut butter banana ice cream! For every three bananas you use, toss in one full tablespoon of creamy peanut butter. Blend it in right when the mixture is almost totally smooth. It makes the texture even richer, like a decadent milkshake!
You can also get adventurous with spices. A half teaspoon of cinnamon or a tiny pinch of nutmeg turns this into a cozy dessert! If you love chocolate, don’t be shy; add two tablespoons of unsweetened cocoa powder with the bananas. It’s a wonderful way to serve up guilt-free indulgence. I have a terrific recipe for peanut butter energy bites you might enjoy if you have extra nut butter lying around!
Tips for Perfect Scoopable Banana Ice Cream
Sometimes, even when you follow the steps perfectly, your banana ice cream doesn’t cooperate! If you aimed for soft-serve and ended up with chunks that won’t budge, don’t throw it out! That just means your bananas froze a little *too* solid, or maybe your blender needed just a tiny bit more help. The solution is easy: take it out and let it sit on the counter for about 10 to 15 minutes. This little bit of patience helps it soften just enough to become that wonderful, scoopable banana ice cream.
If you went the other way and it’s just too soupy—maybe you added too much liquid when you were scraping the sides—don’t panic! Just scoop that mixture into a freezer-safe container and pop it back in. It will firm up nicely, turning into a fantastic frozen fruit dessert. It won’t be quite as airy, but it will be perfectly delicious, especially once you let it sit for ten minutes before serving. For more helpful tips on troubleshooting your frozen fruit dessert creations, stick around!
Storage and Reheating Instructions for Banana Ice Cream
So, you made a double batch because it smells so good and you want to save some for later? Smart move! Saving your homemade frozen banana treats is easy, but you have to remember one crucial thing: because this banana ice cream is purely fruit, it freezes much harder than anything made with dairy cream or stabilizers. It becomes rock solid!
If you’re planning on storing it, transfer that soft-serve consistency into a shallow, freezer-safe container and press a piece of plastic wrap directly onto the surface before putting the lid on. This stops those annoying ice crystals from ruining the texture! When you go to eat it later, pull it out about 15 minutes before you want to serve it. That little thaw time is essential for it to soften back up into something scoopable. If you want to check out another great way to preserve fruit, look at my recipe for homemade fruit leather!
Frequently Asked Questions About Banana Ice Cream
I always get a flood of questions when people try this recipe for the first time, which just goes to show how many ways there are to enjoy a simple apple pie smoothie, or in our case, banana ice cream! Having the answers ready means you can get to the eating stage faster, which is always the goal around here.
Can I use a regular blender for this easy banana nice cream recipe?
Yes, you absolutely can! But you have to be prepared to show that blender some tough love. A high-powered machine like a Vitamix or a Ninja makes this effortless, but if you have a standard blender, you need patience. You will have to stop more frequently, maybe scrape the sides down every 15 seconds, and definitely use that pulse button. It takes longer, but you can definitely achieve that easy banana nice cream recipe result!
Is this banana ice cream recipe suitable for vegans?
It sure is! That’s one of the huge perks of using only frozen bananas. Since there is no dairy, no eggs, and no honey involved, this is a totally certified **vegan ice cream homemade** option and one of the easiest ones you’ll ever find. You get all the creamy satisfaction without worrying about any animal products.
How do I make this a guilt free dessert?
This is my absolute favorite question! It’s a guilt free dessert because the sweetness comes only from the fruit itself. Since we skip refined white sugar and heavy cream, you are essentially eating frozen fruit—just in a much more delicious, frozen form. Enjoy it knowing you are getting natural sugars and fiber!
Estimated Nutrition for This Banana Ice Cream
When you are leaning into a healthy frozen dessert like this, it’s good to know what you’re eating! The nutrition below is based on the basic three-banana recipe with no added flavors like peanut butter—just pure fruit goodness. Remember, since we are skipping all the refined stuff, this is a seriously satisfying way to end a meal. Because every banana is different and your blender might add or remove a little moisture, remember that these numbers are super close estimates. For the specifics on ingredient variability, always check out our full nutritional disclaimer page.
- Serving Size: 1 serving
- Calories: 120
- Sugar: 15g
- Fat: 0.5g
- Carbohydrates: 30g
- Protein: 1.5g
Easy Creamy One-Ingredient Banana Nice Cream
Make creamy, dairy-free ice cream using only frozen bananas. This recipe requires no ice cream machine and is ready in minutes.
- Prep Time: 10 min
- Cook Time: 0 min
- Total Time: 10 min
- Yield: 2 servings
- Category: Dessert
- Method: Blending
- Cuisine: American
- Diet: Vegan
Ingredients
- 3 large ripe bananas, peeled, sliced, and frozen solid
Instructions
- Place the frozen banana slices into a high-powered food processor or blender.
- Process the bananas, stopping frequently to scrape down the sides.
- Continue processing until the mixture breaks down from crumbly pieces into a thick, smooth, soft-serve consistency. This may take 3 to 5 minutes depending on your machine.
- Serve immediately for a soft-serve texture, or transfer to a freezer-safe container and freeze for 1 to 2 hours for a firmer, scoopable texture.
Notes
- For a creamier result, use bananas that are very ripe (spotted) before freezing.
- If the mixture is too thick to blend, add one tablespoon of milk (dairy or non-dairy) at a time until the blades move freely.
- Add 1 tablespoon of peanut butter or 1 teaspoon of vanilla extract during the last minute of blending for flavor variation.
Nutrition
- Serving Size: 1 serving
- Calories: 120
- Sugar: 15
- Sodium: 2
- Fat: 0.5
- Saturated Fat: 0.1
- Unsaturated Fat: 0.4
- Trans Fat: 0
- Carbohydrates: 30
- Fiber: 3
- Protein: 1.5
- Cholesterol: 0