

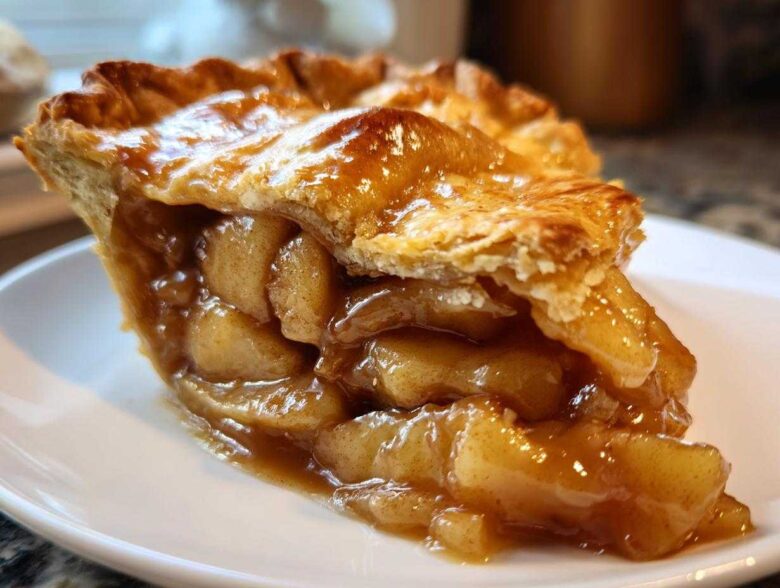
Honestly, once you see how easy it is to whip up a homemade apple pie filling, you won’t ever look at that jarred stuff again. I mean, the aroma alone is worth the effort! I spent years tweaking this batch until I finally nailed what I call the very best apple pie filling recipe. It’s quick, it sets up perfectly thick on the stovetop, and the spices just sing. Forget weak, watery fillings; we are making something robust here that holds its own beautifully inside a flaky crust, or even poured straight over a stack of pancakes. Trust me, this stovetop method changed my whole approach to fall baking!
We’re going for that perfect balance of tart apples, rich brown sugar, and a warm hug of cinnamon. If you click over to see my guide on decorative pie crusts, planning that perfect top layer starts with having the right filling underneath. This recipe gives you that thick, scoopable structure in under twenty minutes of cooking time. No more soggy bottoms!
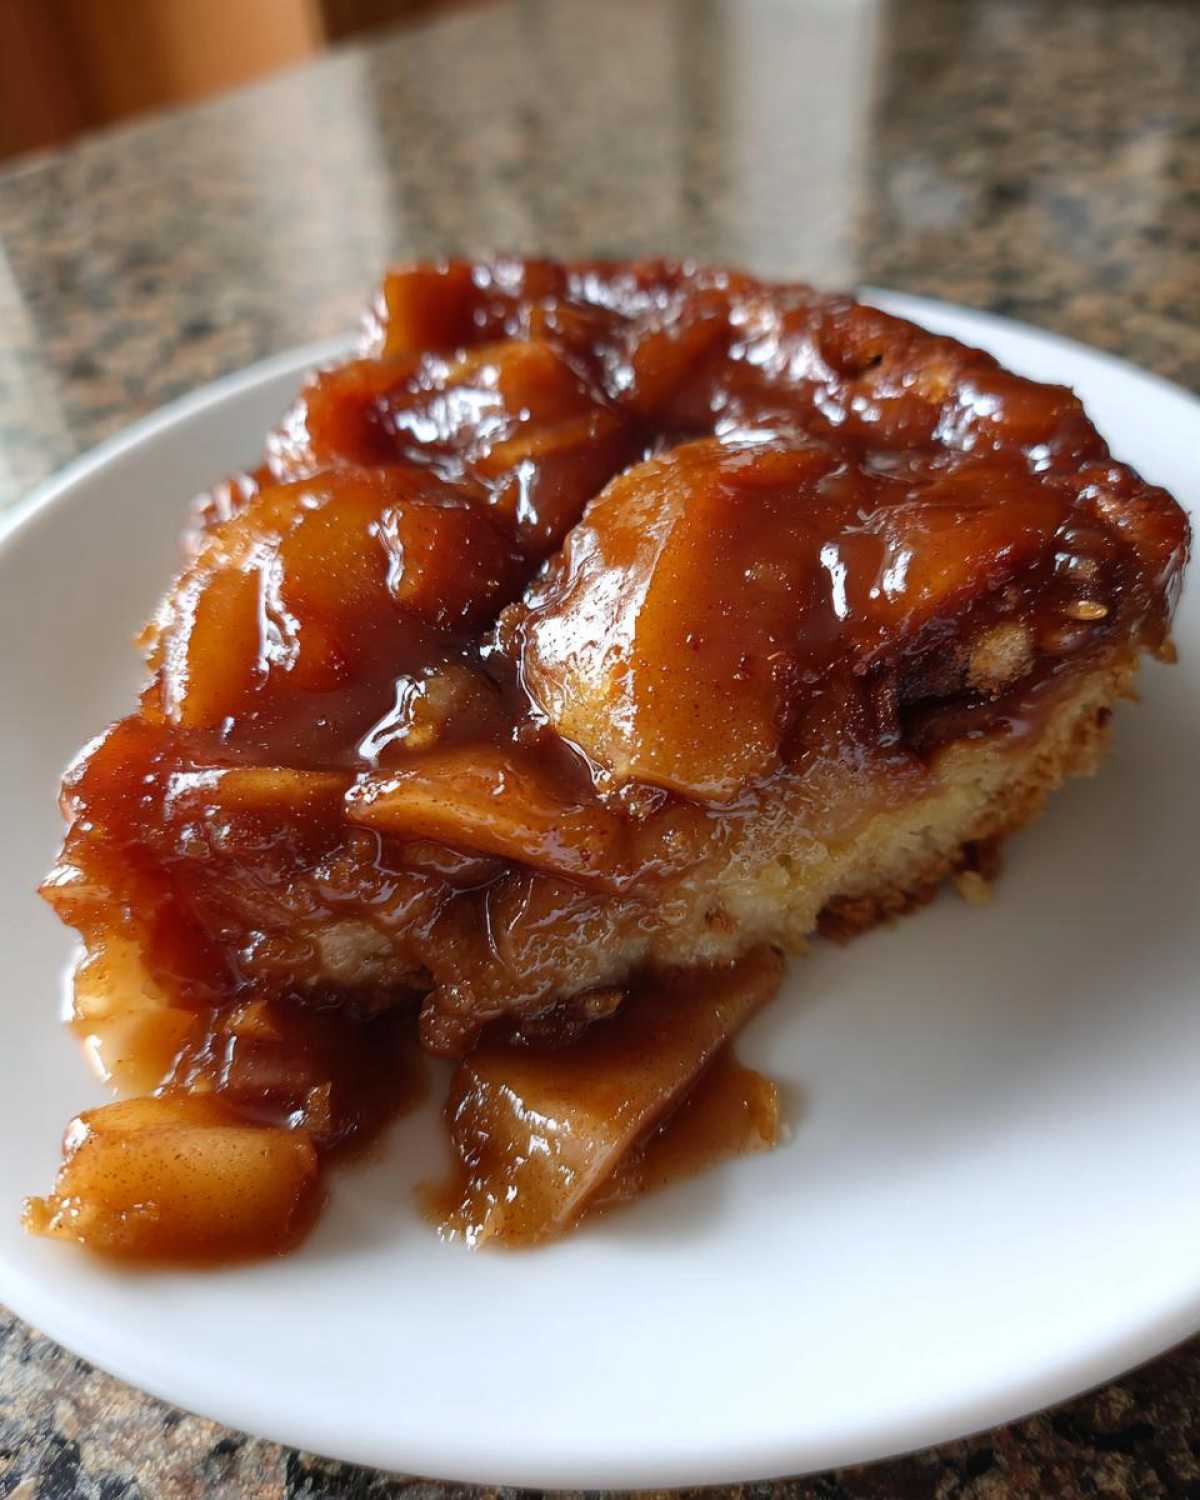
Why This Is the Best Apple Pie Filling Recipe for Thick Results
The secret to moving from ‘okay’ filling to ‘incredible’ filling is skipping the baking-inside-the-crust step initially. When you cook it down on the stove first, you control everything—the texture mostly! This apple pie filling recipe is designed to be robust. We use cornstarch, not just a pinch, to ensure that sugary liquid turns into that jammy sauce the second it starts simmering. If you need ideas for what to do with your leftover crust scraps, check out my fun apple pie smoothie recipe!
Achieving the Perfect Thick Apple Pie Filling Texture
The payoff here is the Perfect Apple Pie Filling Texture. Cornstarch is our MVP early on; it thickens super fast once it hits the heat, coating those apple slices beautifully. But here’s the crucial part: you have to let it cool down completely, preferably in the fridge. As it cools, it sets up like true dessert filling. Don’t slice your pie before cooling, or you’ll have applesauce instead!
Flavor Profile: Cinnamon Apple Filling with Brown Sugar
We aren’t skimping on warmth, either. This isn’t just a touch of spice; it’s a true Cinnamon Apple Filling experience! I load mine up with nutmeg and a hint of allspice too, but the real star for flavor depth is the brown sugar. That molasses content just marries better with the baked apples than plain white sugar ever could. It gives the whole dish a richer, almost toffee-like undertone.
Gathering Ingredients for Your Apple Pie Filling Recipe
Alright, let’s talk supplies! Getting the ingredients right is half the battle for the best apple pie filling recipe. The apples you choose absolutely matter most. You need a mix of tartness and structure so they don’t turn into baby food while simmering away on the stove. I swear by a blend of Granny Smith for that wonderful tartness, paired with Honeycrisp because they hold their shape so well.
This foundational list is what creates that amazing, thick sauce. If you’re looking for another way to use cinnamon and apples, you have to try my apple cinnamon french toast bake. It’s pure comfort!
Ingredient Notes and Apple Selection Tips
When you prep your apples, be precise! We want slices about a quarter-inch thick. Anything thinner will melt away, and anything thicker might not soften enough to blend nicely with the sauce. If you only find super sweet apples at the market, don’t panic—just up your lemon juice just a splash more to bring that necessary tang back into the mix! Remember, we are building flavor from the ground up here.
How to Make This Easy Apple Pie Filling
Putting together this Easy Apple Pie Filling couldn’t be simpler, especially since we skip the fussy oven time for the initial cook. We’re focusing on the stovetop method, which gives you total control over the thickness and spice distribution. Once you see how quickly this comes together, you’ll be making batches all autumn long. You can jump over to my spiced hot apple cider recipe next if you need another autumn warmer!
Step 1: Combining Dry Ingredients for the Apple Pie Filling Recipe
First things first, grab a medium saucepan—this is where all the magic happens. You have to mix your brown sugar, white sugar, cornstarch, and all those lovely spices (cinnamon, nutmeg, allspice!) together before anything else goes in. Seriously, whisk those dry bits until they are perfectly uniformed. If you dump the liquids in before whisking the cornstarch, you guarantee lumps, and nobody wants a lumpy sauce pretending to be filling!
Step 2: Cooking and Thickening the Stovetop Apple Pie Filling
Next, whisk in your water and lemon juice until that mixture is smooth, and then you toss in those beautiful apple slices. Put the pan over medium heat. You need to stir this pretty frequently—don’t walk away! It takes about five to eight minutes until you see it start bubbling really well. Watch those bubbles; that’s the cornstarch doing its job. We want the apples tender, but they absolutely must keep some structure. We are aiming for a warm coating, not apple mush!
Step 3: Finishing Touches and Setting the Texture
Once you confirm it’s thick and bubbly—and not a second later—pull that pan right off the burner. Take the pan completely off the direct heat before stirring in your two tablespoons of butter. That little bit of fat just melts right in, giving the sauce a beautiful sheen. Now for the most important part for that thick texture: STOP. Don’t put it in a pie yet! You have to let this filling cool down entirely, preferably chilling it for an hour or two. That cooling process is what locks in the perfect, thick consistency we worked so hard to create.
Versatility: Using Your Homemade Apple Filling Beyond the Pie
So, what happens if you make too much of this incredible apple pie filling recipe? Or maybe you just aren’t feeling pie this week? Don’t you dare let leftovers go to waste! This filling is practically begging to be used for everything else autumnal. It sets up so perfectly that it works beautifully as a chunky sauce, not just for pies.
I love spooning a warm scoop over my morning waffles, which is why you absolutely must check out my guide on cinnamon roll pancakes sometime. But if you’re looking for something richer, try using this on top of my easy pear crisp topping instead of pears. This versatile Apple Pie Filling for Pies and Crisps also tastes divine stirred through hot oatmeal or dolloped generously over vanilla bean ice cream. It’s just simply the best dessert filling!
Freezer Friendly Apple Pie Filling Recipe Storage Tips
Life gets busy, right? That’s why I love that this apple pie filling recipe is wonderfully Freezer Friendly Apple Pie Filling. I always make a double batch in the fall just so I can bank some for later—it saves so much time when you’re craving pie mid-February!
The most important step is patience here: you absolutely must let the filling cool down completely on the counter, and ideally, chill it in the fridge until it’s set, just like you would for a fresh pie. If you freeze it warm, the excess water can turn into weird ice crystals.
Once it’s totally chilled and thick, portion it out into airtight, freezer-safe containers or heavy-duty zip-top bags. Squeeze out all that extra air! I usually mark the bag with the date and what it is. You can keep this lovely filling frozen perfectly for about six months. When you’re ready to bake, just thaw it overnight in the fridge, give it one final stir, and it’s ready to go into that crust. You can see some of my tips for freezing other foods, like breakfast sandwiches, for general storage success!
Tips for the Perfect Apple Pie Filling Recipe Every Time
Okay, you’ve got the filling cooked down, it’s cooling perfectly, but I have a few last-minute thoughts to ensure your apple pie filling recipe is truly next-level. My biggest piece of advice for avoiding mushy apples—and this is a big one—is not to overcook the mixture during that final stovetop simmer!
We only want those apples to soften slightly while the cornstarch mixture thickens. If you simmer them until they are floppy, they will turn completely to sauce once they cool down and bake in the oven. Remember, they’re going to bake *again* inside the pie!
Also, don’t be afraid to play with the heat level for your personal taste. If you love a zing, maybe throw in a tiny pinch of ground cloves next time. If you are making this for the holidays, you absolutely must try using it in lieu of the filling in my maple pecan pie bars recipe; the spices work brilliantly together. This simple recipe is your sandbox for making dessert magic!
Frequently Asked Questions About Our Apple Pie Filling Recipe
I get tons of questions when people try this recipe for the first time, which I totally understand! It’s an important component of so many wonderful fall desserts, so you want it to be perfect. So many folks ask about substitutions or how long this beautiful homemade sauce will last in the fridge. I’ve gathered the most common ones right here to make sure your baking adventures are smooth!
Can I use different types of apples in this apple pie filling recipe?
Oh, you absolutely can! That’s the fun of making a From Scratch Apple Filling. I really preached the Granny Smith/Honeycrisp mix because that gives you shape and tartness, but feel free to mix and match. If you use softer apples like McIntosh, you might want to reduce the cooking time by a minute or two so they don’t completely disintegrate. Just make sure you have at least two types that are known for being firm!
How long does this homemade apple filling last in the refrigerator?
Because we use the lemon juice, this filling is pretty stable! Once it’s cooled completely, you can store any leftovers in an airtight container in the fridge for easily five to seven days. It thickens up even more overnight sometimes, making it a perfect midnight snack straight from the jar. I often use the extras as a Quick Apple Dessert Sauce over ice cream later in the week, so I always make sure to save some!
What is the difference between this recipe and a commercial apple topping for pancakes?
The difference is night and day, honestly! Commercial toppings are full of preservatives and stabilizers so they can sit on a shelf for months, and they often use way too much high-fructose corn syrup instead of real brown sugar. This recipe gives you that vibrant, fresh spice scent, and you control all the sugar and cinnamon levels yourself! Plus, the texture you get from chilling our cornstarch-thickened sauce after cooking is far superior to anything you buy in a can, making it a truly delicious apple dessert filling.
If you’re looking for other ways to use up any extra fruit or spices, check out these amazing caramel apple crepes next!
Estimated Nutritional Data for This Apple Pie Filling Recipe
Now, I know many of you are after those exact numbers for your weekly tracking, and I totally get that! Planning meals is so much easier when you know what you’re working with. I’ve pulled the estimated nutritional breakdown based on the recipe as written—that means counting 6 cups total yield, divided into 12 standard servings.
Just a friendly heads-up, since this is made from fresh fruit, sugar, and butter, these numbers are really solid estimates. They won’t perfectly match if you swap out Granny Smith for Fuji, or if you go heavy on the brown sugar! Think of this delicious apple topping for pancakes mixture as being close, but not gospel. You can find more healthy fall ideas in my autumn harvest salad recipe if you need a lighter contrast!
Here’s what we are looking at per half-cup serving of this wonderful filling:
- Calories: Approximately 245
- Total Fat: About 3g
- Carbohydrates: Around 56g
- Sugar: Yikes, about 42g (that’s the brown sugar doing its job!)
- Protein: Less than 1g
- Sodium: Very low, just around 5mg
It’s definitely a treat, but it’s made with real ingredients, so you know exactly where all that sweetness is coming from—the real fruit and good brown sugar!
Share Your Delicious Apple Dessert Filling Creations
Now that you’ve got the thickest, most flavorful homemade apple filling ready to go, comes the best part: enjoying it! Seriously, I pour my heart into these types of recipes, and nothing makes me happier than seeing you all bake them at home. I really hope this simple recipe proves how fantastic that from scratch apple filling tastes compared to anything store-bought.
Please, if you try this batch, hop down to the comments below and let me know what you ended up using it for! Did you stick it in a traditional double-crust pie, or did you go rogue and use it as a warm topping for your morning waffles? I love hearing about your successes!
Don’t forget to snap a picture if you serve it up looking beautiful—maybe on top of some ice cream or perhaps alongside my favorite breakfast bakes. Tag me on social media so I can see your amazing fall baking creations! Your feedback and photos really help other readers feel confident trying out this recipe too. Happy baking, friends!
PrintQuick Thick Homemade Apple Pie Filling

Make a thick, flavorful apple pie filling on the stovetop in minutes, perfect for pies, crisps, or toppings.
- Prep Time: 15 min
- Cook Time: 10 min
- Total Time: 25 min
- Yield: About 5 cups
- Category: Dessert Filling
- Method: Stovetop
- Cuisine: American
- Diet: Vegetarian
Ingredients
- 6 medium apples (like Granny Smith or Honeycrisp), peeled, cored, and sliced 1/4 inch thick
- 3/4 cup packed brown sugar
- 1/4 cup granulated sugar
- 1/4 cup cornstarch
- 1 teaspoon ground cinnamon
- 1/4 teaspoon ground nutmeg
- 1/8 teaspoon ground allspice
- 1/4 cup water
- 2 tablespoons lemon juice
- 2 tablespoons unsalted butter
Instructions
- Combine the brown sugar, granulated sugar, cornstarch, cinnamon, nutmeg, and allspice in a medium saucepan. Whisk these dry ingredients together well.
- Stir in the water and lemon juice until the mixture is smooth.
- Add the sliced apples to the saucepan and toss gently to coat them evenly with the sugar and spice mixture.
- Place the saucepan over medium heat. Cook, stirring frequently, until the mixture begins to bubble and thicken, about 5 to 8 minutes. The apples should soften slightly but retain some shape.
- Once the filling is thick and bubbling, remove it from the heat. Stir in the butter until it melts completely.
- Let the filling cool completely before using it in a pie crust or storing it. Cooling helps the filling set to its final thick texture.
Notes
- For a thicker result, allow the filling to cool completely before use; it sets up as it cools.
- This filling freezes well for up to 6 months. Cool completely, then store in airtight, freezer-safe containers.
- Use this filling as a topping for pancakes, waffles, oatmeal, or vanilla ice cream.
- If you prefer a softer apple texture, simmer for 2-3 minutes longer, but avoid overcooking to prevent mushiness.
Nutrition
- Serving Size: 1/2 cup
- Calories: 245
- Sugar: 42
- Sodium: 5
- Fat: 3
- Saturated Fat: 2
- Unsaturated Fat: 1
- Trans Fat: 0
- Carbohydrates: 56
- Fiber: 3
- Protein: 0
- Cholesterol: 6