

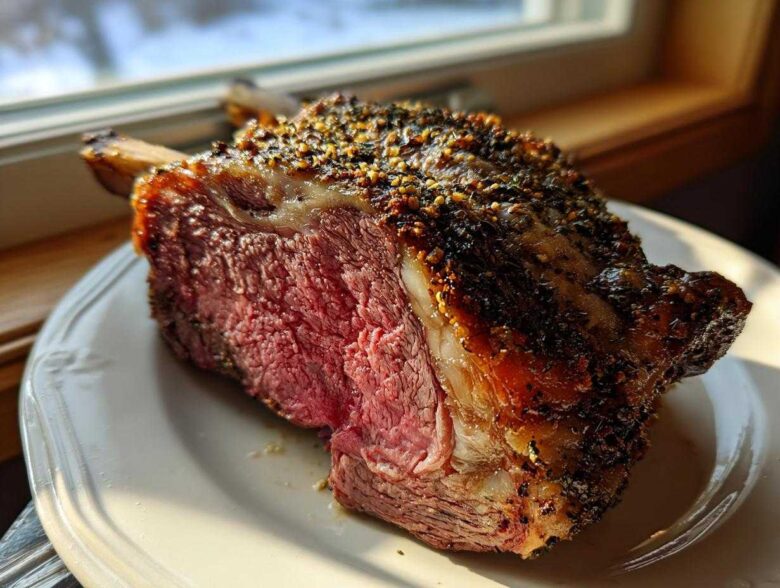
Forget everything you think you know about cooking a massive holiday centerpiece! I used to dread pulling that beautiful, expensive **rib roast** outta the oven, certain it would come out dry and disappointing. But I cracked the code, I really did. This method, using a blast of crazy heat followed by a slow, steady roast, is the absolute easiest and most foolproof way I’ve ever found to guarantee a tender, juicy result every single time. It’s all about mastering that internal temperature, and trust me, once you nail it with this garlic-herb crust, you’ll never look back. This is the recipe that changed holiday dinners for us!
Why This Easy Oven-Roasted rib roast Recipe is Your New Holiday Centerpiece
Honestly, this recipe takes all the guesswork out of the biggest meal of the year, which is why I shout about it from the rooftops! You need a stress-free cooking experience when entertaining, right? This method locks in every bit of moisture.
- It’s genuinely foolproof thanks to the two-stage temperature blast.
- That herb and garlic crust gets beautifully crisp while the inside stays melt-in-your-mouth tender.
- You get restaurant-quality results without needing a smoker or a fancy sous-vide setup. Check out my easy honey garlic chicken if you need another simple win!
Essential Ingredients for Your Perfect rib roast
Okay, let’s talk about what goes into this masterpiece. When you’re making a showstopper like a prime rib, the quality of what you put on that gorgeous piece of beef truly matters. You’ll need the main event—that beautiful bone-in **rib roast**—but the real flavor comes from this simple paste we mix up. Don’t skimp here; this crust is what makes people ask for the recipe! We are mixing kosher salt, pepper, dried rosemary, dried thyme, and, of course, lots of fresh garlic with just enough olive oil to glue it all together.
Ingredient Notes and Substitutions for rib roast
Listen, if you use finely ground table salt, it’s going to draw out too much moisture too fast, leading to a crust that burns before the center is done. You absolutely must use coarse kosher salt for this paste; it dissolves slower and helps create that perfect, savory shell. Also, that olive oil? It’s crucial! It helps the herbs stick when we rub them in and helps create that initial sear when it hits the hot oven.
When you’re at the butcher counter talking about your **rib roast**, always try to get a bone-in cut if you can. The bones conduct heat differently, which helps insulate the meat right next to it, leading to a more even cook and an incredibly flavorful final product. If they only have boneless available, that’s fine, but just know you’ll need to shave a little time off the total cooking estimate later on. Always ask the butcher for the approximate weight so you can plan your time!
Equipment Needed for How to Cook rib roast
You don’t need a million fancy gadgets for this spectacular **rib roast**, but there are three things you absolutely *must* have prepared before that beautiful beef even leaves the fridge. First, grab your sturdy roasting pan, and make sure it has a rack! That rack allows the air to circulate completely around the roast, which is key for that even crust.
Most importantly, you need a reliable instant-read meat thermometer. I’m begging you, do not try to guess doneness with sight or timing alone on a roast this expensive! It’s the only way to guarantee you get that melt-in-your-mouth center everyone is dreaming about. If you’re looking for other simple kitchen helpers, you’ve got to try my one-pot creamy Tuscan chicken next week!
Step-by-Step Instructions for a Tender rib roast
Time to get cooking! Remember that first crucial step: take your **rib roast** out on the counter at least two hours before you even think about turning on the oven. If it’s ice cold in the middle, you’ll never cook it evenly. Once it’s rested a bit, crank that oven way up to 500 degrees Fahrenheit. We are going in hot and fast to start building that amazing crust!
Once it’s preheated, you’ll move it onto the rack in that roasting pan. After just 15 minutes in that scorching heat, immediately knock the temperature down to 325 degrees. Don’t peek or fiddle with it for at least another hour! Then, you watch that thermometer like a hawk. The absolute, non-negotiable part of this whole process? Letting it rest when it’s done. Taking that roast out too early and carving it immediately is like squeezing a sponge! When it finally comes out, tent it loosely with foil and walk away for a full 20 minutes. You can check out my recipe for slow cooker beef barbacoa tacos while you wait; they use totally different flavors, but the waiting game is the same!
Preparing the Herb Paste and Searing the rib roast
Okay, grab your bowl where you mixed all those lovely herbs and that oil. Before you even think about touching the beef, take some paper towels and pat the entire surface of your **rib roast** until it feels completely dry. This is non-negotiable! If the surface is damp, the heat turns that moisture into steam, and steam prevents browning. We want a crust, not steamed beef! Once it’s dry, aggressively rub that garlic-herb paste all over the roast. Really press it into the meat; don’t be shy!
Achieving Perfect Doneness with the rib roast Temperature Guide
This two-temperature dance is the secret weapon for a juicy result. The 15 minutes at 500°F is the sear—it’s just to create that dark, savory exterior. Then, we drop it down to the steady 325°F until it creeps up to within 5 to 10 degrees of your target. Seriously, rely on your thermometer here. If you pull it out when it looks perfect, it will be overcooked by the time you slice it. Trust the thermometer, trust the time, and trust the rest! The exact temperatures you’re aiming for are detailed in the section right below this one.
Mastering the Perfect Prime Rib Temperature Guide for Your rib roast
I know, I know, worrying about the temperature of a huge cut of meat like this **rib roast** feels scary, especially when you’ve spent a pretty penny getting it! But once you know the secret about carryover cooking, you’ll feel like a total professional. The key here is that the roast doesn’t stop cooking the second you pull it out of the oven. Nope! It keeps warming up while it rests, which is why we pull it out a little early.
You absolutely have to use a reliable meat thermometer inserted deep into the thickest part—try to miss the bone, as the bone heats up differently! Here are the internal temperatures I live by. If you hit these marks when you pull the roast out of the oven, you will have perfect slices on the platter later. And hey, if you loved this technique, you might enjoy my garlic butter steak bites recipe for using up smaller cuts!
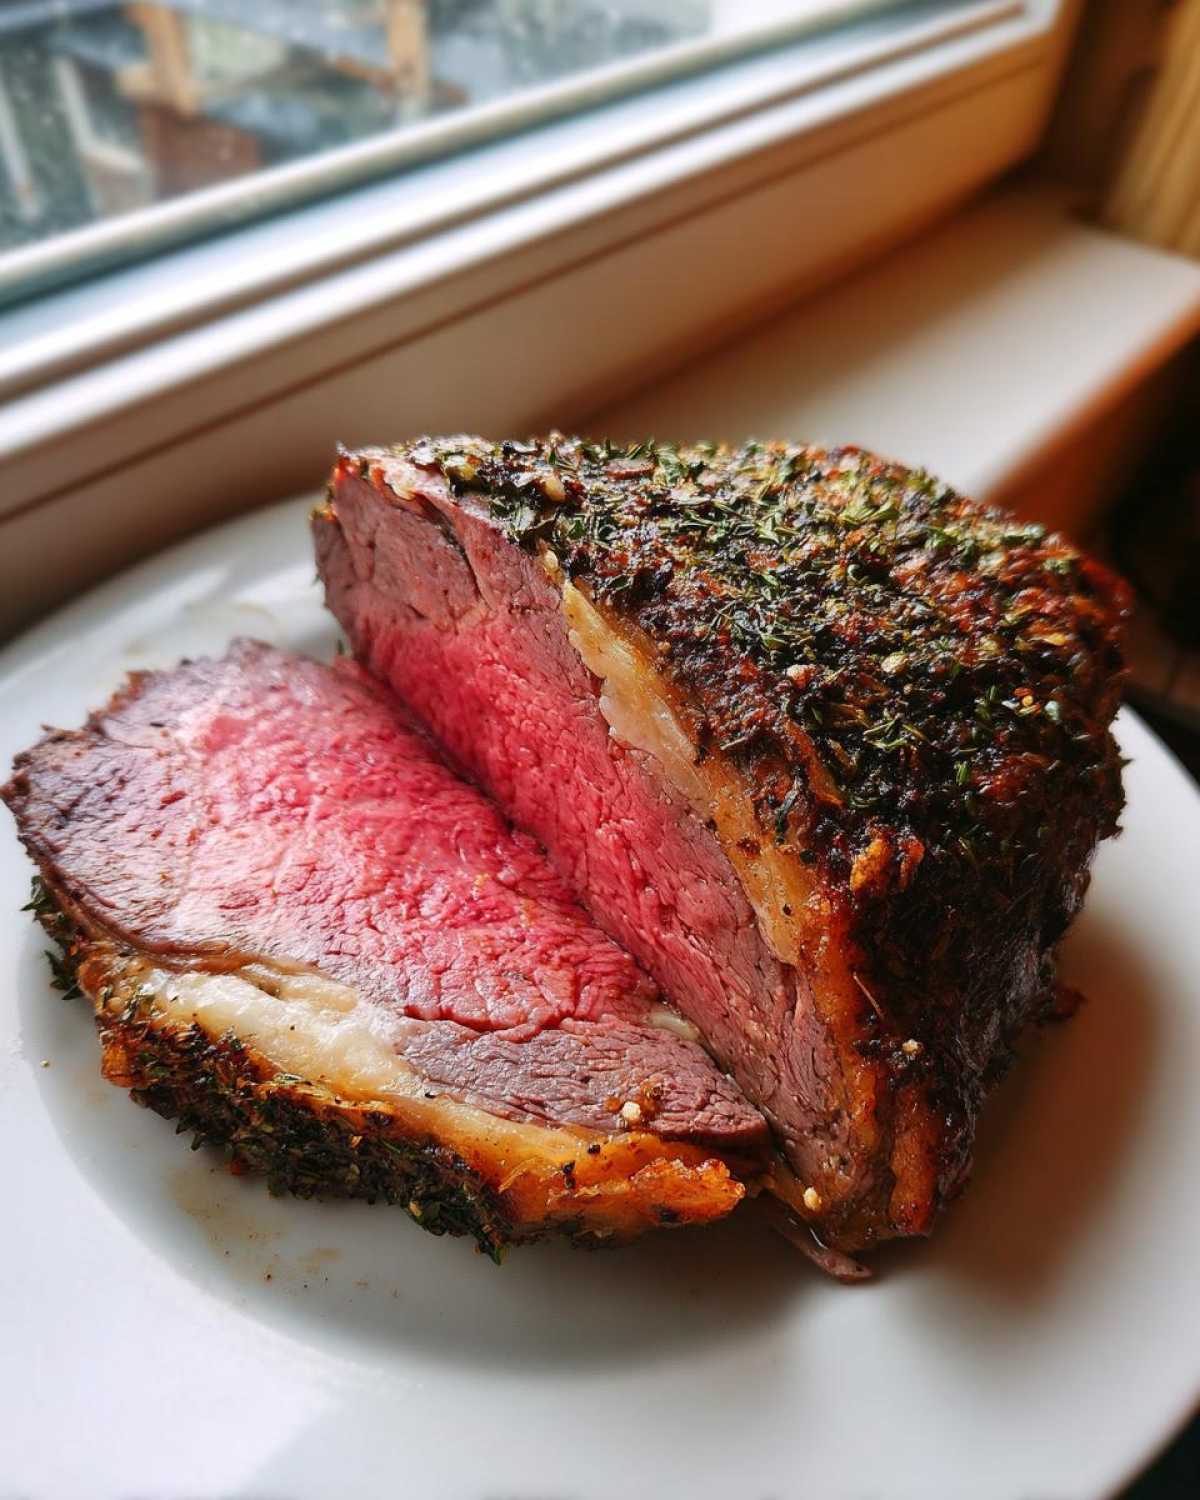
- Rare: Pull it at 120°F to 125°F. (Center will be cool and bright red after resting.)
- Medium-Rare (My Favorite!): Pull it at 130°F to 135°F. (This gives you that perfect warm pink throughout.)
- Medium: Pull it at 135°F to 140°F. (Still juicy, but headed more toward brown.)
Remember, for every single level, that temperature is going to climb another five degrees while it’s under the foil tent resting. That resting time is doing half the cooking work for you! It keeps all those lovely juices locked inside the muscle fibers where they belong, instead of running all over your cutting board.
Making the Simple Au Jus for Your rib roast
Okay, you’ve got this incredible, flavorful pan drippings sitting down there in your roasting pan—don’t waste that gold! While the roast is resting (and remember, it needs that rest!), this is the fastest way to turn those brown bits into a ridiculously tasty sauce. Once the roast is out, pour in two cups of beef broth right into the pan. That broth hits the hot metal and lifts up every single bit of flavor left behind. That’s basically all the work!
You just need to get that pan onto your stovetop and bring that liquid to a simmer. Let it bubble away for just a few minutes until it thickens up just a tiny bit. If you want it perfectly smooth, strain it through a fine mesh sieve when you serve it. Seriously, this quick au jus tastes a thousand times better than anything from a jar. If you aren’t already convinced by this roast, you need to try my one-pot beef stroganoff next!
Tips for a Stress Free Beef Roast and rib roast Success
Even with the perfect temperature plan, there are a few little tricks I’ve picked up over the years that make cooking this **rib roast** even smoother. First thing’s first: if you’re worried about the meat fusing to the rack in the pan, try placing a layer of thick-cut carrots or onions underneath the roast instead of just using the rack! They basically form a natural trivet, and you get bonus veggie flavor for your au jus underneath.
Now, once it’s rested and you’re ready to slice, the direction you cut matters! You always have to carve against the grain. Look closely at the meat after it rests—you’ll see long lines of muscle fiber running through it. You want your knife to cut perpendicular (across) those lines. This breaks up those fibers, making every single slice feel incredibly tender, even if you accidentally cooked it past medium-rare. For more insider knowledge, check out my deeper dive on roast cooking secrets!
And if you’re trying that herb paste application and it seems like it’s just falling off? Don’t panic! Just use your hands to really massage it in, almost like you’re giving the **beef roast** a deep tissue massage. It’ll stick plenty after it goes into the high heat for that initial blast!
Storage and Reheating Instructions for Leftover rib roast
If you’re lucky enough to have any of this gorgeous **rib roast** left over (which, let’s be honest, is often the best part of the holiday!), the key to keeping it great is gentle reheating. You absolutely cannot nuke these thin slices straight or they will turn into leather on you. I always slice the leftover roast thinly across the grain first. Then, store those lovely slices in an airtight container in the fridge for up to four days.
When you’re ready for round two, don’t microwave them dry! Just heat up a small amount of that leftover au jus—or even some plain beef broth—in a saucepan until it’s gently simmering. Then, you just dip the slices in for about 30 seconds until they warm through. They absorb all that moisture right back up! If you’re planning ahead, this roast freezes beautifully. Lay the cooked slices flat on a baking sheet, flash-freeze them for an hour, then transfer them to a heavy-duty freezer bag. They’ll keep well for about two months. For more great make-ahead meals, check out my tips for freezer-friendly breakfast sandwiches!
Frequently Asked Questions About Your rib roast
I know you probably have a few last-minute jitters before you put such a beautiful piece of meat in the oven! It’s totally normal. Cooking a **rib roast** for the first time can feel like a huge commitment, but these common questions always pop up. Let’s knock out a few sticking points so you can walk into the kitchen with total confidence.
Can I use a boneless rib roast instead of a bone-in rib roast?
Yes, you absolutely can! A boneless **rib roast**, or ribeye roast, is often easier to carve right away since you don’t have to work around the actual bones. However, the bones actually act like little insulation shields, helping the meat cook a bit more evenly closer to the center. If you use a boneless roast, just know it will cook faster than the times listed in our temperature guide. I usually shave about 15 to 20 minutes off the total cooking time for a roast of the same weight, but you absolutely must keep checking that internal temperature because the timing is less predictable than with the bone-in cut.
How long should I rest the rib roast before carving?
This step is not optional; it’s part of the recipe! You need to rest your **rib roast** for a minimum of 20 minutes, but honestly, if you can manage 30 minutes while finishing up gravy or side dishes, that’s even better. Think about what happens when that roast comes out of the oven: all those juices are agitated and vibrating, pumped up by the heat, and they are rushing toward the center of the meat. If you carve it immediately, all that delicious liquid just runs right out onto the cutting board, and you’re left with a drier final product.
When you tent that roast with foil and let it sit, the meat slowly relaxes, and those internal juices redistribute themselves evenly throughout the entire roast. It’s like letting the meat take a deep, settling breath. This one simple trick is the foundation for a truly juicy roast every time, so please, don’t skip the resting period!
PrintEasy Oven-Roasted Prime Rib Roast with Herb Garlic Crust
Follow these steps for a tender, juicy prime rib roast featuring a flavorful garlic and herb crust, perfect for any special occasion.
- Prep Time: 20 min
- Cook Time: 2 hr 15 min
- Total Time: 2 hr 35 min
- Yield: 6-8 servings
- Category: Main Course
- Method: Oven Roasting
- Cuisine: American
- Diet: Low Fat
Ingredients
- 1 (5-7 pound) bone-in rib roast (standing rib roast)
- 4 tablespoons coarse kosher salt
- 2 tablespoons black pepper
- 4 tablespoons dried rosemary
- 4 tablespoons dried thyme
- 6 cloves garlic, minced
- 1/4 cup olive oil
- 2 cups beef broth (for au jus)
Instructions
- Remove the rib roast from the refrigerator 2 to 3 hours before cooking to allow it to come closer to room temperature.
- Preheat your oven to 500 degrees Fahrenheit.
- In a small bowl, combine the kosher salt, black pepper, dried rosemary, dried thyme, minced garlic, and olive oil to create a paste.
- Pat the entire surface of the rib roast dry with paper towels.
- Rub the herb-garlic paste evenly over the entire surface of the roast.
- Place the roast, fat-side up, in a roasting pan with a rack.
- Roast at 500 degrees Fahrenheit for 15 minutes.
- Reduce the oven temperature to 325 degrees Fahrenheit. Continue roasting until the internal temperature reaches your desired doneness (see notes for temperatures).
- For a 5-7 pound roast, this usually takes about 1.5 to 2 hours total cooking time after the initial high-heat blast.
- Remove the roast from the oven when it reaches 5 to 10 degrees below your target temperature.
- Transfer the roast to a cutting board, tent loosely with foil, and let it rest for at least 20 minutes before carving. Resting is crucial for juiciness.
- To make the au jus, pour the beef broth into the roasting pan, scraping up any browned bits from the bottom. Simmer on the stovetop until slightly reduced, then strain and serve alongside the carved roast.
Notes
- Use a reliable meat thermometer inserted into the thickest part of the meat, avoiding the bone, for accurate doneness.
- Remove the roast from the oven when it reaches these temperatures: Rare: 120-125°F; Medium-Rare: 130-135°F; Medium: 135-140°F. The temperature will rise another 5 degrees while resting.
- If you prefer a crispier crust, leave the roast in the 500°F oven for 20 minutes instead of 15.
Nutrition
- Serving Size: 6 oz cooked
- Calories: 450
- Sugar: 0
- Sodium: 650
- Fat: 30
- Saturated Fat: 11
- Unsaturated Fat: 19
- Trans Fat: 0
- Carbohydrates: 0
- Fiber: 0
- Protein: 45
- Cholesterol: 140