

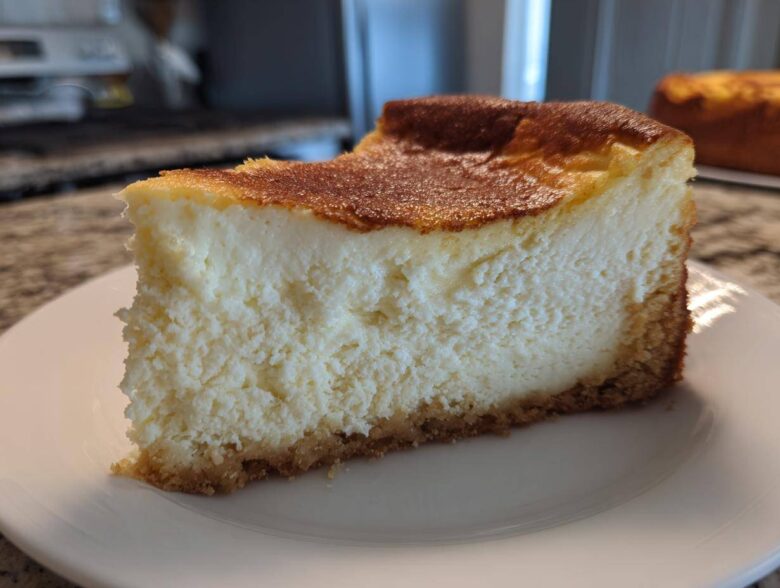
Oh, you know those days? When you’ve crushed your goals, you feel amazing, but that little voice whispers, “Just one slice of real cheesecake.” Before Simon came along, I’d usually stress myself out trying to ‘perfect’ a low-fat version that tasted like sweet cardboard! But now, I’ve cracked the code. This Ultimate Healthy Baked Protein Cheesecake is the real deal. We are talking unbelievably creamy, velvety smooth, and packed with over 35 grams of protein per serving. It’s the ultimate sweet victory, proving that you never have to choose between satisfying a craving and hitting your macros. This recipe is pure praise for your hard work!
Why This Baked Protein Cheesecake Deserves Your Kudos
I’m telling you, this isn’t just another sad, rubbery protein dessert trying to imitate the real thing. This High Protein Cheesecake Recipe genuinely tastes like the indulgent treat you dream about! We are giving ourselves major kudos for this one because it checks every single box:
- It clocks in at an unbelievable 35 grams of protein per slice. That’s huge for a Macro Friendly Cheesecake!
- The texture is out of this world because we rely on drained cottage cheese and Greek yogurt to get that signature creamy mouthfeel.
- It’s wonderfully low in sugar, making it the perfect Sugar Free Protein Dessert for when you need that sweet fix safely.
Seriously, stop depriving yourself! This is dessert that works *with* your goals.
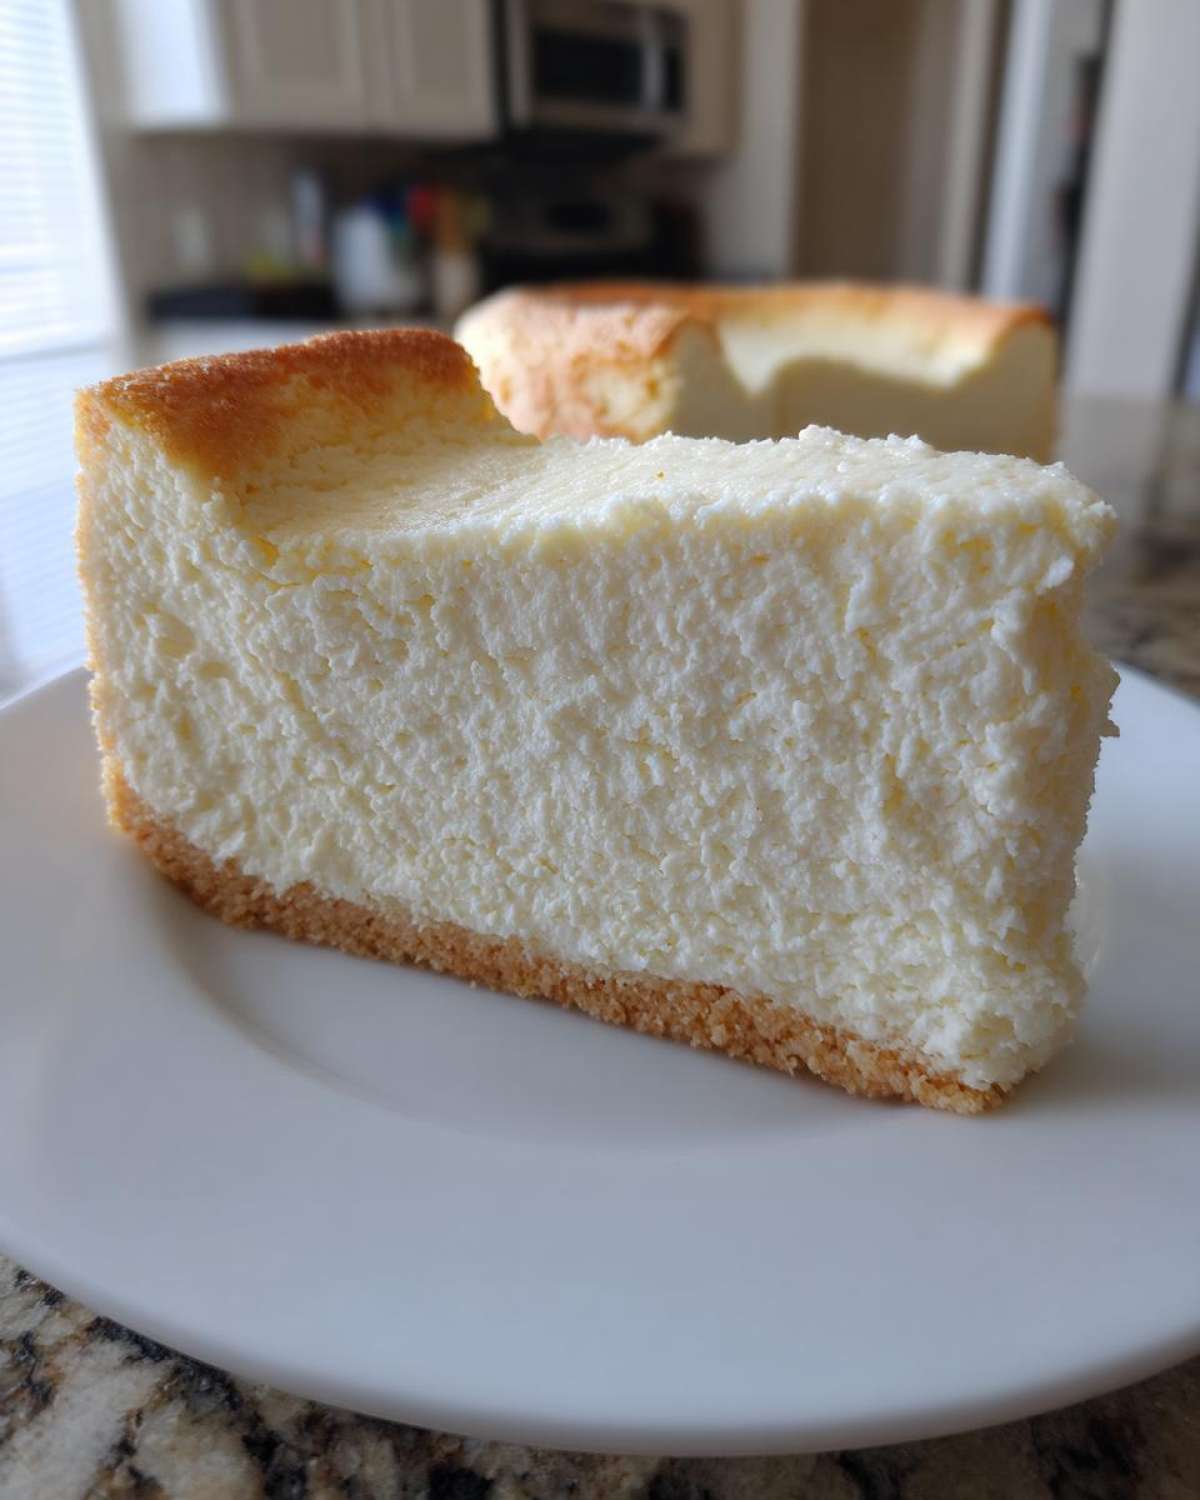
Gathering Ingredients for Your Ultimate Protein Cheesecake Recipe
Okay, this is where we build the foundation for the best Protein Cheesecake you’ll ever make! When I first started making healthier desserts, I got tripped up by vague instructions. Simon always reminds me that clarity earns you major kudos. So, we’re going to list exactly what you need, grouped neatly so you can check your pantry without any fuss. Remember, good ingredients make a good cake, plain and simple!
We need a few things for the base and then the superstars for the creamy center. Don’t skip the instruction to drain the cottage cheese for the filling—that’s our little secret weapon for keeping this a truly creamy protein dessert and not a watery mess! Speaking of cottage cheese magic, if you ever want another super simple, high-protein win, you absolutely have to check out my cottage cheese microwave brownie recipe—same ingredient, totally different vibe!
For the Crust Ingredients
This crust is super simple and keeps things lovely and low-carb. You just need:
- 1 cup almond flour
- 2 tablespoons erythritol or preferred sweetener
- 4 tablespoons melted coconut oil
For the Creamy Protein Filling
This is the powerhouse section! Since we are making a Cottage Cheese Cheesecake Recipe mashup, the texture is going to be incredible. Make sure that cottage cheese is totally drained before you even start blending!
- 1 pound low-fat cottage cheese, drained well
- 1 cup plain non-fat Greek yogurt
- 1/2 cup vanilla whey or casein protein powder
- 1/2 cup erythritol or preferred sweetener
- 2 large eggs
- 1 teaspoon vanilla extract
- 1 tablespoon lemon juice
- Pinch of salt
Once you have all these beauties lined up, we’re ready to start mixing. Pat yourself on the back already—you’re on your way to a fantastic, guilt-free treat!
Step-by-Step Instructions for the Baked Protein Cheesecake
Okay, deep breath! We are moving from prep to the actual show. Simon always says that the moment you turn on the oven, the kitchen starts smelling like success, so let’s get this Baked Protein Cheesecake rolling! Follow these steps exactly, especially the cooling part, and you’ll get that perfect texture we’re aiming for. We aren’t just baking; we’re creating a top-tier Protein Cheesecake experience here!
Preparing the Crust and Oven Setup
First things first: get that oven nice and cozy at 325°F (160°C). You need a 7-inch springform pan—I usually just grease it lightly or use parchment paper on the bottom. For the crust, just toss the almond flour and the 2 tablespoons of sweetener together. Pour in that melted coconut oil and mix until it feels like wet sand that holds its shape when you squeeze it. Press that firmly into the bottom of your pan. Pop it into the oven for just 8 minutes to set it, then pull it out to cool while you work on the star of the show.
Achieving the Creamy Protein Dessert Filling
This blending step is where the magic happens for our Creamy Protein Dessert texture. Get your food processor ready! Put in the well-drained cottage cheese and the Greek yogurt first. Blend those until they are absolutely, totally smooth—no lumps allowed! Scrape down the sides just to make sure everything is incorporated. Now, add in your protein powder, the remaining sweetener, eggs, vanilla, lemon juice, and salt. You want to blend until it’s just incorporated and silky smooth. Be kind here—once those eggs are in, don’t blend forever, or you might introduce too much air!
Baking and Cooling Your Protein Cheesecake
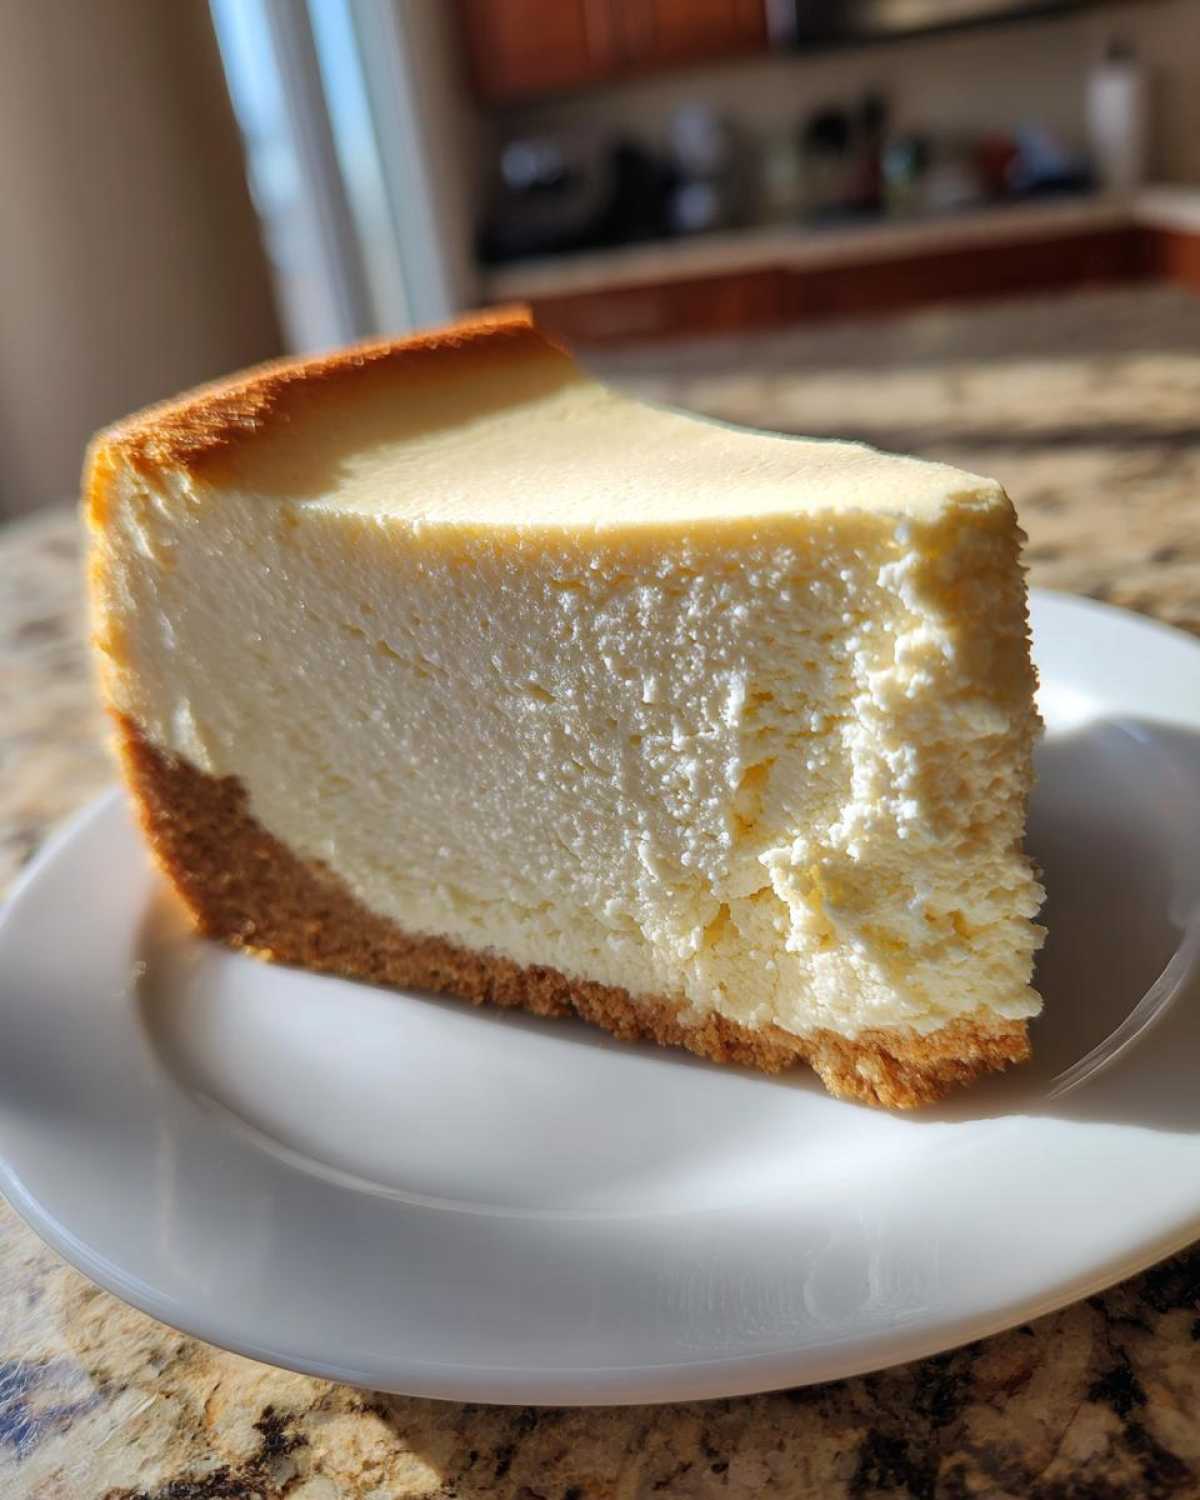
Gently pour that beautiful filling right over your slightly cooled crust. Give the springform pan a couple of gentle taps on the counter; this knocks out any big air pockets that might cause cracking later. Bake this gorgeous High Protein Cheesecake Recipe for 45 to 55 minutes. When you check it, the edges should look firm, but the very center should still have a tiny, jiggle-y wobble. This is crucial! Turn the oven off, crack the door open just a smidge, and let the cheesecake hang out in that residual heat for a full hour. Seriously, don’t skip this slow cool-down! Then, move it to the counter to cool completely before covering it and popping it into the fridge for at least 4 hours, but honestly, overnight is always better.
Don’t worry about cleaning up yet! If you want some extra tips on keeping things perfect, check out my instructions for making your own cheese crackers—it’s all about control in the kitchen!
Tips for Success with Your Cottage Cheese Cheesecake Recipe
Alright, let’s talk real talk. We all know that “healthy cheesecake” can sometimes mean “texture crime scene.” But because we’re aiming for true kitchen kudos here, I have three critical pieces of advice to make sure this Protein Cheesecake sets up perfectly and tastes like heaven. If you follow these, you’re basically guaranteed a win!
First up: Draining the cottage cheese. I know, I know, it sounds fussy, but trust me on this. If that low-fat cottage cheese is saturated with liquid, guess what happens? Your Cottage Cheese Cheesecake Recipe turns runny! I don’t just drain it in a sieve; I actually spread it out onto a few layers of paper towels and press down gently. You’ll be shocked how much liquid comes out. This pre-prep step is the difference between a sturdy slice and a puddle. For some more inspiration on using this MVP ingredient in different ways, you absolutely must see how I use it in my Cloud Bread recipe!
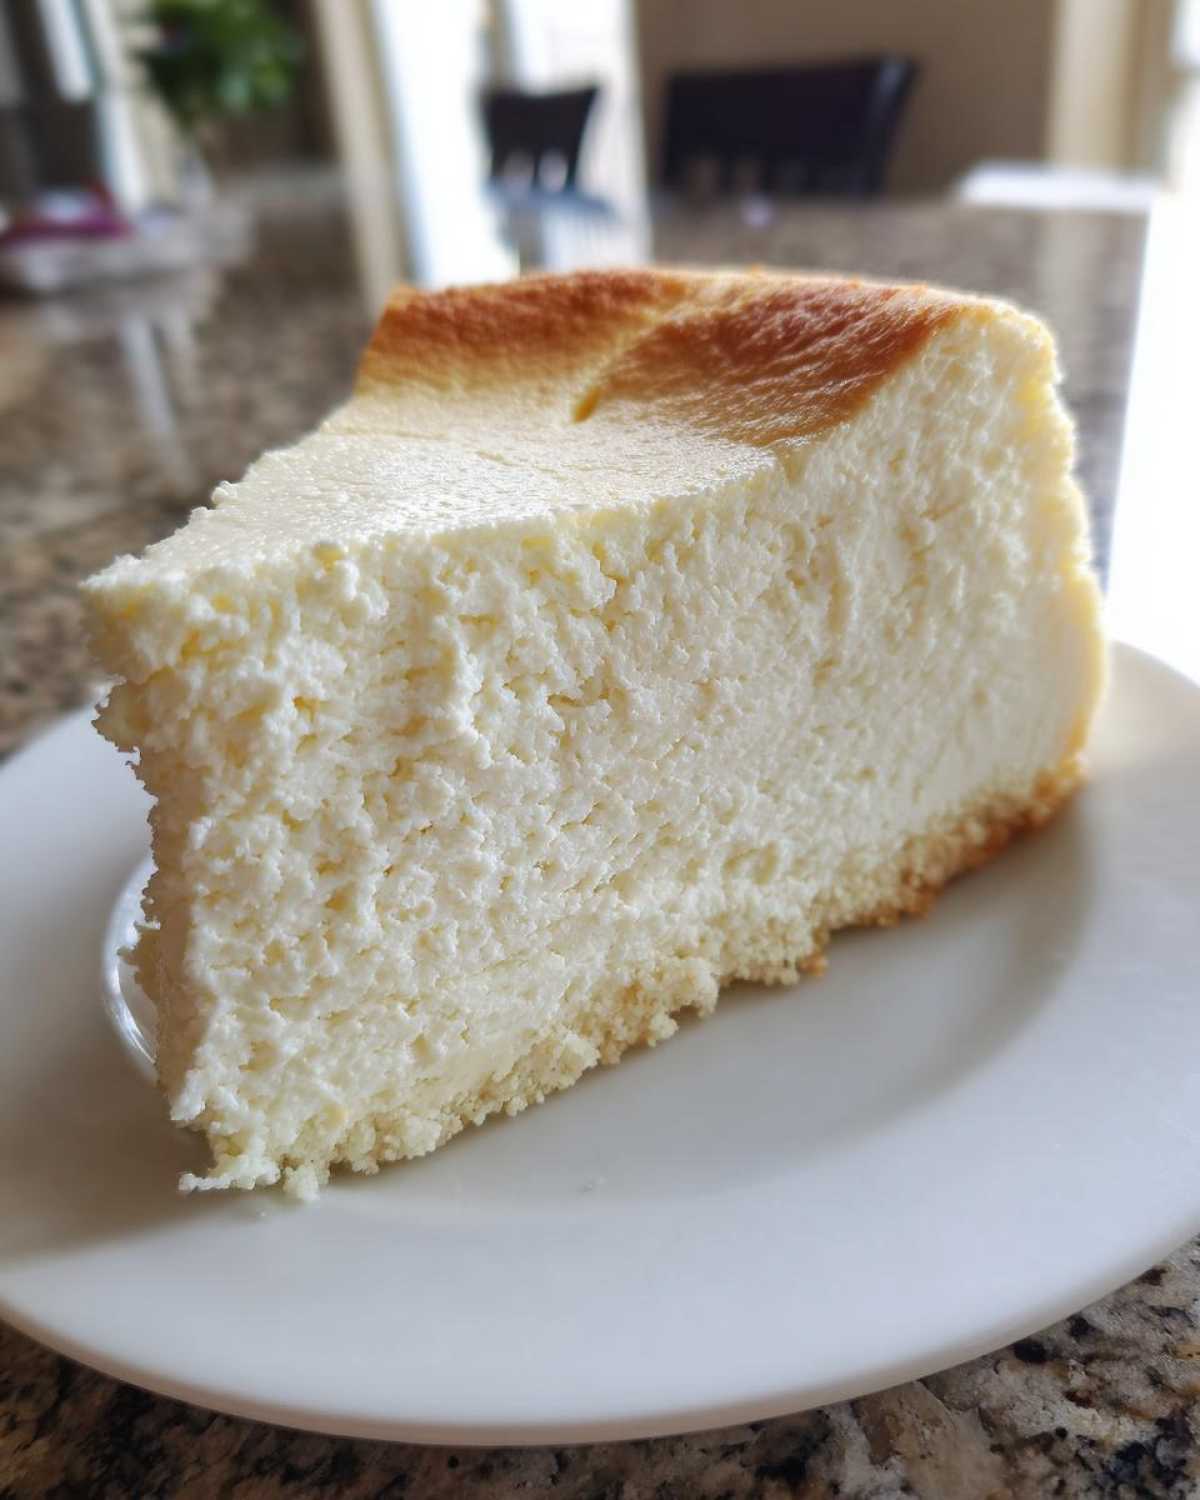
Next, let’s talk about portion control, because we all deserve a treat without stress. If you’re worried about slicing one giant cake perfectly, why not make Mini Protein Cheesecakes instead? Line a standard muffin tin with liners—no greasing needed!—and just divide the batter evenly among 8 to 10 cups. They bake faster too, usually around 20 to 25 minutes. Instant portion control, instant kudos!
Finally, do not rush the chill time. I understand the urge; that aroma filling your kitchen is driving you wild! But this dessert needs that cold hug in the fridge for at least four hours, or overnight if you can manage it. That time allows the protein powders to fully incorporate and the entire structure to firm up beautifully. Enjoying it ice-cold is the absolute best!
Making Variations of This High Protein Dessert
You know how Simon is? He never eats the same plain thing twice! And honestly, that’s the spirit we need in our kitchens. While this Protein Cheesecake recipe is already fantastic, it’s such a great base for experimenting. We are talking about making this recipe your own little masterpiece. The best part about using protein powder is how easily we can swap flavors! If you’re not feeling the vanilla protein, go for chocolate! It turns this into a magnificent, richer High Protein Dessert instantly. Just make sure the amount of dry powder isn’t drastically different, or you might need to check the texture.
If you swap to chocolate protein powder, try adding a teaspoon of instant coffee or espresso powder to the filling—it deepens that chocolate flavor perfectly. You get that satisfying, rich dessert vibe without any guilt!
And toppings! Toppings are where we really earn those extra kudos. Since the cake itself is naturally low in sugar, a little something sweet on top is fantastic. Here are a couple of my favorite ways to dress this baby up:
- Berry Swirl: Mix up a quick, light compote using frozen raspberries or blueberries, maybe just a dash of water and sweetener, and cook it down until it’s thick. Dollop huge spoonfulls right on top of the batter *before* baking. That slight tartness cuts the richness beautifully!
- Lemon Zest Pop: Since we already use lemon juice in the filling, why not add the zest of one whole lemon right into the mix? It brightens the whole flavor profile up immediately. Or, try drizzling a tiny bit of sugar-free lemon glaze (made with lemon juice and powdered erythritol) over the *chilled* cake.
- Nutty Crunch: If you aren’t strictly counting macros, a sprinkle of toasted, chopped pecans or walnuts on top after it’s fully chilled adds the best texture contrast to this smooth cake.
I want everyone to feel like they invented this recipe! If you love pumpkin spice season as much as I do, you seriously have to check out my Keto Pumpkin Cheesecake for another seasonal spin on a similar base. It’s all about adapting that technique you learned here!
Storage and Reheating Instructions for Your Macro Friendly Cheesecake
We made this incredible Protein Cheesecake, and now we have to keep it happy until we want to eat it again! Since this is a baked dessert that relies on that cold, firm setting for the best texture, storage is super simple. You earned this delicious Dessert with High Protein Content, so let’s make sure it tastes just as good on Day Three as it did freshly chilled!
The absolute golden rule here is chilling. We need this thing cold. Once your Macro Friendly Cheesecake has reached that firm, sliceable consistency after its long chill (at least four hours, remember?), that’s when it’s ready to go. You can keep it right in the springform pan if you’re feeling lazy, but make sure you cover the whole thing tightly with plastic wrap first. If you already sliced it, transfer the pieces to an airtight container. It stays fantastic in the fridge for about 5 to 7 days. Every time you pull it out for a little snack, give yourself a huge pat on the back—you deserve that Guilt Free Cheesecake Treat!
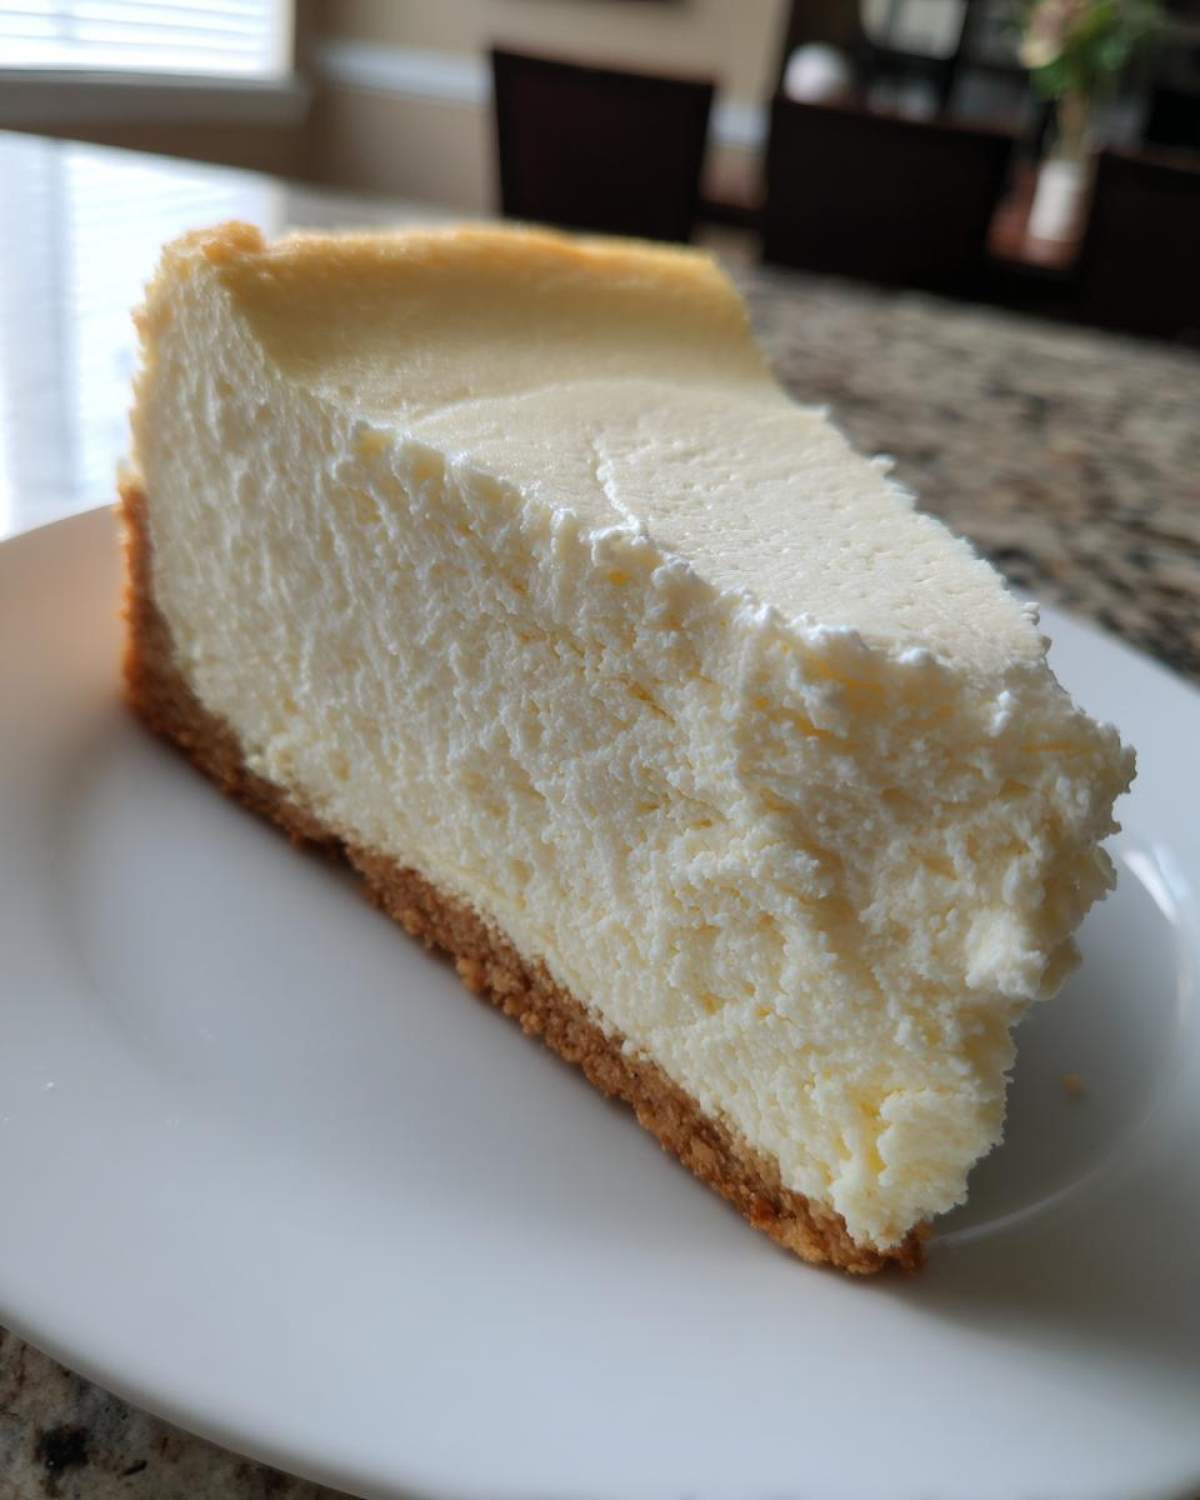
Now, can you reheat it? Technically yes, but honestly, I strongly advise against it for this specific recipe. Reheating a cheesecake, especially one made with yogurt and cottage cheese, usually messes up that gorgeous, creamy texture we worked so hard to achieve in the blender. If you accidentally left a slice out and it warmed up a bit, that’s fine! But if you want that satisfyingly cold, dense bite, keep it chilled. This isn’t like reheating a brownie; this is a cold, creamy moment that should be enjoyed chilled. If you accidentally let a slice get too warm, you can try chilling it again, but I always find a fresh slice is best for the full experience!
Frequently Asked Questions About Protein Cheesecake
I always get so many great questions after I post a new recipe, which tells me you guys are really thinking about how to make these desserts work for your lifestyle! That’s awesome! Simon always cheers when people ask questions because it means they’re engaging with the process. Here are a few things people ask me often about this wonderful Protein Cheesecake recipe.
Can I use whey protein instead of casein in this Protein Cheesecake?
That’s a super common question! Casein protein is fantastic for baking because it absorbs moisture and gives a really dense, thick structure, which is perfect for imitating that classic cheesecake density. If you swap to whey protein, you absolutely *can* still make this—it’s not an issue at all! However, whey tends to be a bit thinner when baked. You might find your final Creamy Protein Dessert is just a tad softer than if you used casein, but honestly, it still tastes delicious!
How do I ensure this remains a Low Calorie Cheesecake?
We designed this recipe specifically to be a Low Calorie Cheesecake treat, so you’re already ahead of the game! The magic here is twofold: first, ditching the heavy cream cheese for low-fat cottage cheese and Greek yogurt. Second, using low-glycemic sweeteners like erythritol instead of traditional sugar. If you stick exactly to the ingredients listed—especially the low-fat dairy and sweetener quantities—you’ll keep that low-calorie count locked in and earn huge kudos!
Is this recipe suitable for a Gluten Free Cheesecake diet?
Yes, absolutely! This is one of the best parts about keeping the crust simple and relying on nut flours. We use almond flour for the base here, which means this recipe is naturally friendly for those needing a Gluten Free Cheesecake option. As long as you double-check that your protein powder doesn’t have any hidden gluten fillers (which is rare, but worth a quick peek!), you should be totally good to go. Enjoy your worry-free indulgence!
If you didn’t find the answer you were looking for, feel free to browse our main recipe index or head over to the contact page. I love hearing from you!
Nutritional Estimate for This Dessert with High Protein Content
Okay, I know for many of us, especially when focusing on fitness goals, the numbers matter almost as much as the taste! Simon always reminds me that while we celebrate the *effort* first, knowing the macros is super motivating. So, here is the estimated nutritional breakdown for one slice of our incredible Protein Cheesecake slice, based on the ingredients listed in the recipe. This is what makes it such a fantastic, Macro Friendly Cheesecake!
Please remember what I wrote in our intro: these figures are based *exactly* on the low-fat and alternative sweetener choices we made. If you swap things out, like using full-fat dairy or swapping sweeteners, your numbers will definitely change. But sticking to this version gives you that amazing 35g protein punch!
- Serving Size: 1 slice
- Calories: 240
- Protein: 35 grams (Can you believe it? KUDOS!)
- Fat: 12 grams
- Carbohydrates: 12 grams
- Sugar: 5 grams
- Fiber: 2 grams
See? Truly a satisfying, high-protein treat that won’t derail your day. Enjoy every bite!
Share Your Kitchen Kudos After Making This Protein Cheesecake
Whew! We did it! We successfully made the creamiest, most satisfying Protein Cheesecake that somehow tastes decadent while totally supporting our fitness journey. Simon is probably already requesting a second slice, and I’m just so proud that you stuck with it!
Now that you’ve conquered this recipe, this is the moment where we stop and give ourselves some serious praise. Seriously! Simon and I started this whole blog because we believe the highest ingredient in any recipe is acknowledgment. So, whether you followed every step perfectly or you had to make a little substitution because you were out of lemon juice—that’s a win! You showed up for yourself and made something delicious.
I’d absolutely love to hear all about it! Did this taste better than you expected for a healthy cheesecake dessert? Did you try one of the flavor variations we talked about? Drop a comment down below and let everyone know how your High Protein Cheesecake Recipe turned out. If you snap a picture of your gorgeous slice—especially if you’re dancing while you eat it like we do—tag us on social media so we can cheer you on!
Your success is what Kitchn Kudos is all about. Thank you for trusting my process, and I can’t wait to see your amazing results!
PrintUltimate Healthy Baked Protein Cheesecake (35g Protein Per Slice)
You deserve a satisfying dessert that supports your fitness goals. This baked protein cheesecake recipe delivers incredible creamy texture using cottage cheese and Greek yogurt, giving you over 35 grams of protein per serving. It is a macro friendly cheesecake you will celebrate making.
- Prep Time: 20 min
- Cook Time: 55 min
- Total Time: 5 hours 15 min
- Yield: 8 servings
- Category: Dessert
- Method: Baking
- Cuisine: American
- Diet: Low Fat
Ingredients
- 1 cup almond flour
- 2 tablespoons erythritol or preferred sweetener
- 4 tablespoons melted coconut oil
- 1 pound low-fat cottage cheese, drained well
- 1 cup plain non-fat Greek yogurt
- 1/2 cup vanilla whey or casein protein powder
- 1/2 cup erythritol or preferred sweetener
- 2 large eggs
- 1 teaspoon vanilla extract
- 1 tablespoon lemon juice
- Pinch of salt
Instructions
- Preheat your oven to 325°F (160°C). Lightly grease a 7-inch springform pan or line it with parchment paper.
- Prepare the crust: In a bowl, mix the almond flour and 2 tablespoons of sweetener. Pour in the melted coconut oil and mix until the crumbs hold together. Press this mixture firmly into the bottom of your prepared pan. Bake the crust for 8 minutes. Remove and let it cool slightly.
- Prepare the filling: In a food processor or high-speed blender, combine the drained cottage cheese and Greek yogurt. Blend until completely smooth, scraping down the sides as needed. This step is key for a creamy texture.
- Add the protein powder, 1/2 cup sweetener, eggs, vanilla extract, lemon juice, and salt to the food processor. Blend until the mixture is perfectly smooth and creamy. Do not overmix once the eggs are added; just blend until incorporated.
- Pour the filling over the cooled crust in the springform pan. Gently tap the pan on the counter a few times to release any large air bubbles.
- Bake for 45 to 55 minutes. The edges should look set, but the center should still have a slight wobble.
- Turn off the oven, crack the door open slightly, and let the cheesecake cool inside the oven for 1 hour. This slow cooling prevents cracking.
- Remove the cheesecake from the oven and let it cool completely on a wire rack. Once cool, cover it and refrigerate for at least 4 hours, or preferably overnight, before slicing.
- Slice and serve your high protein dessert. Give yourself some kudos for making this!
Notes
- For the creamiest texture, make sure you drain your cottage cheese very well before blending. Pressing it between paper towels works well.
- If you prefer a no-bake version, skip the crust baking step and chill the filling for at least 6 hours until firm.
- You can easily make mini protein cheesecakes by lining a muffin tin with paper liners and dividing the batter among 8-10 cups. Adjust baking time to about 20-25 minutes.
- This recipe is naturally low in sugar, making it a great sugar free protein dessert option.
Nutrition
- Serving Size: 1 slice
- Calories: 240
- Sugar: 5
- Sodium: 250
- Fat: 12
- Saturated Fat: 6
- Unsaturated Fat: 6
- Trans Fat: 0
- Carbohydrates: 12
- Fiber: 2
- Protein: 35
- Cholesterol: 60