

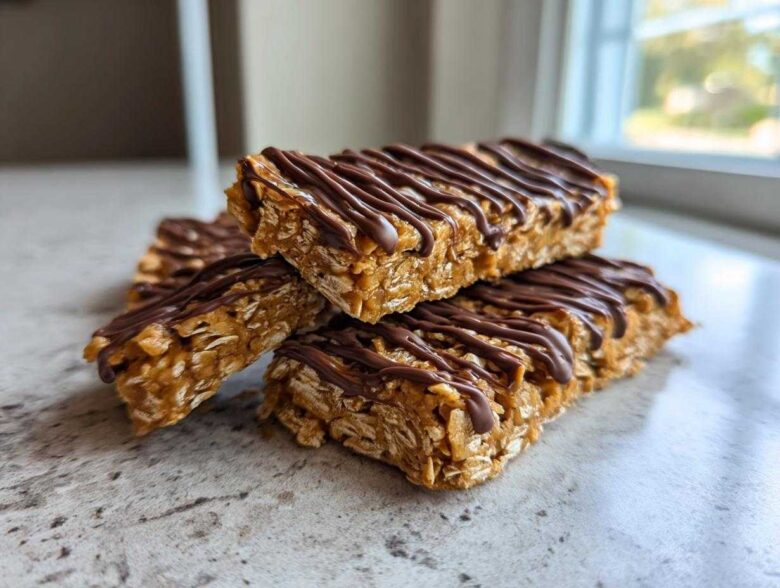
Let’s be honest, store-bought protein bars are usually a letdown, right? They promise the world but end up tasting like cardboard that someone tried to mold into a chocolate flavor. I spent years forcing myself through those chalky things just to hit my protein goals. But that stops right here! Simon always says that if a recipe isn’t fun to make—and if the result doesn’t make you happily sigh—what’s the point? These Easy No-Bake 5-Ingredient Peanut Butter Protein Bars are a total win. They’re so simple, even if you just mash everything together haphazardly, Simon would still give you major kudos for showing up. Trust me, these are the best homemade protein bars you’ll ever taste, no oven required!
Why You Will Applaud These Easy No-Bake Protein Bars
I know you’re busy, and honestly, who has time to wait for an oven to preheat just to dry out a snack bar? That’s why I love these so much. When Simon sees me pulling out just a few bowls, he knows we’re going to have quick, delicious fuel ready before supper. These aren’t just good for you; they are genuinely satisfying, and that’s the real win here!
- They taste like a decadent dessert but fuel you like a powerhouse snack.
- The texture is perfectly chewy—not dusty or crumbly like those cardboard bricks from the store.
- They fit cleanly into any busy schedule, which means more time for kitchen dancing!
Five Ingredients for Perfect Protein Bars
Can you believe it? We only need five main things to make these stellar **protein bars**! Peanut butter, oats, protein powder, a sweetener, and chocolate. That’s it! Think how much money you save compared to buying specialty bars every week. It’s such an easy way to keep your pantry stocked with high-quality fuel without breaking the bank.
No Oven Required for These Protein Bars
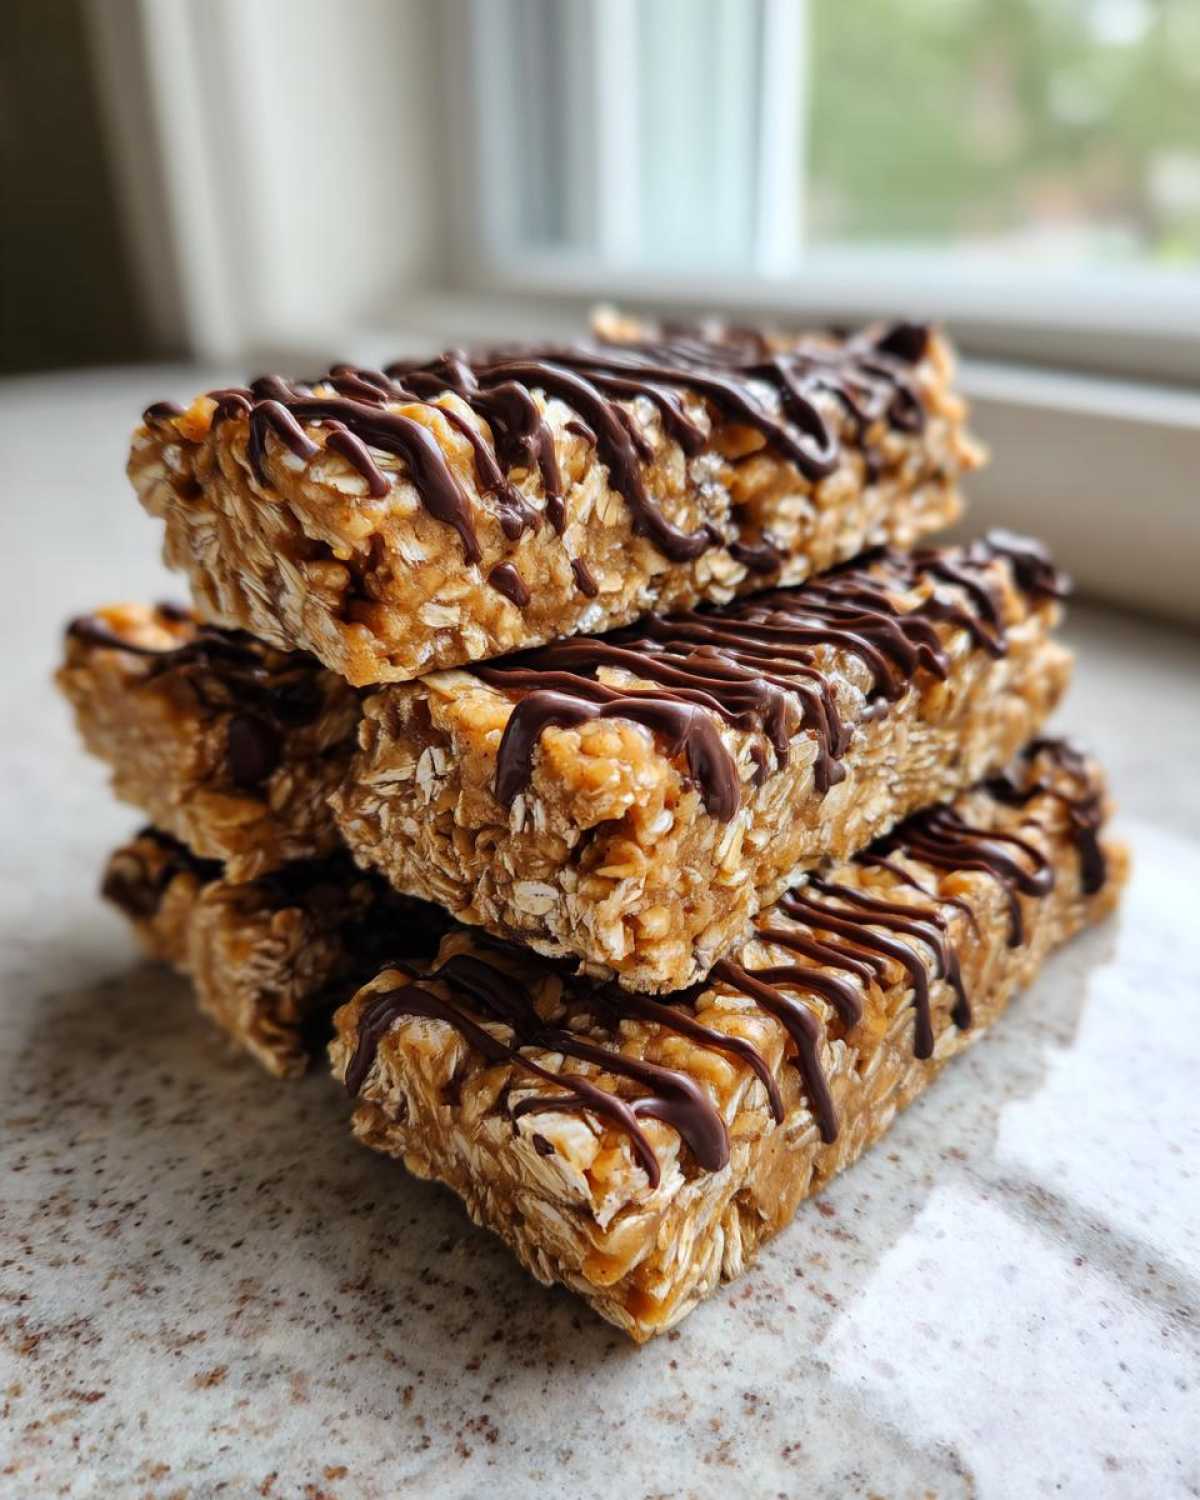
This is my favorite part! We skip the oven entirely. You just mix everything up until it feels like thick cookie dough, press it into a pan, and let the fridge do the heavy lifting while you go watch TV or, better yet, dance around the kitchen. This super simple mix-and-chill method is why these **protein bars** are perfect for beginners. Zero heating means less stress!
Gather Your Ingredients for Homemade Protein Bars
Alright, let’s get organized! Simon always says that the first step (getting everything ready) is half the battle won, especially when we’re making something quick like these **homemade protein bars**. Lay everything out—it makes the mixing part feel even faster. Since we’re only using five core items, there aren’t too many things to track down, which is great for those days when you just need a win. If you’re looking for another easy snack that uses a similar binding concept, you should check out my go-to recipe for peanut butter pretzel bark!
For these **peanut butter protein bars**, you’re going to need:
- One whole cup of creamy peanut butter. Get the smooth stuff; it binds the best!
- Half a cup of your favorite protein powder. I use vanilla, but unflavored works great too so the peanut butter really shines.
- Half a cup of rolled oats. We aren’t making crunchy granola bars, just chewy ones!
- A quarter cup of honey or maple syrup. This is our glue!
- And just a quarter cup of dark chocolate chips for that beautiful, tempting drizzle on top.
Trust me, assembling these few simple items really sets us up for success. If you already keep these staples around, you’re halfway to having amazing **simple homemade snacks** ready for the week. Before we dive in, take a peek at a few notes I’ve gathered on ingredients—they really do make a difference with these **no bake protein bars**.
Ingredient Notes and Substitutions for Your Protein Bars
Since we aren’t baking, what you put in is exactly what you get out, so don’t be afraid to tweak slightly, but know your ingredients matter! If you’re aiming for a purely plant-based snack, just swap the honey for maple syrup—easy swap, no drama there. If you use maple syrup in place of honey, remember that maple syrup is a little runnier, so you might need to add a tiny sprinkle more of your protein powder just to keep that perfect dough consistency.
Also, think about your powder! If you use a whey that tends to be super absorbent, your **protein bars** mix might get stiff quickly. That’s why I always say to keep an extra teaspoon of water or milk nearby, just in case. It’s all about listening to the dough. If you’re curious about other ingredients that mix well with this base, check out some of my favorites for different kinds of protein bar ingredient ideas, but for this go-to recipe, keep it simple! I love how pairing this peanut butter base with just a few things lets the quality shine through.
Step-by-Step Instructions to Make Your Protein Bars
Okay, this is where the magic happens, but don’t stress about precision here—Simon would never let you stress over a simple mix! We are moving from ingredients to actual, tangible, awesome **protein bars**. Since we aren’t using the oven, prep work is key. First things first, line your 8×8 pan with parchment paper, making sure you leave some overhang on the sides. That parchment is your best friend for getting these out in one beautiful slab later. If you’ve ever struggled getting a mixture clean out of a pan, you know I’m talking about future kudos right there! For more quick, no-bake joys, you absolutely have to try out my recipe for chewy no-bake granola bars!
Mixing the Dough for Chewy Protein Bars
Grab your big mixing bowl! Toss in your peanut butter, protein powder, oats, and your drizzle of honey or maple syrup. Now, start mixing. At first, it will look crumbly, and you might think, “Oh no, Alice, it’s too dry!” Wait! Keep going. Seriously, you’re going to need to ditch the spoon and get your hands in there. Squish it together until it starts forming this thick, uniform, marvelous dough. It should feel tacky, like a really good playdough. If it’s still too dry after squishing for a minute, *then* add a tiny splash of water, but usually, the peanut butter is enough to bring it all together for the perfect **protein bars** consistency.
Chilling and Cutting Your No Bake Protein Bars
Once you have that beautiful thick dough, press it down into your prepared pan. And I mean *press*! Use the bottom of a flat glass or just your knuckles to really compact it down evenly. We want these **no bake protein bars** to be solid, not flaky. After we drizzle that melted chocolate on top (which is totally optional but highly encouraged), these babies go straight into the fridge. You must, must, must let them chill for a minimum of two hours. If you try to cut them sooner, they’ll crumble all over your counter, and that’s a moment that deserves zero kudos. Patience pays off—two hours later, you lift out a perfect block and cut them into ten glorious, satisfying bars!
Tips for Perfecting Your Homemade Protein Bars
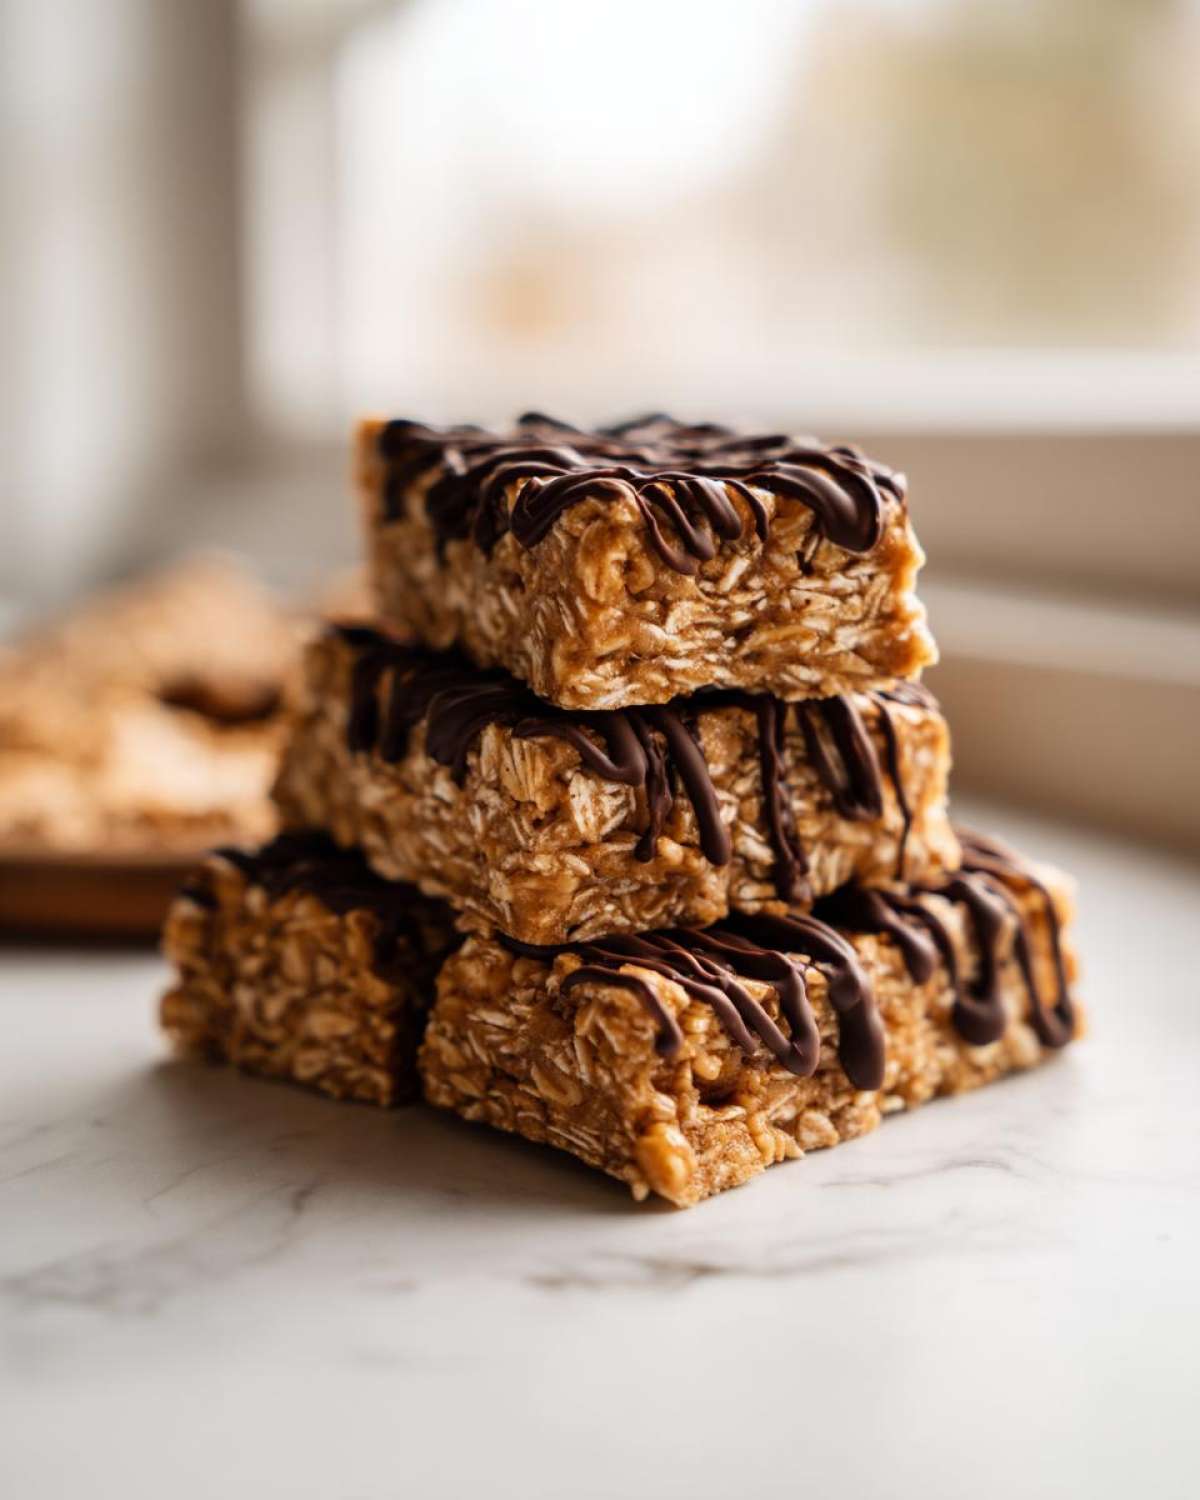
Even though these are super simple **protein bars**, Simon always insists on a little extra finesse at the end. He says that polishing the simple things is what separates a snack from a *moment*. You’ve already done the hard part by mixing it all together, so let’s nail the presentation and the texture so these truly become the **best tasting protein bars** you’ve ever made at home. Don’t skimp on the pressing step—that’s key to them holding up later!
Here are the little things I picked up from watching Simon celebrate his successes:
- Press Like You Mean It: When you put the dough into the pan, you need serious compression. Don’t just smooth it out; press it down hard with a slightly damp spatula or the back of a heavy measuring cup. This eliminates air pockets we don’t need and makes a dense, satisfying bar. We want chewiness, not airiness!
- The Chocolate Drizzle Trick: If you’re adding that chocolate topping, melt it slowly. If you use the microwave, zap it for 20 seconds, stir vigorously, then 15 more seconds. If you rush melting chocolate, it gets grainy, and we want that drizzle looking shiny and smooth, not dull and streaky. Pour it over the chilled block right before the final chill—that way, the chocolate sets up fast and firm.
- Use Cold Hands (If Kneading): If you find your peanut butter mixture is super sticky during the kneading phase, dunk your hands in cold water for a second, shake them off, and then start mixing. The cold temp won’t melt the peanut butter, and it makes handling the dough much cleaner. It slows down the melting, which helps you control the mix perfectly for these **healthy snack bars**.
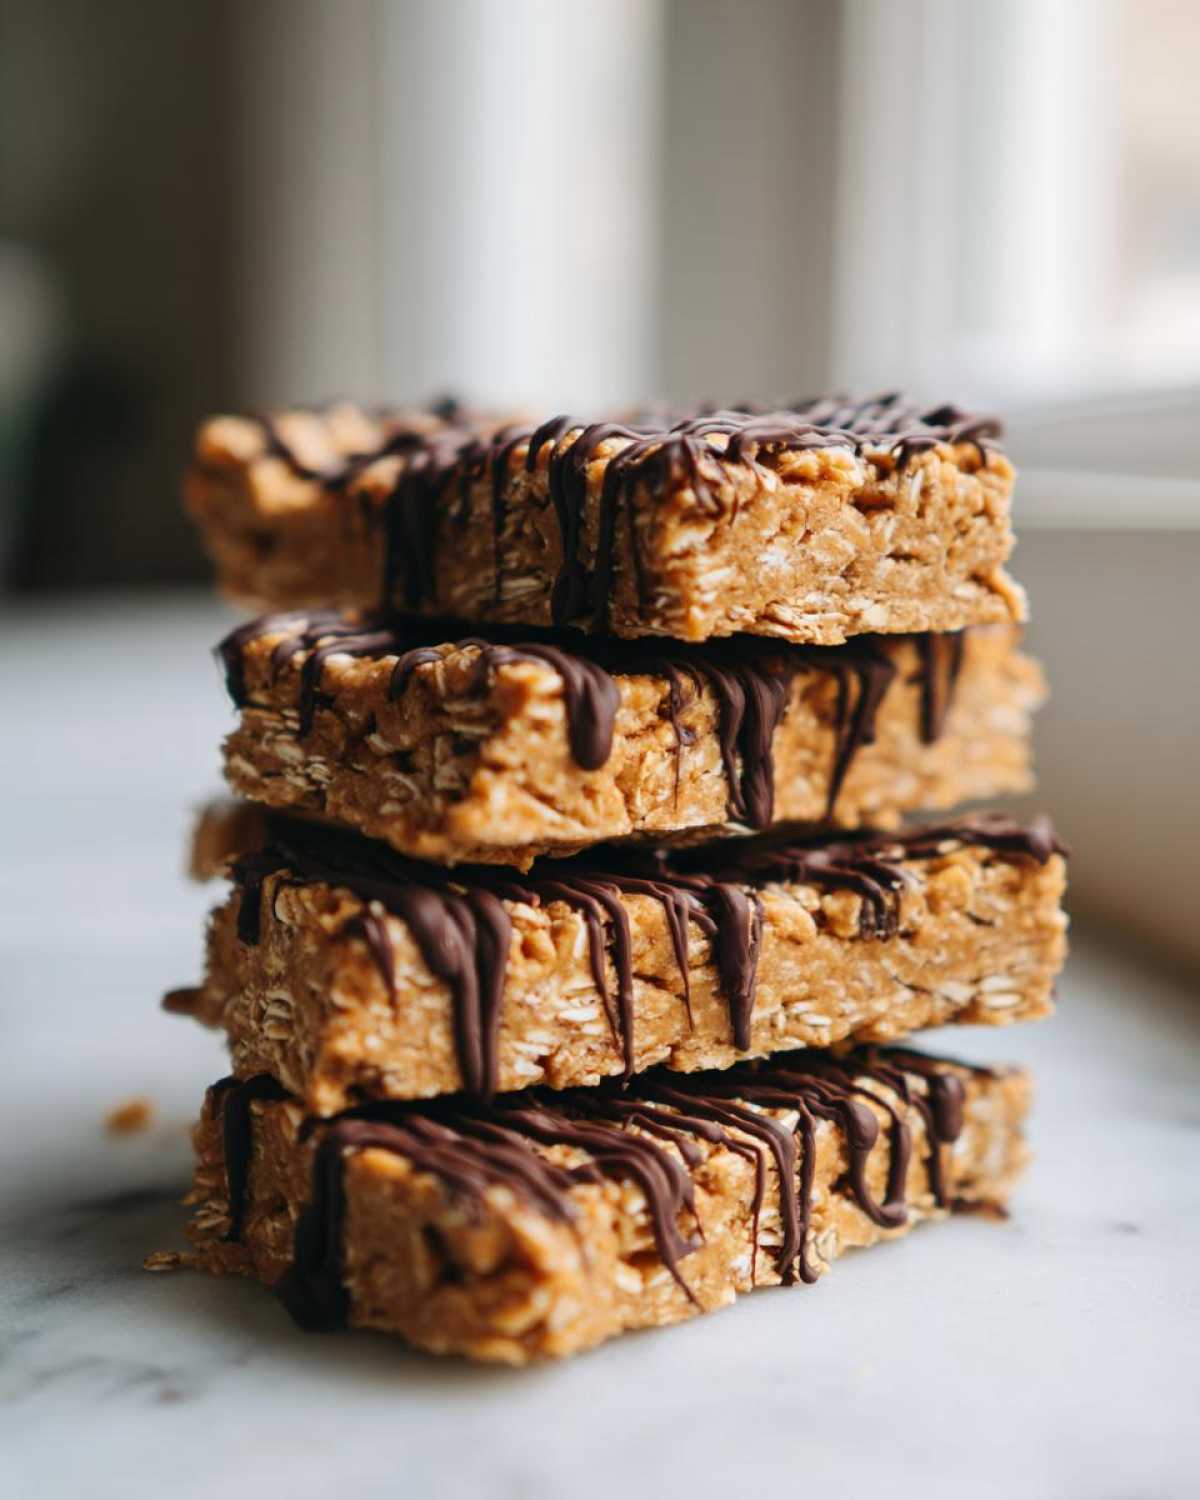
If you follow those small steps, you’ll be giving yourself a huge round of applause (and maybe a little dance break, Simon-style) when you cut into those perfectly set **protein bars**. If you want to see another example of how a simple base can be transformed, check out my guide on the perfect easy protein bar recipe fundamentals!
Storage and Make Ahead for Meal Prep Protein Bars
This is where these **protein bars** truly earn their stripes! If you made these beauties and didn’t immediately devour them all (which, trust me, is a struggle), they are fantastic for keeping on hand. Remember how I mentioned they taste best cold? That means they are tailor-made for your weekly meal prep session.
We want these to stay firm, chewy, and ready to grab when that 3 PM slump hits. The best place for them is definitely the refrigerator. You need an airtight container, of course. Once they are fully chilled and cut, layer them between small squares of parchment paper before putting them in the container. This stops the chocolate drizzle from sticking to the bar underneath it, which keeps that pretty topping intact!
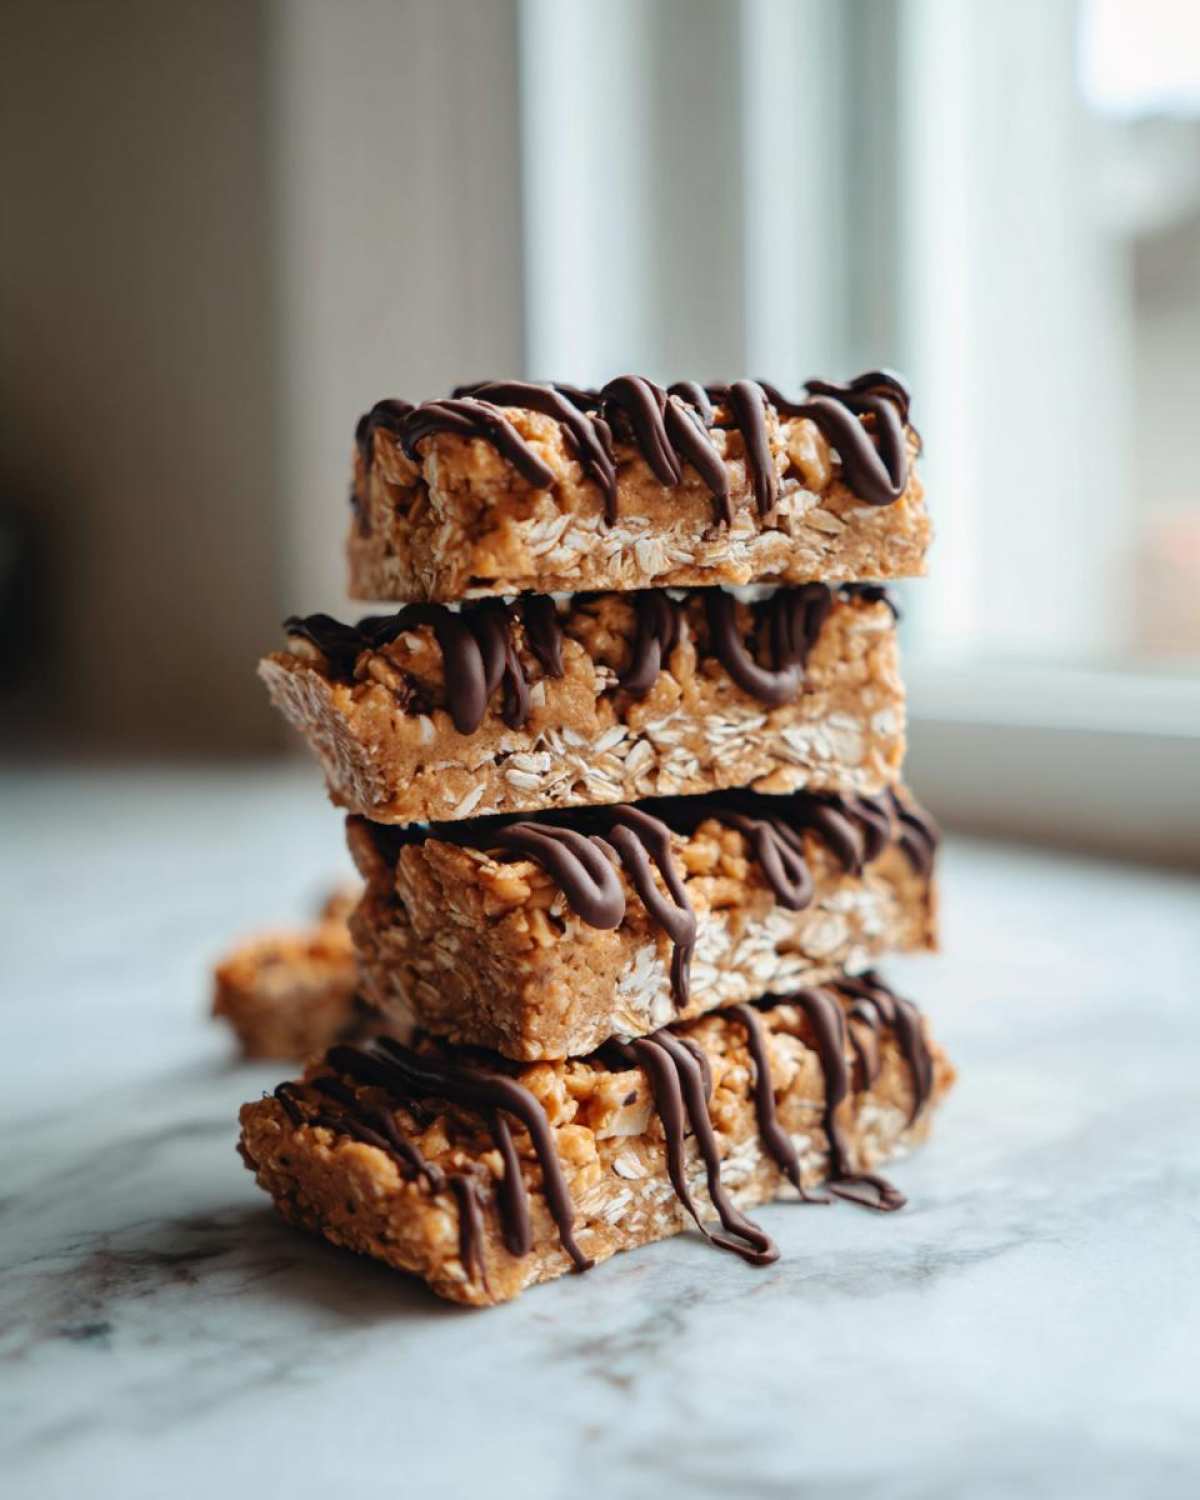
I’ve had success keeping these **meal prep bars** perfectly fine for over a week in the fridge, though honestly, they rarely last that long around our house. They keep their texture so well because there’s no moisture lost to evaporation like you get with baked goods. If you’re getting serious about cooking ahead for the week, you might want to look at how I prep my breakfast, too—these peanut butter bars pair wonderfully next to my easy egg muffins!
You *can* freeze them, too, if you’re making a huge batch! Just wrap individual bars well in plastic wrap or put them in a freezer bag, and they’ll last for a few months. When you want one, just pull it out and let it thaw on the counter for about 10 minutes, and it’s just as good as the day you made it. See? We made a delicious snack that’s also incredibly practical. That’s a double high-five moment right there!
Variations on These Simple Homemade Snacks
I know five ingredients is beautiful in its simplicity, but sometimes we get a little adventurous, right? That’s the fun part of making **homemade protein bars**—you’re the boss of the kitchen! Since this recipe is just four binding agents plus chocolate, it’s really forgiving when you want to switch things up. Simon is always trying to sneak in extra things, usually nuts, but I try to keep the ingredient count low to keep the cost down and the prep fast.
If you’re ready to experiment a little bit, here are a few simple swaps that will still result in fantastic flavors and keep these firmly in the ‘chewy’ category:
- Swap Out the Nut Butter: Peanut butter is classic, and frankly, it’s delicious, but you can absolutely use almond butter or cashew butter instead. Almond butter will give you a slightly milder, sweeter profile. Just be warned: if you use a very natural, oily nut butter, you might need that extra teaspoon of protein powder we talked about earlier to keep things from getting too greasy.
- Get Nut-Free: If you need these to be nut-free friendly (**gluten free protein bars** are often nut-free, too, depending on your powder!), sunflower seed butter is a brilliant substitute. It has a strong flavor, so maybe cut back on the sweetener slightly, as seed butters can sometimes be less sweet than peanut butter.
- Flavored Protein Powder Fun: If you grabbed a chocolate protein powder instead of vanilla, you are automatically upgrading this to a true **chocolate protein bars no bake** situation! You might want to skip the chocolate drizzle on top, too, unless you want a double-chocolate hit. Or, maybe use a vanilla powder but add in a teaspoon of cocoa powder to the dry mix to deepen the chocolate flavor of the base itself.
- Add Fiber and Texture: For a little nutritional boost that keeps things chewy, toss in one or two tablespoons of ground flaxseed or chia seeds along with the oats. It blends right in, and you get those extra healthy fats and fiber without even trying. It’s a great way to feel good about eating something so tasty!
Honestly, the options are endless once you realize this base works so well. If you want to dig deeper into all the fun things you can mix into these bars, I put together a whole cheat sheet of ideas over at my post on protein bar ingredient ideas. Go ahead, try that almond butter—I bet Simon will give you a standing ovation for your creativity!
Frequently Asked Questions About Making Protein Bars
I hear you! When you’re trying out a new **easy protein bar recipe**, especially one that’s **no bake**, it’s natural to have questions pop up. We want every batch to be a success so you can keep giving yourself those kudos! I tried to keep these **protein bars for beginners** as straightforward as possible, but sometimes ingredient swaps lead to minor texture wobbles. Don’t sweat it! Here are the common things people ask so your next batch is absolutely perfect.
Can I use a different nut butter in these protein bars?
You absolutely can! That’s the beauty of **simple homemade snacks**. If you use a natural, oily nut butter—the kind where the oil separates on top in the jar—you might notice your dough feels a little looser than advertised. That’s because natural nut butter tends to be thinner than processed stuff like Jif or Skippy. If it feels too runny to press into a bar, just add an extra teaspoon or two of oat flour (just finely ground oats) or protein powder until you get that nice, thick dough we’re looking for. If you use almond butter, the flavor is way milder, which is nice, but make sure you press hard during the setup!
How do I make these low sugar protein bars?
That’s a great question, especially if these are going into your regular meal prep rotation! Honey and maple syrup are natural sugars, but they still count. If you need to drop the sugar count without sacrificing the ‘stickiness’ that acts as our binder, you have a couple of great options. You can use a zero-calorie liquid sweetener like monk fruit drops or stevia mixed into a thicker carrier, like unsweetened applesauce, to replace the honey volume. Or, if you’re using a protein powder that is already sweetened with something like erythritol, you might only need half the amount of honey listed, so taste test before you commit! You want them sweet enough to satisfy that craving but low enough to fit your goals.
For all the best tips on customizing and troubleshooting your very first attempts at making **homemade protein bars**, I pulled together a comprehensive little guide over here! Check out my beginner’s guide to protein bars—it covers why texture changes happen and how an encouraging mindset helps!
Estimated Nutritional Information for These Protein Bars
Now, this is the part where Simon usually leans over my shoulder and says, “Alice, remember to tell them it’s just an estimate!” And he’s totally right. Since we aren’t using a lab, these numbers are based on the standard values for ingredients like creamy peanut butter and whey protein powder. But look at that protein count! These are fantastic **high protein recipes** that actually taste good!
This information breaks down the numbers for one single, glorious bar, assuming you cut the batch into 10 even servings:
- Serving Size: 1 amazing bar
- Calories: Right around 220—perfect for a controlled snack!
- Protein: 12 grams! That’s a solid win right there.
- Sugar: Only about 8 grams, which is way better controlled than most store-bought options.
- Fat: Around 13 grams, mostly the good stuff from the peanut butter and oats.
- Carbohydrates: 18 grams total, with 2 grams of that being lovely dietary fiber.
See? Everything is nicely balanced for sustained energy. It’s clear why these **homemade protein bars** are so much better than the candy bars disguised as fitness fuel you buy at the checkout line. Enjoy knowing exactly what you’re putting into your body!
Share Your Kitchen Kudos on These Peanut Butter Protein Bars
Well, you did it! You conquered the craving, mastered the mix, and now you’re holding genuinely delicious, homemade **protein bars**! Seriously, give yourself a massive high-five, maybe even a little embarrassing kitchen dance—Simon would definitely be proud of your effort. This recipe was all about proving that healthy snacking doesn’t need complicated steps or a laundry list of ingredients; it just needs a little intentional effort.
I hope these **peanut butter protein bars** become a permanent fixture in your meal prep rotation. They are just so satisfying, and knowing exactly what went into them makes them taste a hundred times better than anything you find pre-packaged. We created Kitchn Kudos so you stop stressing and start seeing every dish, even a five-ingredient snack, as a victory worth celebrating.
Now, the best part: telling us about your success! Head over to the comments below and let me know how they turned out. Did you use dark chocolate or milk? Did you add flaxseed? Don’t keep your wins quiet—we want to hear about them!
If you made these **easy protein bar recipe** bars and they brought a moment of joy to your routine, please leave a rating. And if you ever want to reach out with questions or just generally share your kitchen triumphs, you can always get in touch with us over on the contact page! Happy snacking, and keep those kudos coming!
PrintEasy No-Bake 5-Ingredient Peanut Butter Protein Bars
Make these simple, no-bake protein bars using just five ingredients. They are chewy, satisfying, and perfect for quick meal prep or a healthy on-the-go snack.
- Prep Time: 10 min
- Cook Time: 0 min
- Total Time: 2 hr 10 min
- Yield: 10 servings
- Category: Snack
- Method: No-Bake
- Cuisine: American
- Diet: Vegetarian
Ingredients
- 1 cup creamy peanut butter
- 1/2 cup vanilla or unflavored protein powder
- 1/2 cup rolled oats
- 1/4 cup honey or maple syrup
- 1/4 cup dark chocolate chips (for topping)
Instructions
- Line an 8×8 inch baking pan with parchment paper, leaving an overhang on the sides for easy removal.
- In a medium bowl, combine the peanut butter, protein powder, rolled oats, and honey or maple syrup.
- Mix all ingredients thoroughly until a thick, uniform dough forms. You may need to use your hands to fully incorporate everything.
- Press the mixture evenly into the prepared pan. Press down firmly to make sure the bars hold together well.
- Melt the chocolate chips in a microwave-safe bowl in 30-second intervals, stirring until smooth.
- Drizzle the melted chocolate over the top of the bar mixture.
- Place the pan in the refrigerator and chill for at least 2 hours, or until completely firm.
- Use the parchment overhang to lift the block out of the pan. Cut into 10 even bars.
- Store your homemade protein bars in an airtight container in the refrigerator.
Notes
- For a vegan option, use maple syrup instead of honey and ensure your protein powder is plant-based.
- If the mixture seems too dry, add one teaspoon of water or milk at a time until it binds.
- These bars taste best when kept cold, making them excellent for your next meal prep session.
Nutrition
- Serving Size: 1 bar
- Calories: 220
- Sugar: 8
- Sodium: 110
- Fat: 13
- Saturated Fat: 3
- Unsaturated Fat: 10
- Trans Fat: 0
- Carbohydrates: 18
- Fiber: 2
- Protein: 12
- Cholesterol: 0