

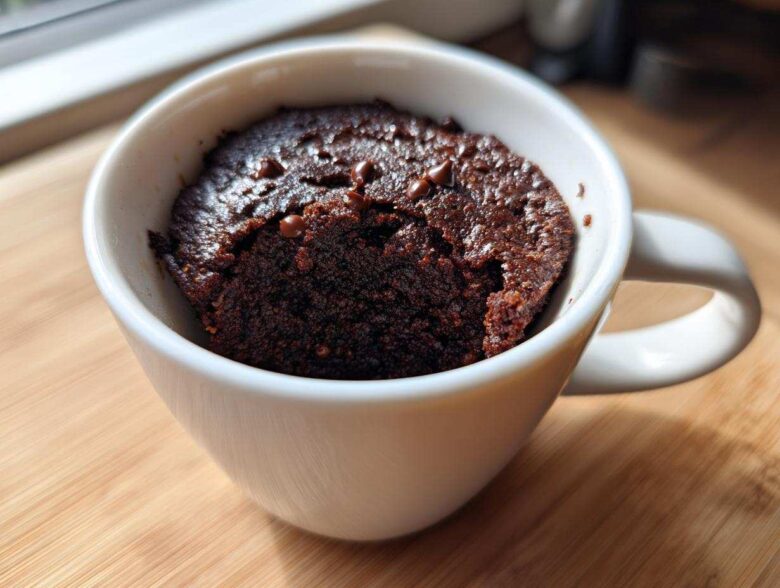
You know those moments, right? It’s 9 PM, you’ve crushed your workout, or maybe you just stared at your pantry and realized you needed chocolate right now, but you absolutely cannot wait for an oven to preheat. I live for those frantic, healthy sweet cravings! That’s why I spent ages perfecting this ultimate **Cottage Cheese Microwave Brownie**. Seriously, this tiny, fudgy powerhouse is my absolute go-to when I need a guilt-free fix.
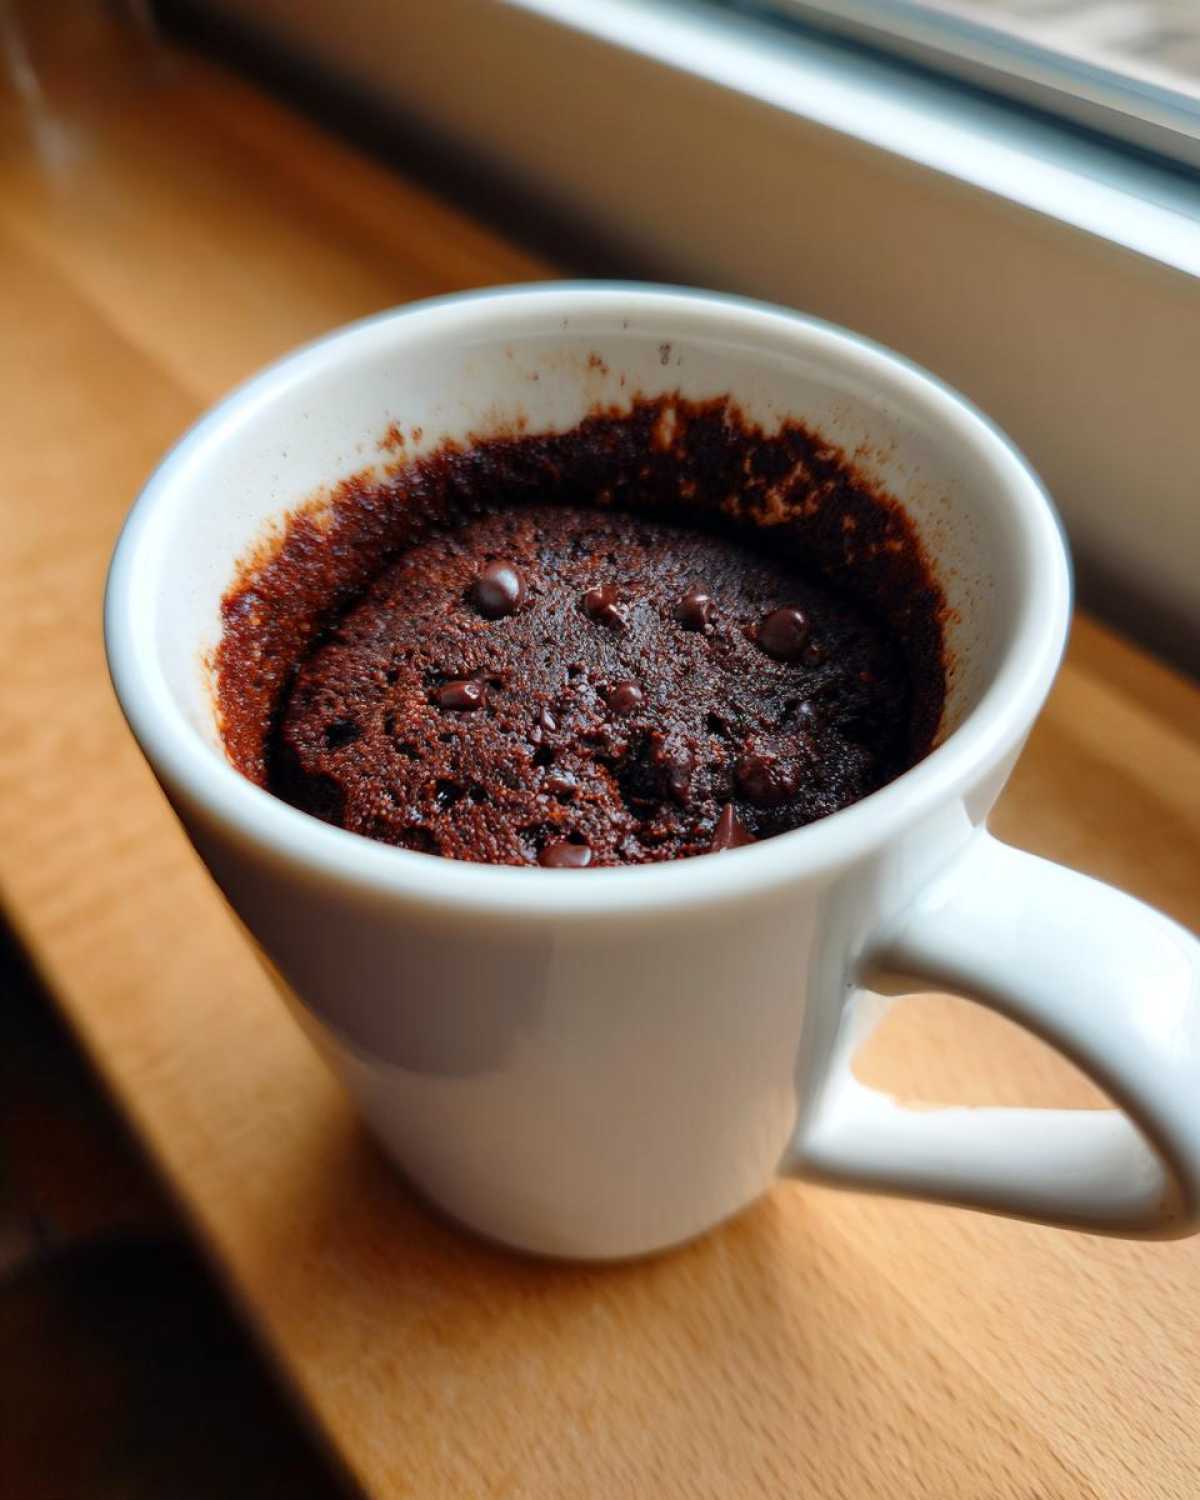
Forget dry, rubbery mug cakes. I’m talking about a genuinely moist, protein-rich dessert you make in under five minutes. I’ve swapped out mountains of sugar and butter for simple ingredients that give you amazing results. After baking everything from layered tortes to massive sheet cakes, trust me, the easiest cheats are usually the best ones we keep coming back to. This recipe is the queen of those.
If you want to see some of my other fast breakfast swaps, I always keep a running list of great kitchen ideas over at my main recipe page. But for now, let’s get this chocolate magic happening!
Why This Cottage Cheese Microwave Brownie Recipe Works (High Protein Single Serve Dessert)
When I first tried making a microwave brownie, I braced myself for disappointment. Usually, they turn out like sad sponges, right? Not this one! This recipe transforms into a phenomenal **High Protein Single Serve Dessert** because the cottage cheese is sneaky—it packs in that protein without tasting sour or weird.
It’s just the perfect solution when you need a **2 Minute Chocolate Fix** without derailing your macros. Honestly, it’s the best healthy baking microwave trick I’ve learned.
- Speed: Done in under five minutes total. Seriously, no excuses!
- Protein Power: We’re hitting 18 grams of protein, which keeps you full and satisfies that sweet tooth.
- Texture Guarantee: It comes out perfectly moist every single time.
- Low Fuss: Everything goes into one mug. Cleanup is basically non-existent!
If you are loving these protein hacks, you should check out my high-protein breakfast burritos for an even bigger protein boost earlier in the day!
Achieving Fudgy Texture with Cottage Cheese
This is the magic part! People worry that cottage cheese will make the brownie grainy, but that’s why you *have* to blend it first. Once smooth, that creamy base acts like a secret weapon, replacing a lot of the standard butter or oil. It keeps the batter incredibly moist, meaning when the microwave hits it, you get a dense, almost molten center. It’s the key to that satisfying, fudgy result we all crave in a brownie.
Essential Ingredients for Your Cottage Cheese Microwave Brownie
Okay, gathering your stuff for this **Cottage Cheese Microwave Brownie Recipe** is half the battle, and it’s super simple. The recipe relies on packing flavor and texture into just a few things. You’ll need a quarter cup of cottage cheese, and please, listen to me: it has to be blended smooth first! Then we add one large egg, one tablespoon of unsweetened cocoa powder for that deep chocolate flavor, and one tablespoon of sweetener.
To keep this light and give it structure, we use only one teaspoon of coconut flour, or maybe some almond flour if we’re being extra strict. A tiny splash of vanilla extract and just a pinch of salt to make the chocolate pop finishes the main base. Oh, and don’t forget the optional chocolate chips if you want those melty pockets!
Ingredient Notes and Substitutions for Low Carb Cottage Cheese Dessert
The most important thing here is that cottage cheese blending step—if it’s lumpy, your brownie will be too! For my friends trying to keep this a **Low Carb Cottage Cheese Dessert**, skip the maple syrup and use granular erythritol or monk fruit sweetener instead. That’s the easiest swap. If you’re aiming for a true Keto Friendly Cottage Cheese Dessert, you must use almond flour instead of coconut flour; coconut flour can sometimes dry things out a little too much when using zero-carb sweeteners.
Also, a fun little trick: a teaspoon of those sugar-free chocolate chips on top before microwaving makes it look professional. Trust me, you won’t even miss the full-sized version!
Step-by-Step Instructions for the Microwave Brownie Hack
This is where the speed of the **Microwave Brownie Hack** really shines! You want to move fast, but accurately. First things first: if your cottage cheese looks lumpy, stop everything and blend it until it’s totally smooth in a small bowl or using a small immersion blender. This prevents any grainy surprises later, which is key! Check out some other quick baking articles I’ve written over at my main recipe page!
Next, grab your favorite microwave-safe mug—one that’s about 8-10 ounces works best for a nice rise. Dump in that smooth cottage cheese, the egg, cocoa powder, your sweetener, coconut flour, vanilla, and a tiny pinch of salt. Whisk it all together until you have a beautiful, uniform chocolate batter. If you’re adding those chips, stir them in now. Don’t overmix, just combine until the streaks disappear!
Crucial Timing for the Perfect Cottage Cheese Microwave Brownie
Microwave timing is everything, and every machine lies differently! Start low. Pop it in on high power for 60 seconds exactly. I usually check it then. You’re looking for the center to look mostly set, but still shiny and moist. If it needs more time to cook, only add 10-second bursts after that initial minute. Overcooking is the death of fudginess!
After it comes out, resist the urge to dive in! Let it cool in the mug for a full minute—this lets the residual heat finish setting the edges perfectly. That 60-second rest makes all the difference.
Tips for Success with Your Quick Healthy Chocolate Treat
When you nail this recipe, you end up with the most satisfying **Quick Healthy Chocolate Treat** imaginable. But I want to make sure you avoid the two most common pitfalls I struggled with early on. First is the texture again: if you want extra fudgy goodness, slightly undercook it! Seriously, pull it when it still looks a *fraction* wet in the dead center; it solidifies beautifully as it rests outside the microwave.
Second, don’t skimp on the salt! Even if you think you only need the tiniest pinch, the salt is crucial for balancing the flavor, especially if you used a zero-calorie sweetener. It pulls all that deep cocoa flavor forward. I know I’ve got a huge repository of all my favorite quick recipes on my blog homepage if you ever need another speedy kitchen idea. Just remember the timing is your best friend here!
Making a Gluten Free Microwave Brownie Variation
Lots of folks ask about keeping this absolutely clean, and I’m happy to report it’s super easy to make a **Gluten Free Microwave Brownie**! If you’re avoiding wheat, the substitution is simple: just swap that one teaspoon of coconut flour for almond flour. That’s it! You don’t have to change anything else in the recipe.
The texture is barely different, too. Almond flour tends to make things just a tiny bit softer or denser than coconut flour, but because this recipe is so small and relies so much on the egg and cottage cheese for structure, you genuinely won’t notice a huge change. It’s still rich and fudgy, just totally gluten-free!
Serving Suggestions for This Fudgy Microwave Dessert
Now that you’ve pulled that perfect, warm, **Fudgy Microwave Dessert** out of the mug, you have to finish it, right? Presentation matters, even for a 2-minute treat! I try to keep the toppings just as quick as the brownie itself. My absolute favorite way to dress this up is with just a little dusting of unsweetened cocoa powder right on top. It makes it look professional!
If you want something sweeter, a drizzle of zero-calorie maple syrup works wonders. Or, if you have a couple of minutes, toss a few fresh raspberries or sliced strawberries on top—the tartness cuts through the rich chocolate so well. I sometimes even add a tiny dollop of plain Greek yogurt for an extra protein kick. If you’re looking for other quick, sweet ways to incorporate fruit, check out my apple pie smoothie recipe for inspiration!
Storage and Reheating Instructions for Your Cottage Cheese Microwave Brownie
Because this is the ultimate **Quick Healthy Chocolate Treat** designed to be eaten immediately—that fudgy magic really happens when it’s warm!—I honestly recommend just making one serving at a time. If you do manage to have leftovers, they are best kept in an airtight container in the fridge for up to a day.
Reheating is straightforward: pop it back in the microwave for just 10 to 15 seconds on medium power. Anything longer and you risk turning that beautiful fudge into rubber. Honestly though, this recipe is so fast, grabbing the ingredients is faster than trying to reheat yesterday’s brownie!
Frequently Asked Questions About the Cottage Cheese Brownie Recipe
I know when you stumble upon a new recipe, especially one that promises this much protein in a **2 Minute Chocolate Fix**, you end up with a million questions. I totally get it! I’ve tried every wrong way to make this so you don’t have to. Hopefully, these quick answers cover what you’re wondering about this **Guilt Free Brownie Recipe**!
If you have other cooking questions or just want to hear about my other quick meals, feel free to browse around my other savory experiments. They are just as fun!
Can I use regular sugar instead of a low-carb sweetener in this Cottage Cheese Microwave Brownie?
Oh yes, you absolutely can! If you aren’t worried about keeping the sugar count down, regular granulated sugar or even a tiny drizzle of maple syrup works perfectly well in terms of texture and mixing. I use the low-carb options mostly because of timing—I usually make this post-workout and need to keep my own sugar spikes minimal. Just remember, using regular sugar makes it less of a ‘healthy’ swap, but it won’t affect the fudgy outcome!
What is the best way to ensure my dessert is a Keto Friendly Cottage Cheese Dessert?
To make sure this fits snugly into a **Keto Friendly Cottage Cheese Dessert** plan, you need two specific tweaks. First, make sure you’re using a natural zero-calorie sweetener like erythritol or monk fruit blend—don’t reach for honey or maple syrup. Second, and this is crucial: swap the coconut flour for the exact same measure of almond flour. That combination keeps the carbs super low while delivering that required density for a proper brownie texture.
Why do you insist on blending the cottage cheese?
If you skip blending, you risk getting tiny, warm, chunky shreds of cottage cheese in your finished brownie, and trust me, that is *not* the fudgy experience you want. Blending it until it’s like smooth, thick cream ensures that the cheese emulsifies perfectly with the egg. This is what gives you that seamless, dense batter which results in a truly **Fudgy Microwave Dessert** when cooked.
Can I make this recipe bigger than one serving?
You can, but the microwave timing gets extremely tricky! Since this recipe is designed for that perfect 60 to 90-second blast, doubling or tripling the ingredients means the center won’t cook properly before the edges get tough. If you need more than one, I highly suggest making two separate single-serving versions back-to-back. It’s the only way I can guarantee you get that perfect **High Protein Single Serve Dessert** quality every time!
Nutritional Estimate for This Protein Packed Microwave Cake
I know when you’re making a **Protein Packed Microwave Cake**, you want to see the numbers! Based on the standard ingredients listed—especially using a low-carb sweetener—this little beauty clocks in around 180 calories and packs a huge 18 grams of protein. That’s amazing for a **Quick Healthy Chocolate Treat**!
Now, always remember that these are just estimates, okay? The exact brand of cottage cheese or the type of sweetener you use can bump those numbers around a bit. But for a small, satisfying dessert, this is a winner, hands down. If you want more quick meal ideas, take a peek at what else I’m whipping up over in the breakfast category!
PrintCottage Cheese Microwave Mug Brownie

Make a quick, high-protein, single-serving brownie in the microwave using cottage cheese for a fudgy texture.
- Prep Time: 3 min
- Cook Time: 2 min
- Total Time: 5 min
- Yield: 1 serving
- Category: Dessert
- Method: Microwave
- Cuisine: American
- Diet: Low Fat
Ingredients
- 1/4 cup cottage cheese (blended smooth)
- 1 large egg
- 1 tablespoon cocoa powder
- 1 tablespoon sweetener (like erythritol or maple syrup)
- 1 teaspoon coconut flour (or almond flour for lower carb)
- 1/4 teaspoon vanilla extract
- Pinch of salt
- Optional: 1 teaspoon chocolate chips
Instructions
- If your cottage cheese is lumpy, blend it until completely smooth first.
- In a microwave-safe mug, combine the blended cottage cheese, egg, cocoa powder, sweetener, coconut flour, vanilla extract, and salt.
- Mix all ingredients thoroughly until you have a uniform batter. Stir in chocolate chips if using.
- Microwave on high for 60 to 90 seconds. Cooking time varies by microwave power. Start with 60 seconds and check for doneness. The center should look set but still moist.
- Let the brownie cool in the mug for 1 minute before eating.
Notes
- For a fudgier result, slightly undercook it; it will firm up as it cools.
- If you prefer a lower-carb option, use almond flour instead of coconut flour and a zero-calorie sweetener.
- Ensure the cottage cheese is well-blended to avoid a grainy texture in the final brownie.
Nutrition
- Serving Size: 1 mug
- Calories: 180
- Sugar: 3
- Sodium: 250
- Fat: 6
- Saturated Fat: 3
- Unsaturated Fat: 3
- Trans Fat: 0
- Carbohydrates: 12
- Fiber: 3
- Protein: 18
- Cholesterol: 100