

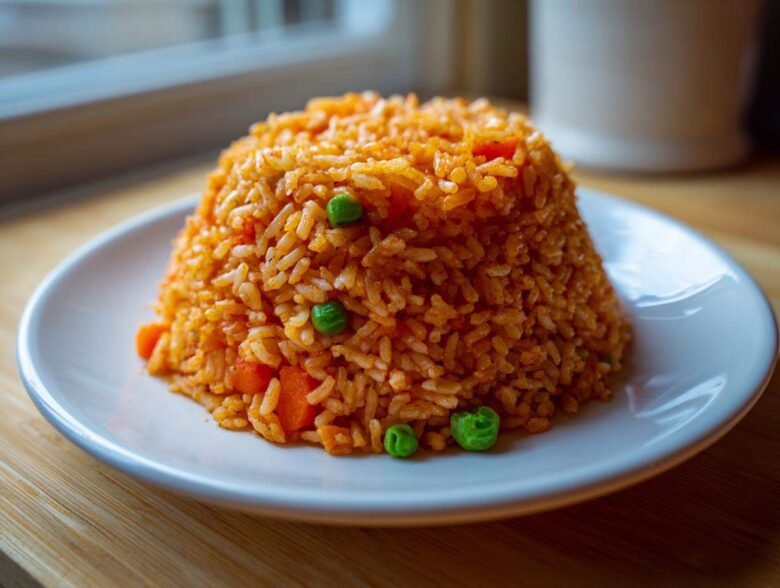
Oh my gosh, you know how much I love a side dish that basically makes the star of the plate look twice as good? I spent years fighting with mushy rice batches—you know, the kind that just turns into sticky, sad goo? I almost gave up! That’s why I am THRILLED to introduce you to my foolproof method for the Easy One-Pot Authentic Spanish Rice, which is really just perfect spanish rice, or as my friend Maria calls it, Arroz Rojo. The secret, and this is huge, is really getting that toasting step right. It’s short, but when that rice turns that perfect pale gold, your whole kitchen smells like a proper Mexican restaurant. Trust me, this recipe gives you that beautiful, fluffy texture with zero fuss and only one pot to wash!
If you want to know a bit more about why we do what we do in the kitchen, you can always check out our philosophy over at our little corner of the internet, but right now, let’s focus on getting dinner on the table fast!
Why This Easy Spanish Rice Recipe Works So Well
People ask me all the time how I get my rice so light and never gummy. It’s not magic, I promise! It’s just a couple of key techniques that make this Easy Spanish Rice Recipe the winner in my weekly rotation. When you need a reliably good side dish, this is it. Here’s what sets this version apart and makes it my go-to Quick Spanish Rice.
- It cooks start-to-finish in under 30 minutes!
- We toast the rice first, which locks in the grain integrity.
- It all happens in one easy saucepan!
Achieving Fluffy Arroz Rojo Texture
The true secret to that amazing, restaurant-quality, Fluffy Arroz Rojo texture is twofold. First, you have to toast it in oil until it sings a little song and turns slightly golden. This seals the outside so it doesn’t burst open and get sticky when the liquid goes in. Second, and this is non-negotiable, you must let it rest completely covered *off* the heat for 10 minutes at the end. That rest lets the final bits of steam finish the job gently, so you end up with individual grains, not a mound of paste.
Minimal Cleanup with This One Pot Rice Side Dish
Honestly, the cleanup is what got me hooked after I perfected the flavor. Because it’s a true One Pot Rice Side Dish, you don’t dirty a skillet, a separate pot for the broth, or a strainer later! Everything happens right there in that one heavy-bottomed pan. You just scrape it out, wipe it down, and you’re done. Perfect for those crazy weeknights when you just want to sit down!
Gathering Ingredients for Authentic Spanish Rice
Once you nail the technique, you realize that the beauty of this Authentic Mexican Rice is that it uses humble pantry staples! That said, because everything piles on top of each other in that one pot, your measurements have to be pretty accurate. A half-cup off on your broth, and you’re back to sticky rice town! But don’t worry; the component list is short, and I’ll walk you through exactly what you need for a truly vibrant side dish.
If you’re looking for other simple meals that rely on pantry power, you should peek at my cheddar egg oatmeal—it sounds wild, but trust me!
Ingredient Notes and Substitutions for Spanish Rice
Look, you can use any rice, but for this specific texture that stays fluffy, you absolutely need long grain white rice. Arborio or Jasmine will give you different, wrong results here! The tomato sauce is what gives us that classic fiery color, so don’t try to substitute it with fresh tomatoes unless you’re ready for a much longer cook time. If you’re out of chicken broth, don’t panic and just dump in water. Instead, use water and add a good quality chicken bouillon cube or paste. As the recipe notes suggest, using bouillon often gives you a richer, deeper savory flavor than standard low-sodium broth anyway. Remember, cumin and garlic are the backbone of this dish; make sure your garlic is minced fresh, not that jarred stuff!
Step-by-Step Instructions: How to Make Spanish Rice
Okay, now for the main event! We’ve gathered our beautiful ingredients, and everything is measured out, which is half the battle solved for this kind of dish. Learning How to Make Spanish Rice is really about managing the heat and trusting the process, especially when it comes to keeping the lid screwed on tight! Once you get the hang of this rhythm, you’ll be whipping up this side dish faster than you can throw together wings for game day. I’m going to walk you through the two critical stages: the toasting, which builds the flavor foundation, and the magical steaming/resting period that guarantees fluffiness. Don’t rush these moments, and you’ll get that incredible, vibrant flavor we all crave. This is where all the flavor development happens before we let the magic of steam take over.
If you need quick reference while you’re in the kitchen, you can always check out the general tips on our main blog page!
Toasting the Rice for Maximum Flavor in Your Spanish Rice
This is my personal obsession, and I cannot stress this enough: that first step where you toast the spanish rice in the oil is everything. You need medium heat—not scorching hot, or you’ll burn the garlic later. Toss that rice in and stir it constantly for a solid five to seven minutes. Seriously, keep moving it! You’re waiting for a cosmetic change; the grains will start looking translucent around the edges and turn a definite light golden brown. If you stop stirring even for a minute, that rice on the bottom will scorch, and you’ll get a bitter taste throughout. When it smells nutty and looks lightly toasted, that’s when you toss in your onions and garlic for just two quick minutes until you can really smell that wonderful tomato-garlic aroma blooming.
Simmering and Resting for Fluffy Arroz Rojo
Once the broth, tomato sauce, and spices are in, bring that whole thing up to a rolling boil so everything gets super excited. The second it hits that boil, reduce the heat immediately all the way down to the lowest setting your burner has on offer. Put the lid on tight and set your timer for 18 minutes. The absolute rule here is: **DO NOT LIFT THE LID.** Peeking releases the steam, and steam is what cooks the rice evenly! Once the timer goes off, kill the heat completely. Remove the pot from the burner if you can—that little bit of extra residual heat can sometimes keep cooking too aggressively. Gently stir in any frozen veggies you might be using, slap that lid back on, and walk away for a full ten minutes. That mandatory resting period is what turns sad, liquid-soaked rice into beautiful, separate, Fluffy Arroz Rojo grains. Seriously, just trust the rest!
Tips for Perfect Mexican Restaurant Style Rice Every Time
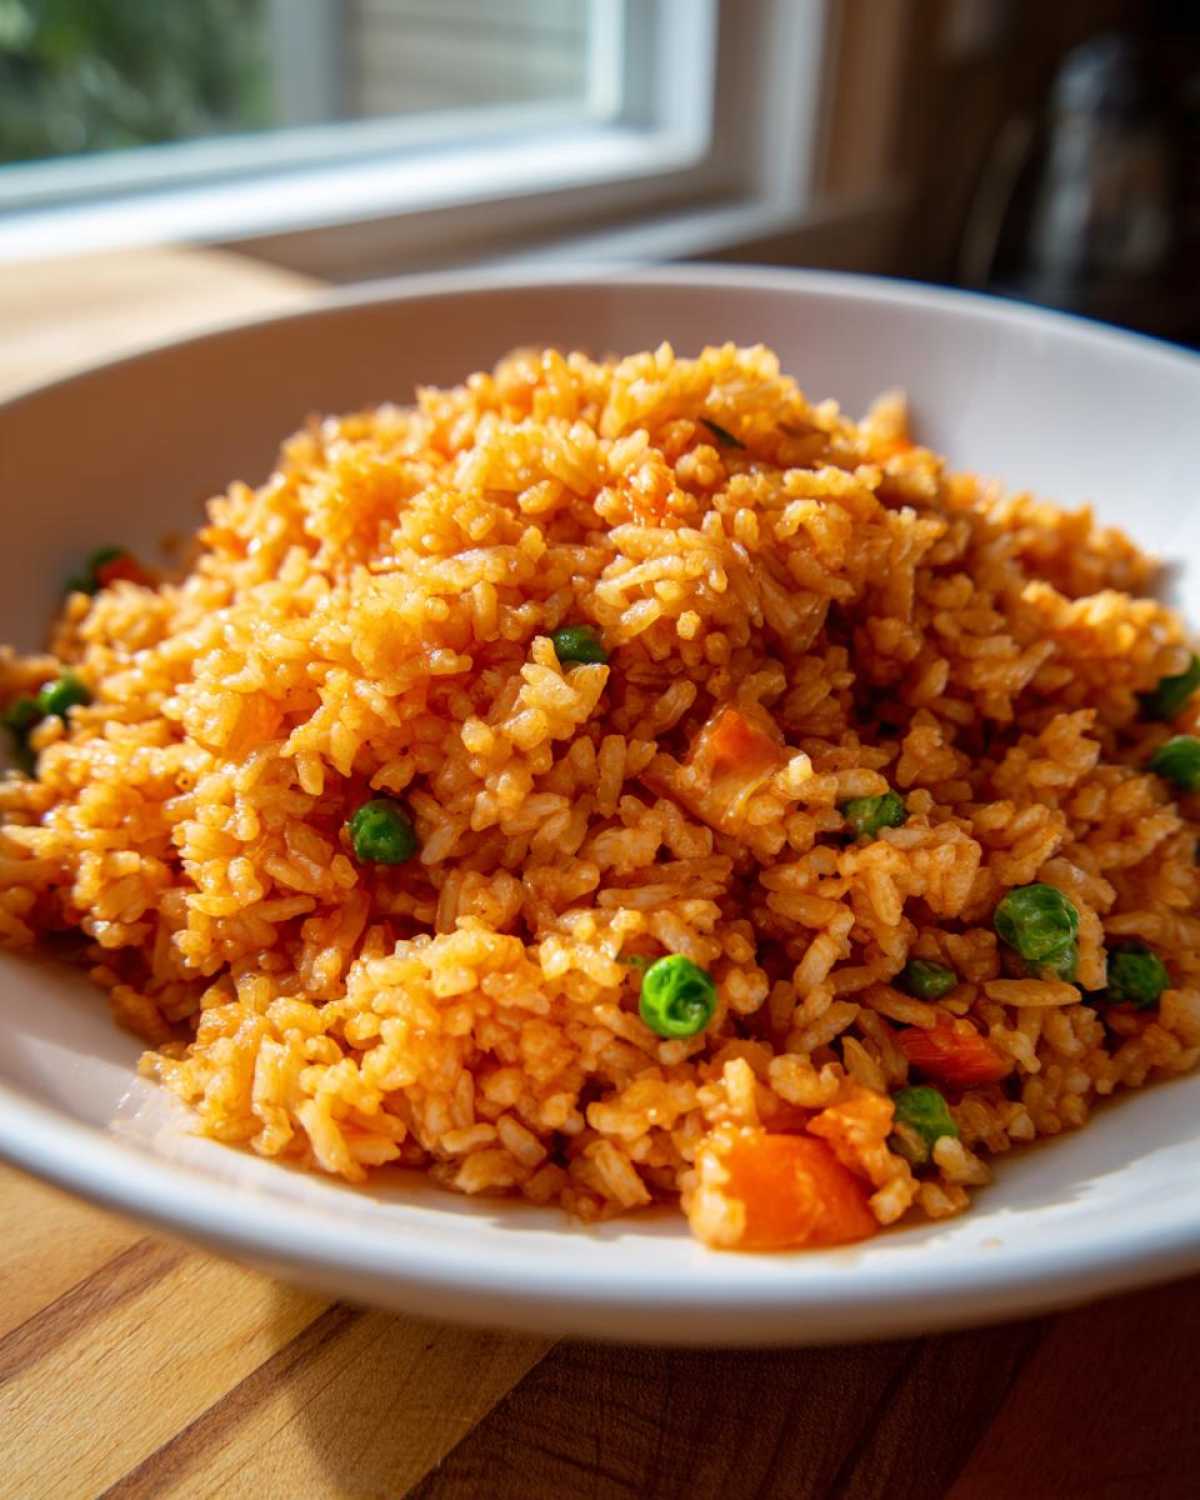
I know you followed the instructions perfectly, but sometimes things still go a little sideways, right? That’s why I want to give you the insider knowledge to guarantee you get that gorgeous, perfectly separate grain structure every single time you aim for that Mexican Restaurant Style Rice.
If your rice is coming out a little too wet after that 10-minute rest, don’t fret! That just means your lowest burner setting is still a little too punchy. Next time, ensure you drop the heat right away after boiling. If you are dealing with undercooked grains (a bit crunchy in the center), the simmer time wasn’t quite enough. Cover it back up, put it on the absolute lowest possible heat source you have—maybe even just the residual warmth of the turned-off burner—and let it sit five or ten minutes longer. Don’t lift that lid!
My number one tip for anyone struggling with liquid ratios? Always use a heavy-bottomed pot. It distributes heat evenly, which stops the bottom layer from scorching while the top layer is still raw. That even cooking is key to that amazing texture you find in the best taquerias. And hey, if you made this wonderful side dish, you absolutely need something spectacular to go with it, like my slow cooker barbacoa tacos!
Serving Suggestions for Your Flavorful Rice Recipe
Honestly, part of the fun of making this amazing, Flavorful Rice Recipe is figuring out what to serve it with! Since this comes out so perfectly seasoned and fluffy, it doesn’t need much company to shine. It is undeniably the Best Side Dish for Tacos you’ll ever make, whether those tacos are filled with carnitas or barbacoa.
But don’t stop there! This is fantastic served right alongside my black bean enchilada casserole for a meatless night, or you could scoop a big spoonful next to some slow-cooked chicken tinga. It just brightens up any plate, and because it’s so sturdy, it holds up perfectly under sauces and toppings.
Storage and Reheating Instructions for Leftover Spanish Rice
I always hope there are leftovers because this stuff is honestly good cold the next day, but for proper enjoyment, you’ll want to store and reheat it correctly. Since we worked so hard to get those individual grains fluffy, we don’t want to destroy that hard work with a quick zap in the microwave! For storage, let the rice cool down completely first. Don’t leave cooked rice sitting on the counter for ages; get it into the fridge within two hours, okay? Pop it into a shallow, airtight container. That helps it cool faster and prevents it from getting too dried out or, worse, developing any bacteria.
Now, for reheating, here’s my trick for keeping that spanish rice soft! Forget just blasting it dry in the microwave. That makes it tough. Instead, put your portion of rice in a microwave-safe bowl, and add just a tablespoon or two of water or broth right over the top of the rice for every cup you are reheating. Cover that bowl tightly with a plate or plastic wrap (venting one corner slightly). The added moisture turns into steam in the microwave, essentially re-cooking it lightly and giving you back that fluffy texture. Microwave in short bursts, stirring between each one, until it’s hot all the way through. If you’re feeling fancy, you can put it in a small saucepan on the stove over very low heat with a splash of broth, stirring gently until warmed. That stove method truly resurrects the great texture for your leftovers, making it taste almost as good as fresh!
Frequently Asked Questions About Making Spanish Rice
I always get so many questions after people try this recipe for the first time, which is wonderful! It usually means they loved the results. I’ve gathered the most common ones here to make sure your experience producing this super savory side dish is perfect from the get-go. A little knowledge goes a long way when trying to nail that restaurant quality!
What is the difference between Spanish Rice and Mexican Rice?
That’s a common point of confusion! Technically, in the US, we often use the terms interchangeably, especially for this type of tomato-based rice. However, if you dig deep, “Spanish Rice” sometimes implies rice cooked with saffron or something that results in a yellower color. What we are making here—the one using tomato sauce, cumin, and onion—is the classic, beloved Authentic Mexican Rice, or *Arroz Rojo*. Either way, it’s delicious, and this recipe nails the flavor you want for tacos!
Can I use brown rice for this recipe?
Oh, honey, you can try, but the results won’t match this method. Brown rice takes much longer to absorb liquid and usually needs more than double the water our recipe asks for. Since the entire point of this Quick Spanish Rice is speed and the fluffy texture achieved by the quick-rest method, brown rice will end up either crunchy or gummy. Stick to the long grain white rice for this one; it’s worth it!
Can I add more vegetables to this Quick Spanish Rice?
Absolutely! I love customizing my sides. While this recipe is perfect with just the optional peas and carrots, you can certainly add things like finely diced zucchini, corn kernels, or even mushrooms. The key is to remember when to add them. If you’re adding hard vegetables like carrots (besides the tiny frozen ones), toss them in after the onions and garlic, and sauté them until they start to soften *before* you add the liquid. If you add them after the liquid goes in, they’ll end up crunchy.
My rice turned out mushy, what did I do wrong?
Don’t feel bad; this happened to me countless times before I figured out the secrets! Mushy rice almost always comes down to one of two things: You either lifted the lid during the 18-minute simmer—don’t do it!—or your low heat setting was still too high. When the rice is covered, it should barely burble. If it’s boiling aggressively, it’s absorbing the liquid too fast and breaking down. If you want to reach out with any other troubleshooting, feel free to contact me!
Estimated Nutritional Data for This Savory Rice Sides
Before you dive into serving up this amazing spanish rice, I always feel it’s important to share a little look at what’s in the bowl! Knowing the facts helps you plan those lovely meals, right? Remember, I don’t have massive lab equipment here in my kitchen, so these numbers are just based on the ingredients listed in the recipe above, calculated based on standard database averages. Think of this as a helpful guide, not a medical guarantee!
This information is based on one serving size being 1/4 of the total recipe yield. If you happen to use low-sodium broth or skip the optional veggies (the peas and carrots), your final count might shift a bit, so keep that in mind!
- Serving Size: 1/4 of recipe
- Calories: 280
- Fat: 6g (with 1g saturated fat)
- Sodium: 550mg (This will vary based on your broth choice!)
- Carbohydrates: 48g
- Sugar: 5g
- Protein: 7g
We keep the fats low and the flavor high in this Savory Rice Sides recipe, which is why I love it so much for weeknight dinners. If you have questions about the ingredients or need clarification on how the nutrition data was gathered, you can always find our full disclosure information over on the disclaimer page!
Share Your Experience Making This Spanish Rice
Now that you have the secrets to achieving the fluffiest, most flavorful spanish rice without needing a sink full of dishes, I really, truly want to hear how it went!
Did my toasting tip work wonders for you? Did those 18 minutes plus 10 minutes of resting time yield that perfect, separate grain? Please don’t be shy! Head down to the comments section and leave me a rating. Five stars means you achieved perfect fluffiness, but even a three-star rating tells me where I might need to clarify my instructions!
And if you snapped a photo of this vibrant orange side dish next to your tacos or enchiladas, share it with me on social media and tag me! Seeing your beautiful results is what keeps me buzzing in the kitchen.
I appreciate you trusting me with this cornerstone recipe. If you have any questions about data usage or privacy while commenting, you can always review our privacy policy!
PrintEasy One-Pot Authentic Spanish Rice (Arroz Rojo)
Make fluffy, flavorful Spanish rice, also known as Arroz Rojo, quickly in one pot. This recipe delivers authentic Mexican side dish taste with minimal cleanup.
- Prep Time: 5 min
- Cook Time: 25 min
- Total Time: 30 min
- Yield: 4 servings
- Category: Side Dish
- Method: Stovetop
- Cuisine: Mexican
- Diet: Vegetarian
Ingredients
- 1 tbsp vegetable oil
- 1 cup long grain white rice
- 1/2 medium onion, finely chopped
- 2 cloves garlic, minced
- 1 1/2 cups chicken broth
- 1 (8 oz) can tomato sauce
- 1/2 tsp salt
- 1/4 tsp ground cumin
- 1/4 cup frozen peas and carrots mix (optional)
Instructions
- Heat the vegetable oil in a medium saucepan or Dutch oven over medium heat.
- Add the rice to the pan. Cook, stirring constantly, for 5 to 7 minutes until the rice grains turn light golden brown. This step helps keep the rice fluffy.
- Add the chopped onion and minced garlic to the pan. Cook for 2 minutes until the onion softens.
- Pour in the chicken broth, tomato sauce, salt, and cumin. Stir well to combine.
- Bring the mixture to a boil. Once boiling, reduce the heat to low, cover the pot tightly with a lid, and simmer for 18 minutes without lifting the lid.
- After 18 minutes, remove the pot from the heat. If using, gently stir in the frozen peas and carrots mix.
- Keep the pot covered and let it stand for an additional 10 minutes off the heat.
- Fluff the rice gently with a fork before serving.
Notes
- To achieve the best color and flavor, do not skip toasting the rice in oil until it is lightly browned.
- Use low-sodium broth if you need to control the salt content.
- For a richer flavor, substitute half the chicken broth with water and use a chicken bouillon cube.
Nutrition
- Serving Size: 1/4 of recipe
- Calories: 280
- Sugar: 5
- Sodium: 550
- Fat: 6
- Saturated Fat: 1
- Unsaturated Fat: 5
- Trans Fat: 0
- Carbohydrates: 48
- Fiber: 3
- Protein: 7
- Cholesterol: 0