

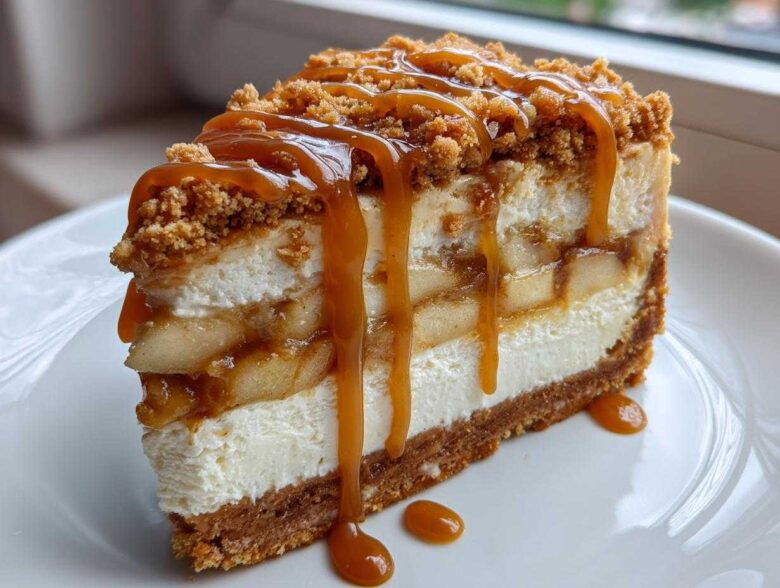
Oh my goodness, let me tell you about my absolute favorite dessert to bake when the leaves start turning—it’s the one that wins every Thanksgiving table, hands down! If you’ve ever stared at a perfect slice of apple pie and thought, “I wish this was creamier,” then this recipe is for you. We are merging two superstars into one incredible treat: my show-stopping Salted Caramel Apple Pie Cheesecake. Trust me, this isn’t some half-baked idea; it’s a rich adventure in texture and flavor. I always make this specific apple pie cheesecake for my Thanksgiving guests because it looks so impressive, but it’s genuinely straightforward to assemble. If you want to know more about how we test these showstoppers in the kitchen, check out our about us page!
We’re hitting that perfect balance between tart, spiced apples and that smooth, tangy cream cheese filling. Plus, we’ve got a crunchy streusel on top and just enough salty caramel to make everyone swoon. You absolutely need to see how delicious this gourmet dessert mashup is!
Why This Salted Caramel Apple Pie Cheesecake is the Best Fall Dessert
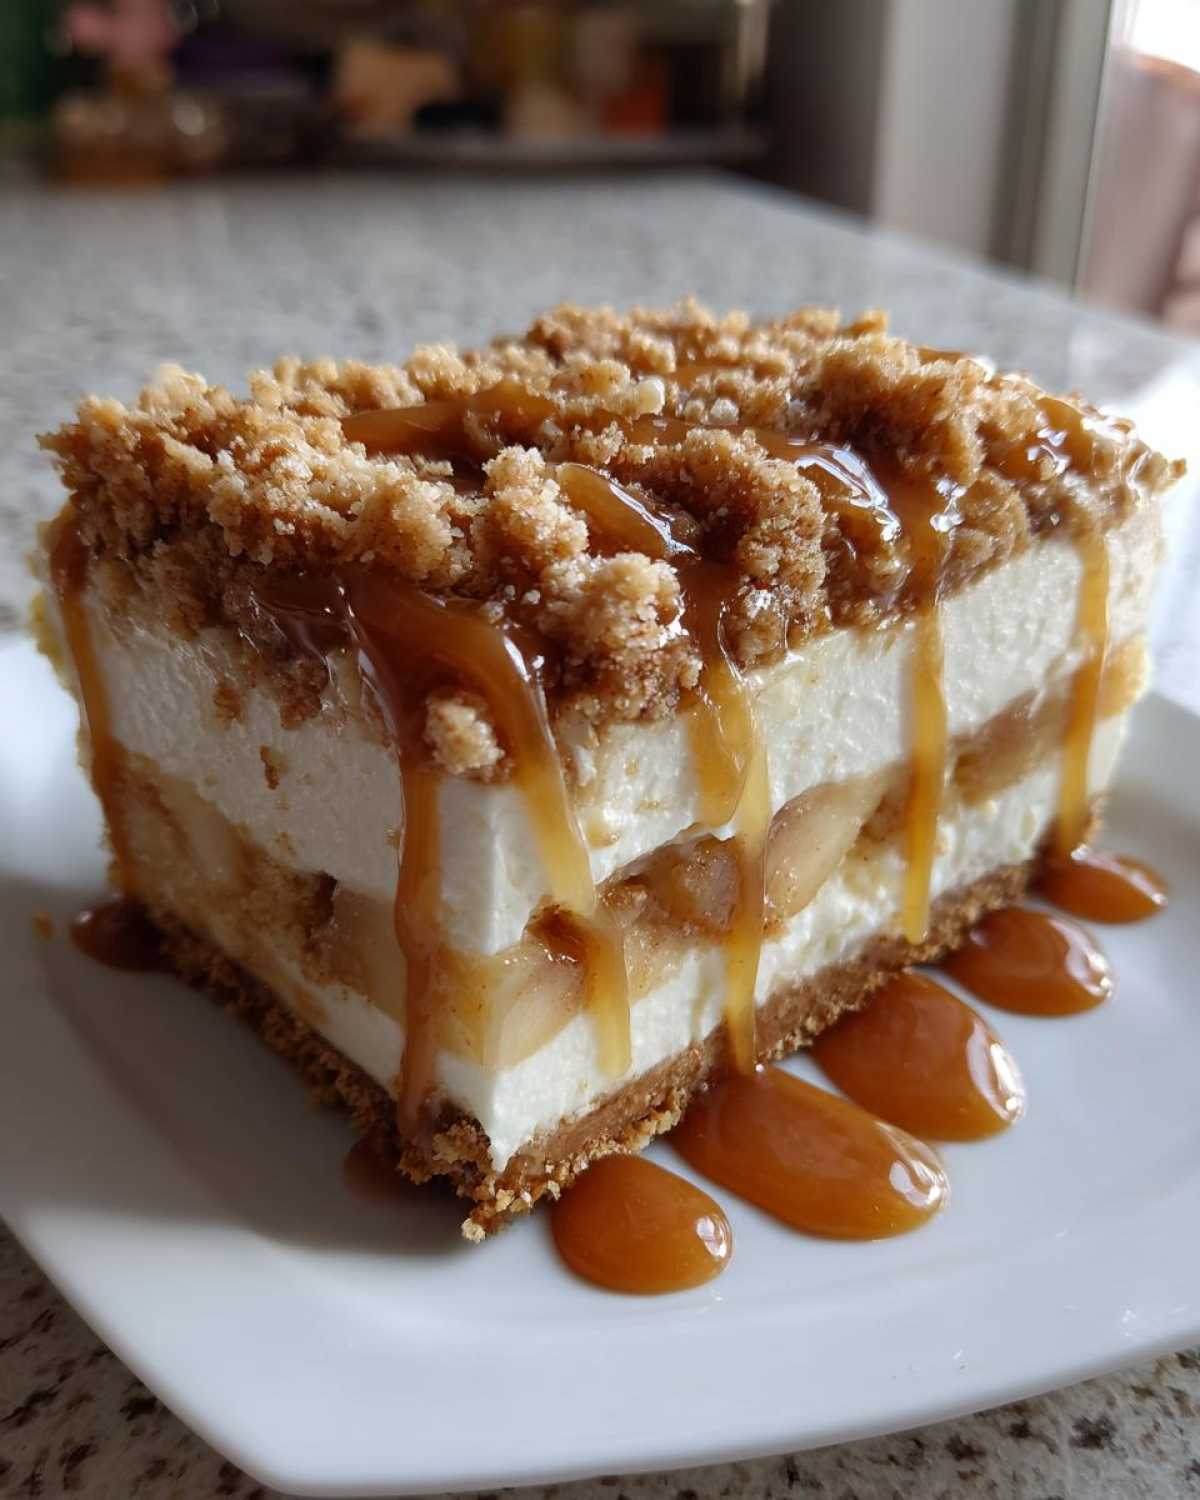
Honestly, there’s nothing better than that first crisp, cool day, and this dessert captures all those wonderful feelings! This isn’t just a dessert; it’s the ultimate Best Fall Dessert experience wrapped up in one pan. I think what makes this gourmet dessert mashup work so magically is that every single component sings its own little flavor solo, but they harmonize perfectly when you eat them together.
- It’s thick, it’s creamy, it’s spicy, and it’s got that salty-sweet finish—what more could you possibly want?
Perfect Textural Contrast in Every Bite
This is where we really shine! You bite down, and first, you get the buttery crunch from that perfectly pressed graham cracker crust. Then comes the cloud made of cream cheese—so smooth! Right in the middle, you find the tender, spiced apple filling. And finally, that little sprinkle of streusel on top gives you that needed resistance. It’s just heavenly, really.
Ideal for Holiday Cheesecake Ideas
When I have parties, I want something that looks like I spent three days fussing over it, even if I didn’t! This fits the bill perfectly. It screams special occasion and is definitely an Impressive Party Dessert. Forget the plain vanilla cheesecake; this layered beauty is what people remember long after the holiday is over.
If you loved the idea of layering flavors, you should see my recipe for maple pecan pie bars—they give you that same kind of decadent fall vibe!
Essential Ingredients for Your Apple Pie Cheesecake
Okay, the secret to making sure this dessert comes together perfectly isn’t just in the mixing; it’s in having everything exactly right before you start. I know it feels like a long list, but organizing it by component—crust, apples, batter—makes it so much easier. When I start prepping, I lay everything out so I can see I have my **softened cream cheese** ready to go and my butter is the right temperature, or chilling, depending on what job it has!
If you’re looking for another great way to use up fall fruit, you seriously need to check out my recipe for easy pear crisp. It uses a similar streusel technique!
For the Graham Cracker Crust Dessert Base
This is the foundation that holds all our creamy goodness, and it needs to be rock solid! Don’t skimp on pressing it down firmly into that springform pan.
- 1 1/2 cups graham cracker crumbs
- 1/4 cup granulated sugar
- 6 tablespoons unsalted butter, melted
For the Cinnamon Apple Topping Filling
This is where all that incredible apple pie flavor lives! Make sure you dice your apples nicely—I usually stick between Honeycrisp for sweetness or Granny Smith if I want a real tart kick. That little bit of cornstarch is crucial; it thickens our sauce so it doesn’t just run everywhere when we slice into the finished product.
- 3 medium apples (such as Honeycrisp or Granny Smith), peeled, cored, and diced
- 1/4 cup brown sugar
- 1 teaspoon ground cinnamon
- 1 tablespoon cornstarch
- 1/4 cup water
- 1/2 cup pre-made salted caramel sauce (we’ll use some now and save the rest for drizzling later!)
For the Creamy Baked Dessert Batter
This is the main event! Remember what I said about the cream cheese? It needs to be soft, like room temperature soft, not Melty-McMelty. If it’s cold, you’ll end up with lumps, and nobody wants a lumpy **creamy baked dessert**!
- 3 (8 ounce) packages cream cheese, softened
- 1 1/2 cups granulated sugar
- 1 teaspoon vanilla extract
- 1/2 teaspoon salt
- 4 large eggs (also room temperature, if you can!)
For the Streusel Topped Dessert Finish
The streusel is the perfect crunchy counterpoint. The trick here? The butter MUST be cold when you mix it in. I cube it up and stick it back in the fridge for ten minutes if I suspect it’s gotten too warm while I was prepping the batter!
- 1/2 cup all-purpose flour
- 1/4 cup packed brown sugar
- 1/4 cup cold unsalted butter, cut into small pieces
Step-by-Step Instructions for Making Apple Pie Cheesecake
Alright, ready to get baking? This is the part where everything comes together! I always put on some upbeat music for this stage because it’s so satisfying to watch this beautiful dessert take shape. Just remember, patience is our backbone here—especially when it comes to the water bath and the cooling time. We aren’t rushing beauty!
You can find some really neat decoration inspiration for wrapping the pan over on classic apple pie crust techniques if you want to get fancy with your foil wrapping!
Preparing the Crust and Oven Setup
First things first, fire up that oven! We need it hot at 350°F (175°C). Now, the springform pan needs protection because it is going into a pool of hot water later. Take out your heavy-duty aluminum foil—I use two layers, tucked tight—and wrap the entire outside of your 9-inch springform pan. This keeps the water bath from seeping in and making our crust soggy. Oops!
You’ll mix your crust ingredients (crumbs, sugar, melted butter) and press that mixture down really firmly onto the bottom. Pop it into the hot oven for exactly 10 minutes just to set it up. Once that’s done, pull it out and let it cool down just a tiny bit while we make the filling.
Cooking the Cinnamon Apple Topping
This filling gets cooked on the stovetop, which concentrates those lovely apple pie flavors. Get your diced apples, brown sugar, cinnamon, cornstarch, and that little bit of water into a saucepan over medium heat. You need to stir this nearly constantly, maybe for about 8 to 10 minutes. You’re done when the sauce has thickened up nicely and the apples are just starting to get tender. Don’t let them turn to mush!
Once it’s thick, take it off the heat right away and let it cool down completely. If you put hot apples on cold cheesecake batter, you’re inviting trouble!
Mixing the Cheesecake Batter (Avoid Overmixing)
Time for the star layer! Get that softened cream cheese into your mixer. Beat it by itself until it is silky smooth—no lumps allowed! Then add your sugar, vanilla, and salt, and beat until creamy. Here’s the super important bit: add the eggs one at a time. You want to mix *just* until the yolk disappears before adding the next one. If you whip in the eggs too fast or too long, you incorporate too much air, and that leads straight to cracks in your beautiful dessert.
Assembling and Baking the Apple Pie Cheesecake
Now we layer! Pour about half of your plain cheesecake batter over that cooled crust. Gently spoon half of your cooled apple filling evenly over that layer. Then, carefully pour the rest of the batter on top, followed by the rest of the apples. Finally, sprinkle that crumbly streusel all over the top layer of apples.
To get that incredible texture that makes this an amazing apple pie cheesecake, we must use a water bath. Place your foil-wrapped pan inside a larger roasting pan. Now, carefully pour very hot water into the roasting pan until it comes about halfway up the sides of your springform pan. Bake this whole setup for 60 to 75 minutes. When it’s done, the edges should look set, but if you gently nudge the pan, the very center should still have a tiny wobble. That’s the jiggle test!
Cooling and Chilling for a Creamy Baked Dessert
Don’t pull it out immediately! That quick temperature change is why cakes crack. Turn the oven off, but leave the cheesecake inside with the door cracked open slightly. Let it hang out in that warm environment for a full hour. Next, take it out of the water bath, remove the foil, and let it cool completely on a wire rack on the counter.
Only once it’s totally room temperature do you cover it and move it to the fridge. You must chill this for at least 6 hours, but honestly, overnight is what really makes this a perfect creamy baked dessert. It firms up beautifully!
Expert Tips for a Perfect Apple Pie Cheesecake
We’ve covered the steps, but I want to share a few real-world secrets that turn a good Apple Cheesecake Recipe into a truly great one. These little details are what my mom taught me—the things you only learn after baking hundreds of these things! Getting this right transforms it from just dessert into cozy, glorious Seasonal Comfort Food.
If you want another fantastic, cozy bake recipe, you have to try my apple cinnamon French toast bake—it has that same comforting spice profile!
Temperature Matters for Smooth Cheesecake
This tip is non-negotiable if you want that smooth, velvety texture. Seriously, take your cream cheese out about an hour before you plan to mix. If it’s too cold, you’ll end up with cheeseball lumps in your batter that just won’t blend away, no matter how long you mix. It gets extra frustrating when you realize it halfway through!
The same goes for the eggs! Putting cold eggs right into softened cream cheese can shock the mixture and cause it to curdle slightly. Room temperature eggs blend right in seamlessly, keeping everything totally lump-free and ensuring you get that perfect, uniform cheesecake base.
Water Bath Alternatives for Your Apple Pie Inspired Treats
I love the water bath (bain-marie) because it guarantees that beautiful, crack-free top that looks so professional. The steam keeps the top layer of the cheesecake from drying out too fast while the bottom bakes. That said, maybe you’re out of heavy-duty foil, or maybe you’re just in a hurry!
You absolutely *can* bake this without the water bath, especially if you’re using a springform pan that seals well. But you have to watch it like a hawk. Without the moist environment of the water, the top layer cooks faster and is much more likely to dry out and crack. If you skip it, make sure you keep a close eye on it after that 60-minute mark. It’s a trade-off for speed, but I always warn people that you sacrifice a little bit of that guaranteed perfect surface for their apple pie inspired treats.
Variations on the Caramel Apple Cheesecake
Even a perfect recipe like this Caramel Apple Cheesecake deserves a little tweaking now and then! If you’re feeling adventurous or just made this several times already, I have a couple of easy ways you can give it a fresh twist. We aren’t messing with the main structure of this layered marvel, but we can certainly play with the flavor notes.
If you want to check out another one of my favorite ways to combine apples and caramel, you should definitely look at my caramel apple monkey bread recipe—it’s seriously addictive comfort food.
Spice Adjustments for the Cinnamon Apple Topping
The cinnamon is essential, of course, but if you want that really deep, complex, *holiday* smell going on, try sneaking in a pinch of nutmeg or a tiny dash of allspice along with the cinnamon in your apple filling. Just a quarter teaspoon of nutmeg makes a huge difference. It gives the apple layer that classic pie warmth we all love!
Making Mini Apple Pie Cheesecake Bites
If you’re worried about the water bath or you just need individual servings for a party platter, portioning this out into cupcake tins is a fantastic idea! You’ll line those tins with paper liners, of course. Since the batter is thinner, the baking time drops way down. You’ll probably only need about 18 to 22 minutes at 350°F. Keep an eye on them, as they go from done to overdone quickly. This is one of those easy No Bake Cheesecake Variations that still requires an oven!
Serving Suggestions for Your Apple Pie Cheesecake
Okay, the hard part—the baking and the chilling—is over! Now for the best part: making this gorgeous apple pie cheesecake look as amazing as it tastes. Remember how we reserved some of that incredible salted caramel sauce? This is its moment to shine!
Since this is such a decadent, rich treat, I usually like to serve small slices. It’s definitely an impressive dessert that packs a huge flavor punch, so a little slice goes a long way. You want to make sure it’s served chilled, right out of the refrigerator, so that creamy texture is firm and perfect.
Before you even slice it, take that reserved salted caramel and drizzle it lovingly back and forth over the entire top surface. The visual effect of the dark, glossy caramel running over the pale cheesecake and the crumbly streusel is just stunning. It really elevates this from ‘homemade bake’ to ‘restaurant-worthy’!
If you’re serving this during a chilly evening get-together, I highly recommend pairing a small slice with a warm drink on the side. If you need something festive to sip on, you absolutely have to try my recipe for spiced hot apple cider. The warm apple and cinnamon notes complement this dessert perfectly!
Storage and Reheating Instructions
I always hope there will be leftovers when I make this big apple pie cheesecake, but usually, there aren’t! If you do manage to save a slice or two (good job!), storage is super important to keep that creamy texture intact.
You definitely want to keep this cheesecake in the refrigerator at all times. Once it’s fully chilled, cover the remaining cake tightly with plastic wrap or an airtight container lid. Make sure the plastic wrap isn’t actually touching the surface, especially if you still have caramel drizzled on top! That tight seal stops the cream cheese from picking up any weird fridge smells.
It stays wonderfully good in the fridge for about four to five days. You might think you can enjoy a slice slightly warmed up, but please resist that urge! This dessert relies on being served cold. If you try to reheat it, the texture of the cheesecake part will get runny and just generally sad looking. Slice it cold, serve it cold, and enjoy that firm, perfect creaminess.
If you want to know how to make sure your next bake is just as perfect, check out my tips on the apple pie smoothie—it’s a completely different way to enjoy those apple flavors, but it highlights why keeping ingredients cool matters!
Frequently Asked Questions About Apple Cheesecake Recipe
I always get so many questions once people see pictures of this layered beauty! It’s totally normal when you’re combining two legendary desserts into one, right? Here are the things I hear most often about making this amazing Apple Cheesecake Recipe. I hope these help clear up any last-minute worries so you can get this into your oven!
If you’re looking for other ways to use these classic autumn flavors, try sipping on my apple pie smoothie—it’s just as delicious but totally different!
Can I make this apple pie cheesecake recipe ahead of time?
Oh, yes, please do! This is the best thing about any good cheesecake, really. You absolutely must make it ahead of time. Remember how I stressed that 6-hour minimum chilling time? Well, for the absolute best flavor and the firmest, dreamiest texture, I always tell folks to chill this overnight. It lets the flavors of the spice and the caramel really settle into the creamy base. It comes out perfect the next day, ready to go!
What apples work best for the Cinnamon Apple Topping?
This is a great question because the wrong apple will turn to mush and ruin the texture of our filling. Remember, we want tender, not gummy! I usually lean toward Granny Smith apples because they hold their shape beautifully under heat and give you a nice, necessary tartness to cut through all that rich cheesecake. However, if you prefer something a little milder, a Honeycrisp is a fantastic swap. Just make sure you dice them evenly so they all cook at the same rate!
How do I prevent my cheesecake from cracking?
Cracking is the bane of every baker’s existence, but we’ve totally got this covered with two major defenses. First, the water bath! That gently humidifies the oven environment, keeping the top from setting too fast. It’s the number one defense against surface cracks. Second, and maybe even more important, is the cooling process. You cannot take it straight from a hot oven to a cold counter, and definitely not straight into the fridge!
Take that hour in the warm, turned-off oven. That slow transition lets the structure relax. If you follow that slow cool-down and then chill it overnight, you should have a stunning, smooth top, guaranteed!
Estimated Nutritional Data for this Apple Pie Cheesecake
Now, I have to give you the standard disclaimer here: because this is a homemade dessert, and because we are using real butter and rich cream cheese when making this gourmet dessert mashup, these numbers are just an estimate! I always run the recipe through my calculator, but variations in your exact brand of caramel or the size of your eggs can change things slightly. Also, please remember this is calculated per slice serving.
This is definitely not an everyday diet food; this is happy occasion, holiday-only stuff! You’ll want to enjoy every single creamy bite.
Here is the estimated breakdown for one generous slice of this incredible seasonal comfort food:
- Serving Size: 1 slice
- Calories: 450
- Fat: 28g
- Carbohydrates: 45g
- Protein: 6g
- Sugar: 40g
Yep, it’s a treat! But when it tastes this good, it’s totally worth it when you make something special like this apple cheesecake recipe occasionally. You deserve the best!
Share Your Impressions of This Gourmet Dessert Mashup
Whew! If you made it all the way through this recipe, you have earned bragging rights! Now that you’ve hopefully baked up this beautiful Salted Caramel Apple Pie Cheesecake—or at least you’re dreaming about it—I really, really want to hear what you thought!
Baking is such a personal thing, and sharing is what makes it fun. Did you try the water bath? Did your streusel stay nice and crunchy? Tell me everything that happened in your kitchen! I put so much work into making sure this recipe delivers that amazing multi-layered experience, and I thrive on hearing how it turns out for you and your crew.
Please take a quick second and give this recipe a star rating right below this section so other bakers know what to expect. And if you did share any photos on social media, please tag me! I absolutely love seeing your gorgeous takes on this gourmet dessert mashup.
If you have any questions at all about substitutions, baking times, or troubleshooting those stubborn lumps, don’t hesitate to ask in the comments below. I always try to get back to everyone with a helpful tip! If you need to get in touch directly for business inquiries or longer questions, you can always reach us via the contact page.
Happy baking, friends! I hope this becomes your go-to celebration dessert, too!
PrintSalted Caramel Apple Pie Cheesecake with Streusel Topping
A rich, creamy cheesecake base layered with spiced apples and topped with a crunchy streusel and salted caramel sauce.
- Prep Time: 35 min
- Cook Time: 75 min
- Total Time: 110 min
- Yield: 12 servings
- Category: Dessert
- Method: Baking
- Cuisine: American
- Diet: Vegetarian
Ingredients
- 1 1/2 cups graham cracker crumbs
- 1/4 cup granulated sugar
- 6 tablespoons unsalted butter, melted
- 3 (8 ounce) packages cream cheese, softened
- 1 1/2 cups granulated sugar
- 1 teaspoon vanilla extract
- 1/2 teaspoon salt
- 4 large eggs
- 3 medium apples (such as Honeycrisp or Granny Smith), peeled, cored, and diced
- 1/4 cup brown sugar
- 1 teaspoon ground cinnamon
- 1 tablespoon cornstarch
- 1/4 cup water
- 1/2 cup pre-made salted caramel sauce
- 1/2 cup all-purpose flour
- 1/4 cup packed brown sugar
- 1/4 cup cold unsalted butter, cut into small pieces
Instructions
- Preheat your oven to 350°F (175°C). Wrap the outside of a 9-inch springform pan with heavy-duty aluminum foil.
- Prepare the crust: Mix graham cracker crumbs, 1/4 cup sugar, and 6 tablespoons melted butter. Press the mixture firmly into the bottom of the prepared springform pan. Bake for 10 minutes. Let cool slightly.
- Prepare the apple filling: In a medium saucepan, combine diced apples, 1/4 cup brown sugar, cinnamon, cornstarch, and water. Cook over medium heat, stirring occasionally, until the apples soften slightly and the sauce thickens, about 8-10 minutes. Remove from heat and let cool.
- Prepare the cheesecake batter: Beat the softened cream cheese, 1 1/2 cups sugar, vanilla extract, and salt in a large bowl until smooth. Beat in the eggs one at a time, mixing just until combined after each addition. Do not overmix.
- Assemble the cheesecake: Pour half of the cheesecake batter over the cooled crust. Spoon half of the cooled apple filling evenly over the batter. Pour the remaining batter over the apples. Top with the remaining apple filling.
- Prepare the streusel topping: In a small bowl, combine flour, 1/4 cup brown sugar, and 1/4 cup cold butter. Use your fingers or a pastry blender to cut the butter into the dry ingredients until coarse crumbs form. Sprinkle the streusel evenly over the top layer of apples.
- Bake the cheesecake in a water bath: Place the foil-wrapped springform pan inside a larger roasting pan. Carefully pour hot water into the roasting pan until it reaches halfway up the sides of the springform pan. Bake for 60-75 minutes, or until the edges are set but the center still jiggles slightly.
- Turn off the oven, crack the door open slightly, and let the cheesecake cool in the oven for 1 hour. Remove from the water bath and cool completely on a wire rack. Chill in the refrigerator for at least 6 hours, or preferably overnight.
- Before serving, drizzle the top generously with salted caramel sauce. Remove the springform ring.
Notes
- For the best texture, bring the cream cheese and eggs to room temperature before mixing.
- If you prefer a less intense caramel flavor, reserve half the caramel sauce for serving.
- If you do not want to use a water bath, bake the cheesecake without water, but watch closely to prevent cracking.
Nutrition
- Serving Size: 1 slice
- Calories: 450
- Sugar: 40g
- Sodium: 300mg
- Fat: 28g
- Saturated Fat: 17g
- Unsaturated Fat: 11g
- Trans Fat: 0.5g
- Carbohydrates: 45g
- Fiber: 2g
- Protein: 6g
- Cholesterol: 105mg