

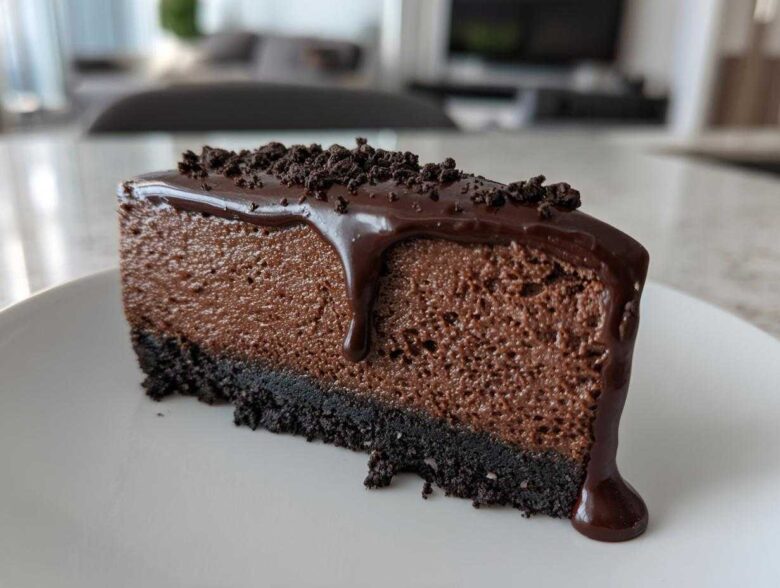
I’m here to tell you a huge secret: you don’t need to stress about water baths or worrying if your oven temperature is right just to get a truly decadent dessert. Forget everything you think you know about fiddly baked cheesecake! We are going straight for the top spot with the ultimate triple chocolate no-bake chocolate cheesecake. This recipe delivers that rich, silky smooth cheesecake texture every single time I make it, and honestly, the ease of the no-bake method is just glorious for parties or even just a Tuesday night chocolate craving.
Seriously, if you love intense chocolate flavor, get ready. This version, built on a snappy Oreo crust and topped with shiny ganache, is what I reach for when I need a showstopper. You can find more of my favorite quick fixes for rich treats over here if you need more no-fuss recipes!
Why This Creamy Chocolate Cheesecake Recipe Stands Out (E-E-A-T Focus)
When it comes to true indulgence, ordinary just won’t cut it, which is why this specific chocolate cheesecake recipe jumped straight to the top of my favorites list. My goal here was maximum decadence with minimum kitchen panic. You get that deep, dark chocolate flavor that screams ‘bakery style cheesecake’ but without any chance of cracks or sinking centers. Trust me, giving up the oven for this one is totally worth it.
- No Water Bath Needed: That’s right, zero fuss or worrying about steam!
- Guaranteed Creamy Texture: It sets up unbelievably perfectly every single time.
- Triple Threat: We hit milk, dark, and cocoa chocolate notes for ultimate richness.
This version is my go-to for holiday stress because it’s so reliable; it just hangs out in the fridge getting firmer and more delicious.
Achieving Silky Smooth Cheesecake Texture Without Baking
The magic really comes down to the chemistry of the ingredients when we skip the heat. In a baked version, if you overmix or the temperature fluctuates, you get graininess—ugh! But here, we are relying on cold whipping cream folded in at the end.
When you whip the heavy cream separately until it forms stiff peaks, you are basically incorporating tons of beautiful, stable air bubbles. Folding that air gently into the dense, rich chocolate cream cheese base lightens everything up beautifully. This technique results in the lightest, silkiest smooth cheesecake you’ve ever tasted, making it the best chocolate cheesecake I’ve ever made at home, hands down.
Ingredients for the Ultimate Triple Chocolate Cheesecake
This incredibly decadent chocolate cheesecake recipe really doesn’t ask for much, which is why I love it for a quick, rich chocolate dessert when company drops by unexpectedly. Remember, precision matters here because we aren’t baking off any mistakes! Everything is mixed cold or room temperature, so be sure you have your ingredients ready to go before you start mixing. If you’ve ever made a no-bake pumpkin cheesecake, you’ll recognize similar principles, but with way more chocolate!
We need three main construction zones here: the base, the main body of the cheesecake, and the glossy topping. Check out the list below and make sure you have everything on hand. You can see other fantastic no-bake recipes here if you need more inspiration!
For the Oreo Crust Cheesecake Base
This is the foundation, so we want it sturdy and packed tightly! We need a full 9-inch springform pan for this amount of filling, so watch that you crush enough cookies.
- 1 3/4 cups crushed Oreo cookies (that’s about 28 regular cookies, crushed until they look like sand!).
- 6 tablespoons unsalted butter, melted smooth.
For the Rich Chocolate Cheesecake Filling
This is where the creamy chocolate cheesecake truly comes together. The most important thing here, seriously, is your cream cheese. It has to be fully softened, almost mushy. If it’s cold, you will end up with lumps, and we absolutely cannot have lumpy, decadent chocolate cheesecake!
- 16 ounces full-fat cream cheese, softened completely.
- 1 cup granulated sugar.
- 1/2 cup unsweetened cocoa powder (sift this to avoid little clumps!).
- 4 ounces unsweetened chocolate, melted down and cooled slightly—this gives us the intense dark chocolate color.
- 1 teaspoon vanilla extract.
- 1 1/2 cups heavy whipping cream, kept ice cold from the fridge.
- 1/4 cup powdered sugar (this helps stabilize all that whipped cream!).
For the Dark Chocolate Ganache Topping
This shiny top layer really seals the deal and makes it look like a true bakery style cheesecake experience. We are using semi-sweet here to keep the overall dessert balanced.
- 4 ounces semi-sweet chocolate, finely chopped.
- 1/2 cup heavy whipping cream (this might be leftover from your main filling cream, but measure it separately!).
Step-by-Step Instructions for No Bake Chocolate Cheesecake
Okay, now that we have all our gorgeous ingredients ready, let’s put this ultimate triple chocolate cheesecake together. You’re going to be amazed how fast this comes together since we’re skipping the oven entirely! It really is the easiest way to make a show-stopping dessert for any gathering. If you want to see another fantastic no-bake recipe that uses a graham cracker base similar to this, you should check out my no-bake peanut butter pie!
Preparing and Chilling the Oreo Crust
First things first, we need a solid base for our creamy chocolate cheesecake. Grab that 9-inch springform pan. In a bowl, just toss those measured crushed Oreos with the 6 tablespoons of melted butter. You want to mix this until it really looks like wet sand—every crumb should be coated.
Now, press that mixture firmly into the bottom of your pan. I like to use the bottom of a glass measuring cup to really compact it down; this ensures it won’t crumble when you slice it later. Once it’s tight and even, pop that pan straight into the refrigerator to chill while you work on the filling. Give it at least 15 minutes to firm up a bit.
Mixing the Creamy Chocolate Cheesecake Filling
Time for the star! Grab your biggest mixing bowl. Beat that fully softened cream cheese and the granulated sugar together until you have something pale and completely smooth. Remember what I said—no lumps allowed in this rich chocolate dessert!
Next, sift in your cocoa powder slowly and mix until it’s just incorporated. Then, pour in the melted and cooled unsweetened chocolate and the vanilla. Scrape down the sides—we want everything mixed perfectly, but don’t overbeat it yet!
In a completely separate, clean bowl, whip your 1 1/2 cups of cold heavy cream with the 1/4 cup of powdered sugar until you reach stiff peaks. This is crucial for that beautiful texture! Now, take your time here: gently fold that whipped cream into the chocolate mixture. You must fold gently! We are creating pockets of air here that give you that light, airy yet intensely flavorful, creamy chocolate cheesecake. Stop folding the second you don’t see any white streaks left.
Setting the Chocolate Cheesecake
Once your filling is light and uniform, pour it right over your chilled Oreo crust. Use an offset spatula to smooth the top nicely. Then, cover it loosely with plastic wrap. Resist the urge to peek!
This dessert needs time to set up solid enough to hold that ganache, so it needs a good 6 hours in the refrigerator minimum. If you can manage it, honestly, let it hang out overnight. When you make it the day before a party, it’s truly the easiest holiday dessert imaginable!
Making and Applying the Chocolate Ganache
Once your chocolate cheesecake is completely firm, it’s ganache time. Put your finely chopped semi-sweet chocolate into a bowl that can handle heat. Now, heat that last 1/2 cup of heavy cream in a tiny saucepan until it just starts to bubble around the edges—don’t let it boil hard!
Pour that hot cream right over the chocolate and just walk away for about five minutes. Let the heat do the heavy lifting. After that rest, whisk it until it turns into a glossy, smooth liquid. Let that ganache cool for about 10 minutes so it thickens up to a beautiful, spreadable consistency—it shouldn’t be too runny or it will slide right off.
Pour or gently spread the ganache evenly over the top of your set dessert. Return the whole thing to the fridge for just 30 more minutes to let that dark chocolate topping get firm before slicing the first piece!
Tips for the Best Homemade Chocolate Cheesecake
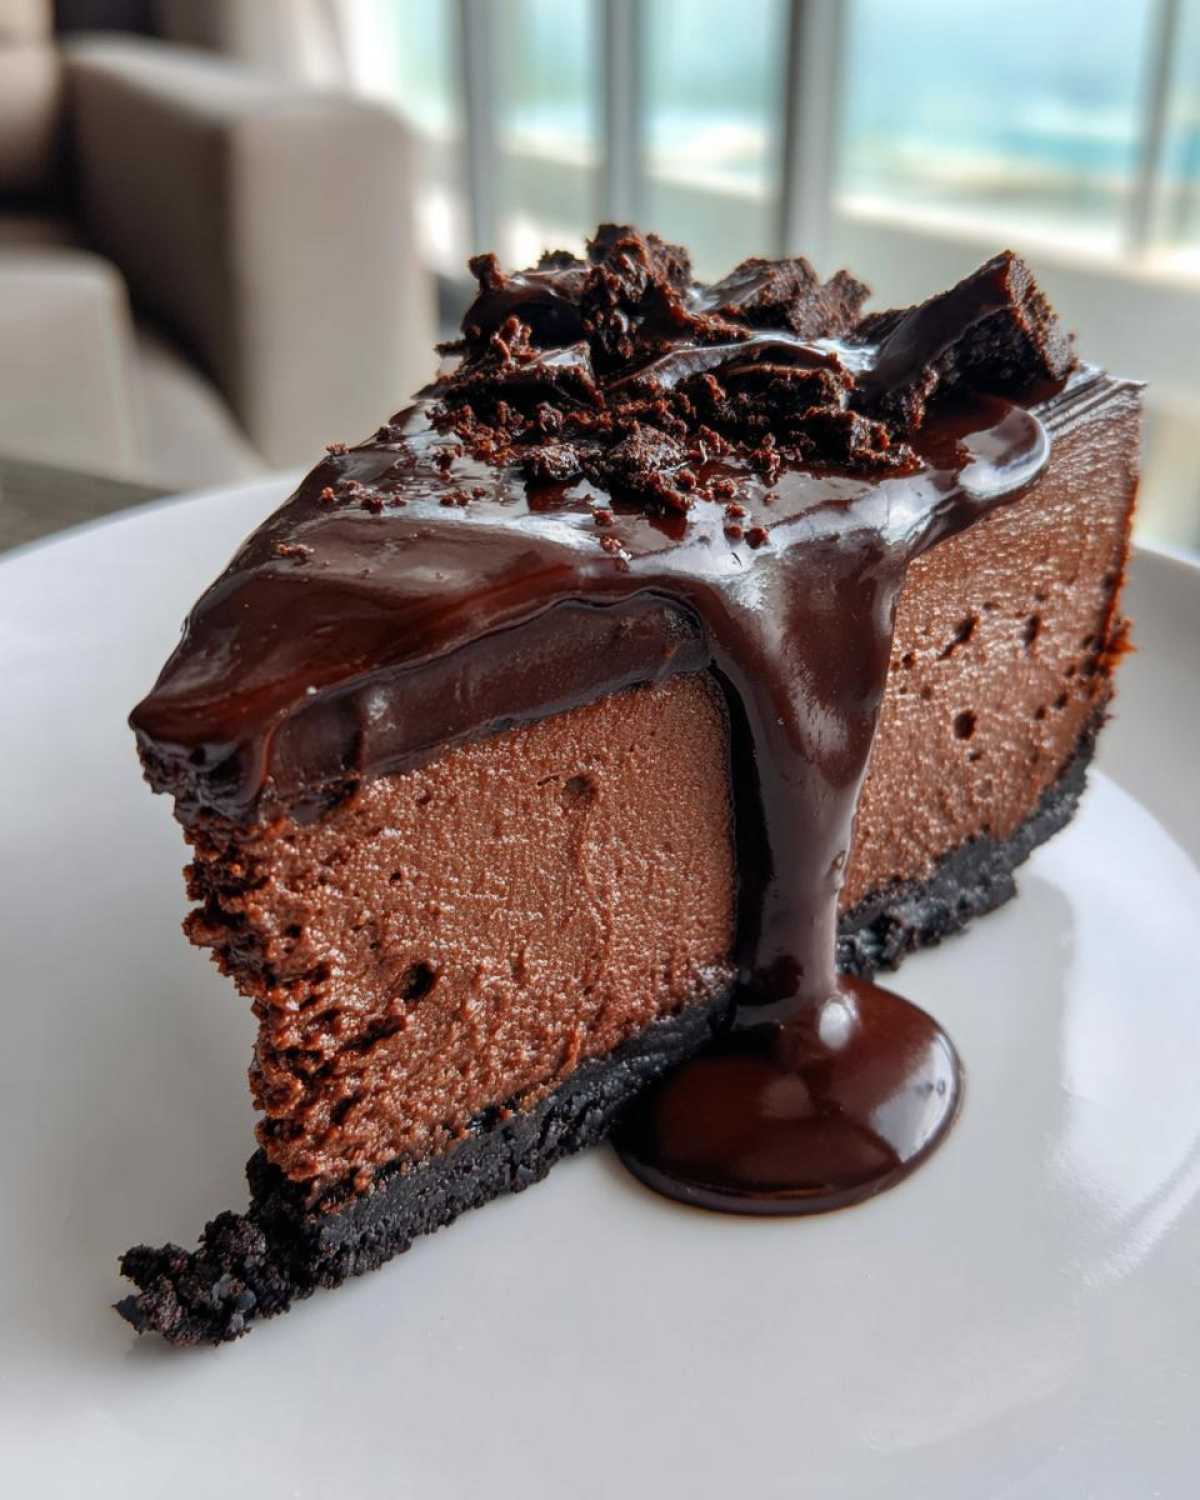
Getting a bakery-style result with this decadent chocolate cheesecake at home is totally achievable, I promise! The success of a no-bake recipe really comes down to a few simple tricks that I’ve picked up over making this absolute favorite for every birthday and holiday. If you follow these pointers, you’ll end up with a rich, gorgeous slice every time. Keep these tips handy when you make your next homemade chocolate cheesecake!
Don’t forget to check out my notes on brown butter pumpkin bread if you’re feeling adventurous with butter later on; managing fat temperature is key in everything we bake!
Ingredient Temperature and Preparation Secrets
Temperature is everything, especially when you are dealing with dairy for a super creamy chocolate dessert. For the filling, your cream cheese needs to be truly room temperature—I mean, it should squish easily between your fingers without any resistance. If you try to mix cold cream cheese, you’ll end up with little lumps no matter how long you beat it, and that ruins the silky smooth cheesecake dream!
On the flip side of the temperature coin, your heavy whipping cream needs to be ice cold. Seriously, stick the bowl and the beaters in the freezer for 10 minutes before you whip it up. Cold cream traps air much better, which is what gives us those gorgeous, stable stiff peaks we need to fold into that rich chocolate base.
Serving Your Decadent Chocolate Cheesecake
Getting the perfect slice out of the springform pan can feel nerve-wracking, especially when it’s so beautiful! The chocolate ganache topping sets up nicely, but you still want clean edges for presentation.
Here is the trick that separates the amateurs from the pros: clean slicing. Before you even attempt to cut the first piece, fill a tall glass with very hot water. Dip a long, thin sharp knife into the hot water and wipe it completely dry with a paper towel. Slice down the side of the cheesecake.
Repeat that process—dip, wipe dry, cut—for every single slice you make. The heat melts the chocolate surface slightly as you cut, guaranteeing a clean release without dragging the ganache or the crust. It looks magical when you pull that first perfect slice away!
Variations on This Chocolate Cheesecake Recipe
While I truly believe this no-bake, triple chocolate masterpiece is the absolute pinnacle of rich chocolate dessert perfection, I know some of you are bakers at heart and might want to switch things up! It’s great to know you can tweak this base recipe to suit your mood or what you have on hand. We love variety in the kitchen, right?
If you’re into experimenting with other flavors, maybe you’ll also enjoy my recipe for chocolate chip zucchini bread next time you need a different kind of chocolate fix!
Making a Baked Dark Chocolate Cheesecake Alternative
So, let’s talk about the oven. If you’re feeling nostalgic or just prefer that dense, slightly tangy texture a baked cheesecake gives you, you can definitely adapt this. Since we are going for a dark chocolate cheesecake here, I suggest using melted unsweetened chocolate in the filling instead of cocoa powder for a deeper flavor, though you should still use the eggs specified in a standard baked recipe for structure.
The crucial part, though, is the water bath—don’t skip it! You’ll need to wrap your springform pan tightly in heavy-duty foil to prevent leaks, and then place that wrapped pan inside a larger roasting pan. Pour boiling water into the roasting pan until it comes about halfway up the side of the cheesecake pan. You’ll bake this kind of chocolate cheesecake at about 325°F for 50 to 60 minutes. It’s fussier, but worth it if you crave that classic baked result!
Crust Swaps for Your Chocolate Dessert Recipes
The Oreo crust is just phenomenal because it’s so chocolatey, but sometimes you don’t have enough Oreos, or maybe you just want a different flavor counterpoint to that rich chocolate cheesecake filling. You have options!
My favorite swap is chocolate wafer cookies—they behave almost identically to Oreos but give you a slightly more delicate crunch. If you want to lighten the whole thing up a touch, use graham crackers, but here is my secret: toast those graham crackers lightly first! You can toss them with a tablespoon of cocoa powder and maybe switch out half the butter for melted coconut oil for a really interesting flavor profile in your Oreo crust cheesecake base.
Feel free to experiment! A good crust ratio is usually about 1 3/4 cups of crumbs to 1/3 or 1/2 cup of melted fat, depending on how tightly you press it.
Storage and Reheating Instructions for Creamy Chocolate Cheesecake
One of the best things about this creamy chocolate cheesecake being a no-bake recipe is how long it keeps! Since it’s so rich in dairy fats, we need to be smart about storage to keep that ganache topping shiny and the filling perfectly silky smooth. If you’re anything like me, you’ll inevitably have leftovers, even after a big party serving this decadent chocolate dessert.
The most important takeaway here is keeping this bad boy airtight. You don’t want any fridge odors creeping into your beautiful dessert, and you don’t want the air drying out that gorgeous chocolate ganache layer, either!
For the best results, after the ganache topping has fully set (about 30 minutes back in the fridge), cover the entire springform pan tightly with plastic wrap. If the pan lid fits snugly, use that instead! Place the whole thing in the coldest part of your refrigerator.
This chocolate cheesecake will look and taste fantastic for up to five days when stored this way. Seriously, on day three or four, the flavor is even more intense and developed—that’s when it becomes the ultimate chocolate lovers dessert in my book!
Now, you asked about reheating, which is funny for a no-bake! We never reheat this, of course, but if you need to soften it slightly from a deep chill (say, if you let it sit in the freezer for a bit, which you can do!), just let it sit on the counter for about 20 minutes before slicing. That slight warming makes for the easiest slice. Never microwave this, or you’ll end up with melted chocolate goo instead of that perfect, rich chocolate dessert!
Frequently Asked Questions About This No Bake Chocolate Cheesecake
Every baker has questions, especially when tackling what promises to be the best chocolate cheesecake ever! Since no-bake recipes rely on chilling mostly, timing and ingredient prep can make or break that creamy texture we are aiming for. I’ve pulled together the common questions I always get about this recipe. If you’ve made my easy easy pear crisp, you know I aim for straightforward answers!
Can I make this chocolate cheesecake ahead of time?
Yes, please do! This is one of the biggest advantages of this recipe. Since it needs a solid chill time anyway, making it the day before serving is perfect. In fact, I find that letting this rich chocolate dessert chill for a full 24 hours really allows the dark chocolate flavors to deepen and meld together perfectly. Just remember to keep it well-covered in the fridge!
What is the best way to soften the cream cheese for this easy chocolate cheesecake?
This is a make-or-break step for getting that silky smooth cheesecake texture! Do not try to microwave it on high—that just heats the outside and leaves you with a gooey edge and a cold center. The best way is to leave the cream cheese foil-off on the counter for at least two full hours before you start making the crust. If you’re really in a rush, cut the blocks into small 1-inch cubes and let them sit for about an hour; they’ll soften much faster that way.
Can I freeze this silky smooth cheesecake?
You absolutely can freeze this no-bake miracle! Because it doesn’t have eggs that can separate, it freezes beautifully. Once the ganache topping is completely set, cover the cheesecake pan tightly with plastic wrap, and then wrap it again in a layer of aluminum foil or put it in a large sealed freezer bag. This protects it from freezer burn.
When you want to serve it, pull that decadent chocolate cheesecake out of the freezer and let it thaw slowly in the refrigerator overnight. It usually takes about 8 to 10 hours to completely thaw and return to that perfect, creamy texture!
Nutritional Estimate for This Rich Chocolate Dessert
I always get asked about the nutrition when someone sees this gorgeous, rich chocolate dessert, especially since it’s packed with chocolate and cream cheese. Now, I have to be super upfront with you: this breakdown is just an estimate, okay? Because we are dealing with homemade ingredients, things can swing a little based on the exact brand of Oreos or how much chocolate you really used in the ganache! I’m basing this on the standard ingredient amounts listed above.
If you want to see the full medical disclaimer about my estimates, you can click right over here. But for those of you counting macros, here’s the rough idea per slice—and remember, this is a very rich slice!
- Calories: Around 450 per slice. Yes, it’s an indulgence, but you deserve it!
- Fat: Roughly 32 grams. That’s where the cream cheese richness comes from!
- Carbohydrates: We are looking at about 38 grams.
- Protein: About 7 grams. Not bad for a no-bake chocolate cheesecake!
This is definitely not an everyday snack, but it’s the perfect cheesecake for parties when you need something truly satisfying and decadent!
Share Your Experience Making This Chocolate Cheesecake
Okay, that’s it—the ultimate triple chocolate cheesecake is officially ready for your kitchen! I put everything I know about achieving that perfect, creamy chocolate cheesecake into these steps. Now, I desperately need to know how you enjoyed it!
Did you follow the no-bake method exactly? Did you find this to be the easiest chocolate cheesecake you’ve ever tackled? I am obsessed with hearing back from you all because your feedback helps me know what variations people love most. Please, please leave a star rating below; it helps other bakers find this fantastic rich chocolate dessert!
And if you went all out and made it for a special event, you have to show me those gorgeous slices! Tag me on social media when you post photos of your homemade chocolate cheesecake—especially that shiny ganache topping. If you ran into any unexpected hiccups or you did something incredible to make it even better for your family, drop the details in the comments section!
If you have any burning questions about ingredient swaps or storage after you’ve served it, my contact page is always open over here. Happy baking (or, well, *no-baking*!)!
PrintUltimate Triple Chocolate No-Bake Cheesecake
A rich, creamy, and silky no-bake chocolate cheesecake featuring an Oreo crust and a dark chocolate ganache topping.
- Prep Time: 30 min
- Cook Time: 0 min
- Total Time: 6 hours 30 min
- Yield: 10 servings
- Category: Dessert
- Method: No Bake
- Cuisine: American
- Diet: Vegetarian
Ingredients
- 1 3/4 cups crushed Oreo cookies (about 28 cookies)
- 6 tablespoons unsalted butter, melted
- 16 ounces cream cheese, softened
- 1 cup granulated sugar
- 1/2 cup unsweetened cocoa powder
- 4 ounces unsweetened chocolate, melted and cooled slightly
- 1 teaspoon vanilla extract
- 1 1/2 cups heavy whipping cream, cold
- 1/4 cup powdered sugar
- 4 ounces semi-sweet chocolate, chopped (for ganache)
- 1/2 cup heavy whipping cream (for ganache)
Instructions
- Prepare the crust: Mix the crushed Oreos and melted butter. Press the mixture firmly into the bottom of a 9-inch springform pan. Chill in the refrigerator for 15 minutes.
- Make the filling: In a large bowl, beat the softened cream cheese and granulated sugar until smooth.
- Sift in the cocoa powder and mix until just combined.
- Beat in the melted and cooled unsweetened chocolate and vanilla extract. Scrape down the sides of the bowl.
- In a separate bowl, whip the 1 1/2 cups of cold heavy cream and powdered sugar until stiff peaks form.
- Gently fold the whipped cream into the chocolate cream cheese mixture until no streaks remain. Do not overmix.
- Pour the filling over the chilled Oreo crust and smooth the top. Cover loosely with plastic wrap and refrigerate for at least 6 hours, or preferably overnight, until firm.
- Prepare the ganache: Place the chopped semi-sweet chocolate in a heatproof bowl. Heat the 1/2 cup of heavy cream in a small saucepan until it just begins to simmer. Pour the hot cream over the chocolate. Let it sit for 5 minutes, then whisk until smooth.
- Let the ganache cool slightly (about 10 minutes) until it thickens to a spreadable consistency.
- Pour or spread the ganache evenly over the set cheesecake. Return to the refrigerator for 30 minutes to set the topping before serving.
Notes
- For a darker crust flavor, use chocolate wafer cookies instead of Oreos.
- If you prefer a baked version, bake at 325°F for 50-60 minutes using a water bath.
- To release the cheesecake easily, run a thin knife dipped in hot water around the edge before releasing the springform side.
Nutrition
- Serving Size: 1 slice
- Calories: 450
- Sugar: 35g
- Sodium: 250mg
- Fat: 32g
- Saturated Fat: 19g
- Unsaturated Fat: 13g
- Trans Fat: 0.5g
- Carbohydrates: 38g
- Fiber: 2g
- Protein: 7g
- Cholesterol: 95mg