

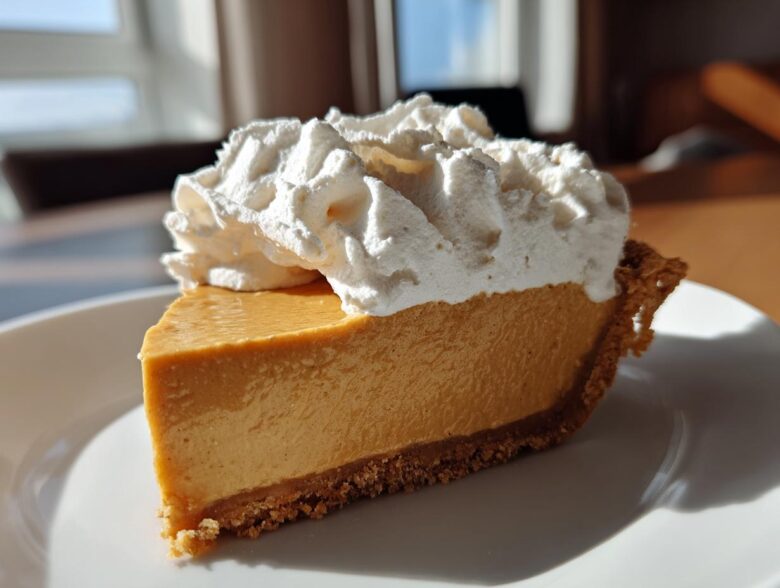
Oh, nothing beats the pure, cozy joy of a homemade pie, right? Especially when that pie tastes like a hug from your favorite relative! For years, I tinkered in the kitchen trying to nail that perfect, nostalgic flavor, and I finally landed on what I call the definitive guide to making an old-fashioned, truly creamy butterscotch pie. Forget those versions that taste like sugary goo; this one has that rich, deep brown sugar flavor that melts on your tongue.
When you’re dealing with egg yolks and heat, things can go south fast. Trust me, I’ve scrambled enough custard bases to fill a breakfast diner! But I finally figured out the secret rhythm—the slow temper and the steady stirring—which lets you create that incredible, velvety filling without any lumps. Come on over to my little corner of the internet, and let’s make this your best dessert finale yet. You can check out more about my baking philosophy right here!
Why This Old-Fashioned Butterscotch Pie Recipe Works
You need a butterscotch pie recipe that stands up tall and tastes exactly like the one you remember from childhood, right? This recipe means business when it comes to flavor and texture. We aren’t messing around with thin fillings or weird stabilizers here!
- We guarantee that deep, unmistakable brown sugar flavor—this isn’t just caramel cheating!
- The final texture is luxurious, thick, and holds its shape beautifully.
- It tackles the main fear: staying perfectly smooth, never grainy or runny.
Achieving the Silky Smooth Custard Filling
The magic for that perfect creamy butterscotch pie filling is one word: tempering. Never, ever dump the hot milk mixture right into your egg yolks unless you want scrambled eggs floating in your pie! We slowly introduce that dairy warmth to the yolks, raising their temperature gently. This crucial step ensures you get that stunning, perfectly smooth custard base required for any truly old fashioned butterscotch pie.
Perfecting Your Flaky Pie Crust Recipe
For any great filling, you need a proper stage! This recipe demands a fully baked crust before we pour in that hot filling. You need that crisp barrier between the silky smooth dessert and the buttery bottom so you don’t end up with a soggy mess. While I love a good homemade flaky pie crust recipe, feel free to use your favorite blind-baked shell right here!
Ingredients for Your Homemade Butterscotch Dessert
Okay, let’s talk about what you need to gather for this amazing homemade butterscotch dessert. Getting these simple ingredients right is half the battle! Make sure your brown sugar is packed nicely in the measuring cup, and please, take the time to truly beat those egg yolks lightly—we don’t want giant yellow clouds when we start mixing.
This recipe makes enough filling for one standard 9-inch pie shell, which must be pre-baked and cooled, remember! Having those four tablespoons of butter cut into smaller pieces helps it melt faster right at the end when we take the pot off the heat.
- 1 (9 inch) unbaked flaky pie crust (make sure it’s cooled down!)
- 1 cup packed light brown sugar
- 1/4 cup cornstarch
- 1/4 teaspoon salt
- 1 1/2 cups whole milk
- 1/2 cup heavy cream
- 3 large egg yolks, lightly beaten
- 4 tablespoons unsalted butter, cut into pieces
- 1 teaspoon vanilla extract
And for that cloud-like finish, make sure you have the chilling cream ready to go!
- 1 cup heavy whipping cream, chilled
- 2 tablespoons powdered sugar
- Pinch of salt
If you need a refresher on how to make a great base, check out my notes for similar delicious pie bar bases—the technique for a strong foundation is often the same!
Easy Butterscotch Pie Tutorial: Step-by-Step Instructions
Putting together this butterscotch pie feels like magic, I promise! It comes together surprisingly fast on the stovetop, which keeps things nice and cozy in the kitchen. Just follow these steps closely, and you’ll have that rich filling ready for its cool down. If you want to see how I handle other spiced fillings, check out my recipe for moist brown butter pumpkin bread!
Preparing the Crust and Initial Filling Base
First things first: you absolutely must have a completely cool crust ready to go. I mean stone cold! Once your crust is baked and cooled, grab a medium saucepan. Whisk that brown sugar, cornstarch, and salt together really well before adding any liquid—this prevents lumps later. Then, slowly whisk in the whole milk and heavy cream until it looks like smooth, sweet mud.
Now, cook it over medium heat, stirring constantly. It will start looking like pudding—we are looking for it to coat the back of a spoon before taking the pan off that heat.
Tempering Eggs for a Smooth Custard Pie Filling
This is the game-changer for a smooth custard pie filling. Once off the heat, we temper those yolks! Slowly drip about a cup of that hot sugar mixture into your pre-whisked yolks while you whisk the yolks like crazy. If you dump it all in, you’ll ruin your whole effort and get soup instead of pie!
Once tempered, pour the egg mixture back into the main pan. Return it to low heat for just a minute or two; this thickens it up permanently. Stir those pieces of butter in until they vanish, add your vanilla, and pour it right into that waiting crust. Seriously, press plastic wrap right down onto the goo to stop it from forming a skin!
Chilling and Whipped Cream Topping for Your Butterscotch Pie
The waiting is the hardest part! This pie needs a minimum of four hours in the fridge—really, longer is better—for the filling to set up right. Don’t even think about skipping that chill time if you want that perfect slice!
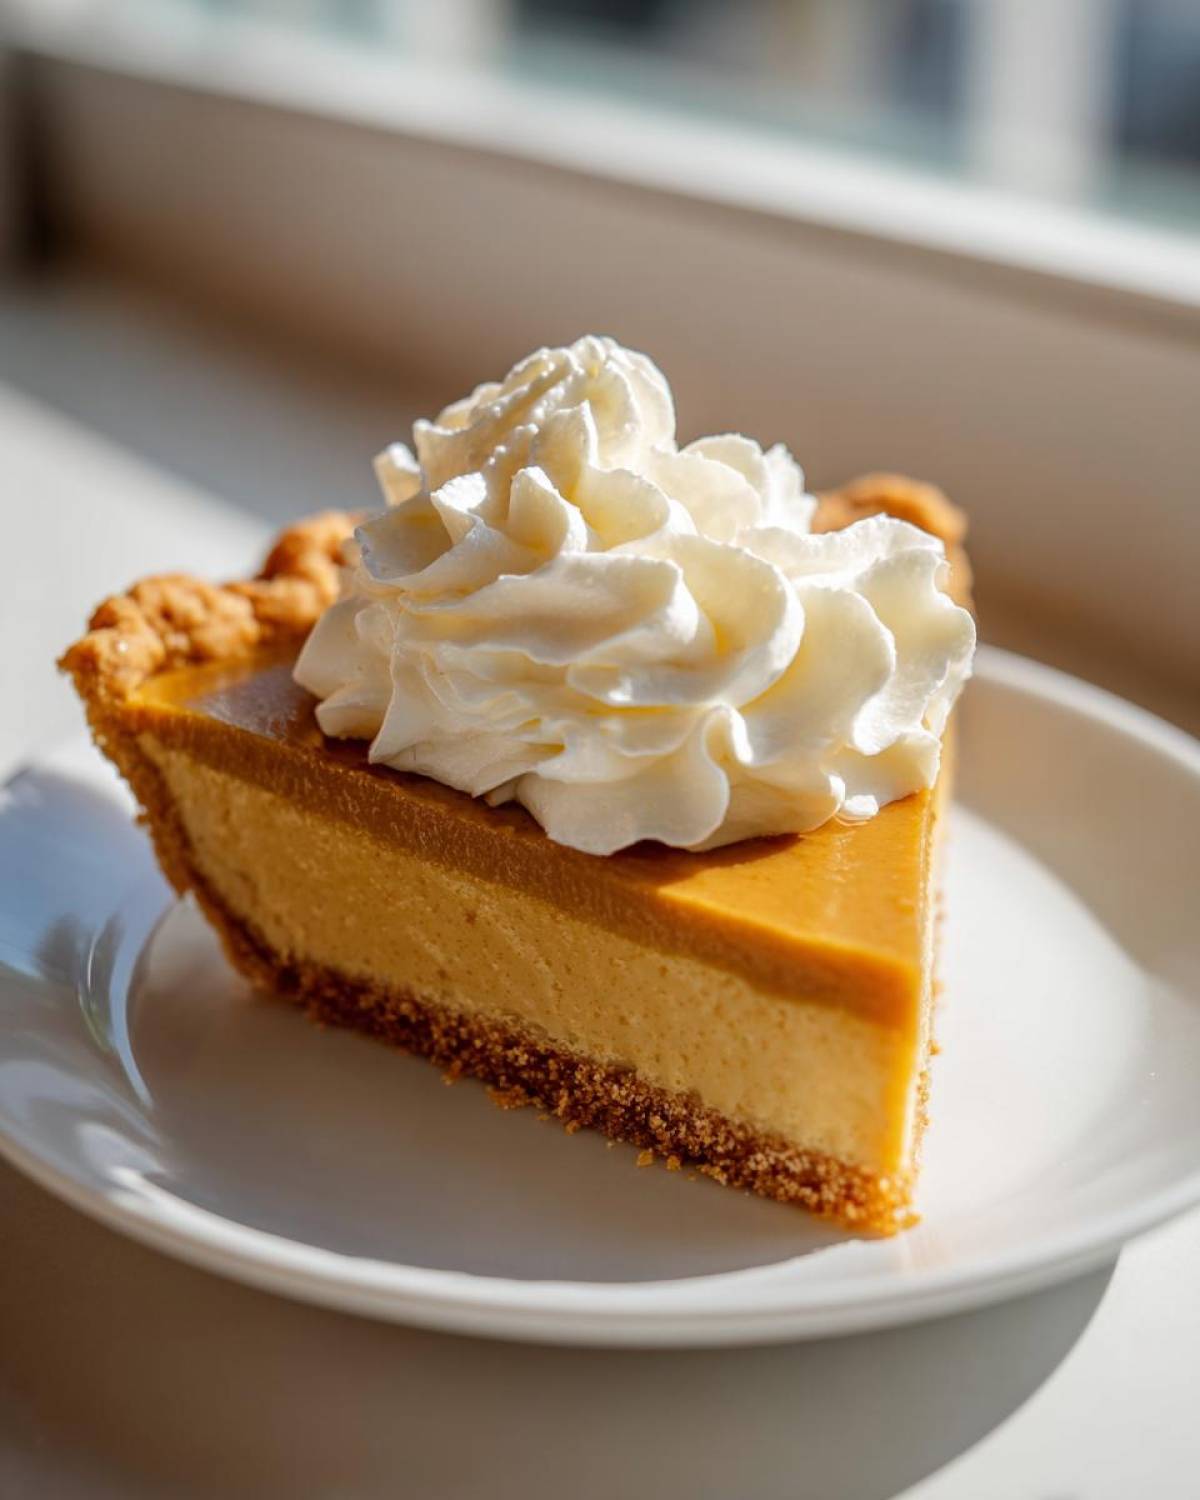
When you’re ready to serve, grab that chilled heavy cream and use a hand mixer to whip it stiff with a little powdered sugar and salt. This light, billowy topping is the perfect contrast to the deep, rich flavor of the pie. Spread it on, and call yourself a baking champion!
Tips for the Best Southern Butterscotch Pie
Now that you know the technique, let’s talk about optimizing the flavor for that true, best southern butterscotch pie taste. You want that deep, almost smoky note, right? That comes from using good quality light brown sugar—don’t skimp here. If your sugar is clumpy, you need to press it firmly into the cup because molasses content is everything for that rich caramel dessert depth!
A common pitfall I see people make is boiling the custard vigorously once the egg yolks are in. Please don’t! After tempering, low and slow heat for that final minute is all you need. Boiling risks texture failure, and we are shooting for perfection here. If you want to see a related flavor profile done right, check out my salted caramel apple pie bars—the slow cooking process is similar!
Also, that little bit of vanilla extract at the end? It’s not optional! It brightens up the heavy brown sugar flavor so it doesn’t taste flat. You’ll be amazed at the difference it makes in this homemade butterscotch dessert.
Variations on the Classic Butterscotch Pie
My recipe is the ultimate classic, but I know sometimes you need a quick fix or a little twist for a holiday gathering! If you’re looking for a true no bake butterscotch dessert option, ditch the pastry shell—just whip up some graham cracker crumbs with melted butter and press that into your pie plate. Chill it for an hour, and bam, you have a crust!
If you want to stick with the flaky crust but step up the finishing touch, try crushing a handful of those salty-sweet pretzels and sprinkling them lightly over your finished whipped cream. It just adds that little bit of texture that takes this comfort food pie over the top. For another fun sprinkle idea, peek at my recipe for amazing caramel corn—it gives you ideas for crunchy toppings!
Storage & Reheating Instructions for Your Comfort Food Pie
This rich comfort food pie tastes absolute best the day you make it, especially with that beautiful fresh whipped topping! You definitely want to keep this beauty chilled in the refrigerator. It should stay perfectly good for about three, maybe four days max, tucked safely away.
Now, here’s the tough love part: freezing is a no-go for this smooth custard. The texture just gets weird when it thaws. If you must freeze it, only freeze the filling *before* you add the topping. Even then, let it thaw slowly in the fridge overnight. Trust me, fresh is always best for this recipe!
Frequently Asked Questions About Butterscotch Pie
Can I make this a no bake butterscotch dessert?
You totally can! If you want a true creamier butterscotch pie recipe that skips the oven entirely, you just need to modify the crust. Instead of baking the pastry, mix about 1 1/2 cups of graham cracker crumbs with 1/3 cup of melted butter. Press that mixture firmly into your pie plate and chill it for at least an hour. The filling itself still needs to be cooked on the stove to set the custard, though!
Why is my butterscotch pie filling runny?
Nine times out of ten, a runny filling means the cornstarch didn’t fully activate, or you didn’t let it cook long enough before tempering. Remember, you need that mixture clinging to the back of your spoon before taking it off the heat! Also, make sure you chilled it for the full four hours. Rushing the chill means you’ll have delicious, warm butterscotch pudding pie instead of a firm slice!
What’s the main difference between butterscotch and caramel?
This is a fun one! Chemically, they are so close, but the flavor difference is huge. Caramel gets its flavor primarily from just white granulated sugar cooked down. For this old fashioned butterscotch pie, we rely on brown sugar—that molasses content in the brown sugar gives butterscotch its distinctive, deeper, almost richer flavor profile compared to plain caramel.
Can I store leftovers without the whipped topping?
Yes, absolutely! If you know you won’t eat the whole pie right away, definitely store the pie filling *before* adding the whipped cream. You can keep it tightly covered in the fridge for up to four days. When serving leftovers, you can make a quick fresh batch of whipped cream, or you might like to try the topping suggested in the variations section like a crumb mixture. Speaking of no-bake treats, you should check out my recipe for no bake peanut butter bars!
Nutritional Snapshot of This Creamy Butterscotch Pie Recipe
I know some of you bakers are watching those numbers, so I pulled together a basic nutritional breakdown for a slice of this heaven. Remember, I’m a baker, not a nutritionist, so these figures are just estimates based on my standard ingredient amounts—especially since crusts can vary wildly!
This is meant to be a rich treat, so it packs a punch in the indulgence department, which is why we only need one slice to satisfy that craving for a true, creamy butterscotch pie recipe. If you want to lighten it up a bit, using a lighter cream might shave a few calories, but honestly, where’s the fun in that?
- Serving Size: 1 slice
- Calories: 410
- Sugar: 45g (But hey, it’s mostly from that glorious brown sugar!)
- Fat: 22g
- Saturated Fat: 13g
- Carbohydrates: 50g
- Protein: 5g
Enjoy this beautiful, glorious pie in moderation, knowing you made it entirely from scratch!
Share Your Show Stopping Dessert Finale
Well, now you have the blueprint for the ultimate butterscotch pie! I truly hope you take the plunge and make this for your next gathering. As you pull that beautiful pie out of the fridge, topped high with fluffy cream, you’ll know you’ve created something special.
Once you try this easy butterscotch pie tutorial, please don’t keep the results to yourself! I adore hearing how it turned out for you. Come back and leave a rating for this recipe right here on the page—five stars if you agree it’s the creamiest ever!
And if you snapped a picture of your glistening slice of dessert pie for gatherings, tag me on social media! It genuinely makes my day to see your culinary triumphs. If you have any last-minute questions that I didn’t cover, feel free to reach out via my contact page. Happy baking, and enjoy that perfect, rich slice!
PrintOld-Fashioned Creamy Butterscotch Pie
Make a rich, smooth, homemade butterscotch pie with a velvety custard filling and a light whipped topping. This recipe provides clear steps for a perfect, scratch-made dessert.
- Prep Time: 20 min
- Cook Time: 15 min
- Total Time: 4 hours 35 min
- Yield: 8 servings
- Category: Dessert
- Method: Stovetop Custard
- Cuisine: American
- Diet: Vegetarian
Ingredients
- 1 (9 inch) unbaked flaky pie crust
- 1 cup packed light brown sugar
- 1/4 cup cornstarch
- 1/4 teaspoon salt
- 1 1/2 cups whole milk
- 1/2 cup heavy cream
- 3 large egg yolks, lightly beaten
- 4 tablespoons unsalted butter, cut into pieces
- 1 teaspoon vanilla extract
- 1 cup heavy whipping cream, chilled
- 2 tablespoons powdered sugar
- Pinch of salt
Instructions
- Prepare your 9-inch pie crust and bake it according to your preferred method until lightly golden. Let it cool completely.
- In a medium saucepan, whisk together the brown sugar, cornstarch, and salt.
- Gradually whisk in the whole milk and heavy cream until smooth.
- Cook the mixture over medium heat, stirring constantly with a wooden spoon or whisk. Do not let it boil rapidly.
- When the mixture thickens enough to coat the back of a spoon (about 8 to 10 minutes), remove the pan from the heat.
- In a separate small bowl, whisk the egg yolks lightly.
- Temper the yolks: Slowly pour about 1 cup of the hot sugar mixture into the yolks while whisking constantly. This prevents the eggs from scrambling.
- Pour the tempered yolk mixture back into the saucepan with the remaining hot mixture.
- Return the saucepan to medium-low heat. Cook, stirring constantly, for 1 to 2 minutes until the filling is very thick. Do not allow it to boil after adding the yolks.
- Remove from heat. Stir in the butter pieces until fully melted and incorporated. Stir in the vanilla extract.
- Pour the hot filling immediately into the cooled, pre-baked pie crust. Press plastic wrap directly onto the surface of the filling to prevent a skin from forming.
- Chill the pie in the refrigerator for at least 4 hours, or until the filling is completely set.
- Before serving, prepare the topping: In a chilled bowl, whip the 1 cup of heavy whipping cream with the powdered sugar and a pinch of salt until stiff peaks form.
- Spread or pipe the whipped cream over the chilled pie. Serve immediately or keep refrigerated until serving.
Notes
- For a different crust, you can press a mixture of graham cracker crumbs and melted butter into the pie plate and chill it instead of baking.
- If you prefer a richer topping, substitute the whipped cream with stabilized meringue or store-bought whipped topping.
- To ensure a smooth custard, stir the base constantly while heating, especially when tempering the eggs.
Nutrition
- Serving Size: 1 slice
- Calories: 410
- Sugar: 45
- Sodium: 180
- Fat: 22
- Saturated Fat: 13
- Unsaturated Fat: 9
- Trans Fat: 0.5
- Carbohydrates: 50
- Fiber: 1
- Protein: 5
- Cholesterol: 95