

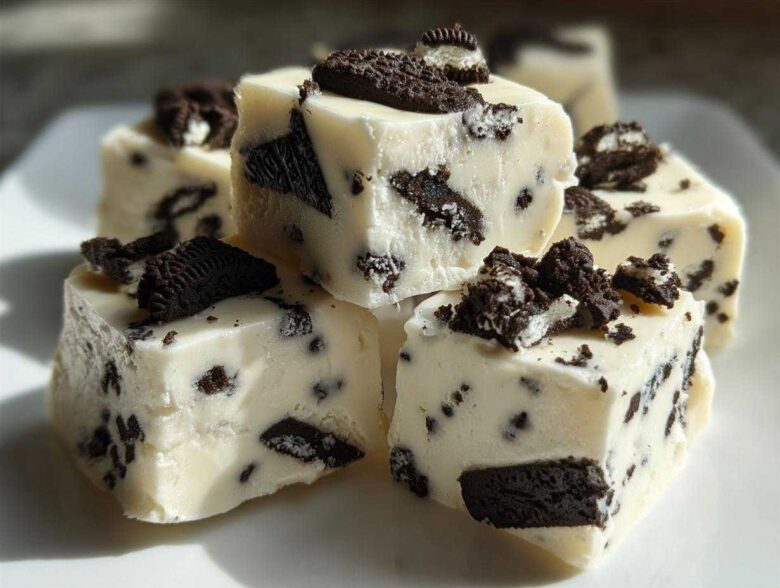
Sometimes you just need a massive sugar rush, right? But when that craving hits, the last thing I want to do is turn on the oven or spend an hour fussing over temperatures and candy thermometers. I’ve tested so many candy recipes over the years, sorting through the failures to find the real winners. And let me tell you, this oreo fudge is in a league of its own.
This is, without a doubt, the easiest, no-bake version of *any* fudge you will ever make; we’re talking three to five ingredients, depending on how you count the Oreos! I absolutely love making this specific oreo fudge because I can whip it up in about ten minutes while dinner is simmering, and then it’s chilling away. It’s my absolute go-to for last-minute teacher gifts or when unexpected guests drop by.
After tweaking the ratios of chocolate to condensed milk dozens of times while trying to keep it quick, trust me, this specific combination yields the perfect, dreamy, creamy texture every single time. Forget grainy candy; we’re aiming for smooth perfection here.
If you need a foolproof, super-fast sweet solution, stick with me. We’re about to make some magic happen with minimal effort. I even included a link to my favorite no-bake bars if you need even more oven-free inspiration over here: No-Bake Peanut Butter Bars.
Why This Easy Oreo Fudge is Your New Favorite No Bake Fudge Recipe
I know what you’re thinking: *fudge* means hard work, right? Wrong! That’s the absolute best part about this oreo fudge. It’s designed for days when you want maximum decadence for minimum time spent standing over a stove. Seriously, I can get it prepped and into the pan before my coffee cools down!
This recipe has won me over repeatedly because it checks all the boxes without fail. I’ve put together the top reasons why I think you’ll fall head over heels for this sweet treat:
- It’s a true no-bake option, meaning zero oven time needed. Perfect for the summer when you don’t want to heat up the kitchen!
- We use just a few items you probably already have, making it a fantastic emergency dessert base.
- The final product is unbelievably smooth. No weird crystals forming, just pure, creamy happiness.
- It slices like a dream, making it perfect for sharing or stashing away for yourself—no judgment here!
If you’re looking for other amazing oven-free desserts, you absolutely have to check out my no-bake peanut butter pie recipe next.
Quick Fudge Ideas: Ready in Minutes
Active prep time clocks in at under ten minutes. That’s my favorite metric for any *Quick Fudge Idea*! Once that hot condensed milk hits the white chocolate, the work is essentially over. You stir, you fold, you chill. It’s that simple. This speed makes it excellent for unexpected dessert needs or those times I realize I forgot to bake something for a potluck tomorrow morning.
Achieving that Creamy Homemade Fudge Texture
The secret handshake in this recipe is the marriage of sweetened condensed milk and good quality white chocolate. When that hot liquid hits the chips, it creates a beautifully stable emulsion. It’s what guarantees that luxurious, melt-in-your-mouth *Creamy Homemade Fudge* texture we all dream about. You don’t get that grainy feeling at all; it just stays velvety soft.
Essential Ingredients for Perfect White Chocolate Oreo Fudge
Okay, let’s talk about what goes into this amazing treat. The beauty of this oreo fudge is how few things we actually require. You can technically call this a *3 Ingredient Fudge* foundation if you count the Oreos as the flavor addition, but trust me, the vanilla makes a huge difference!
Here is what you need to grab before you start getting excited:
- 14 ounces sweetened condensed milk (Make sure this is the thick, syrupy kind, not evaporated milk—that’s a common mistake!)
- 12 ounces white chocolate chips (Don’t skimp here; quality matters for the melt!)
- 1 teaspoon vanilla extract
- 2 cups crushed Oreo cookies (That’s usually about 24 cookies—give or take, depending on how rough you crush them!)
These four ingredients combine to create the ultimate *Cookies and Cream Fudge* experience. I always have the condensed milk on hand for quick desserts like this!
Ingredient Notes and Substitutions for Oreo Fudge
When it comes to the white chocolate, please, please choose a good brand. If you use lower-quality chips, sometimes they seize up or don’t incorporate smoothly when hit with the warm milk. We are aiming for that silky smooth texture, so melt quality is key!
Now, for the Oreos, this is where you can have some fun with your *Oreo Dessert Recipes*! If you’re making this for Christmas, try chopping up some Mint Oreos instead of the classic chocolate wafer. Or, if you want a slightly different look and flavor profile, Golden Oreos work surprisingly well too. They blend into the white chocolate base, giving you a subtle cookie crunch without the dark contrast.
Remember, if you’re looking for other quick savory things to make while the fudge chills, I’ve got a killer recipe for sweet potato sausage breakfast hash!
Step-by-Step Instructions for Your No Bake Fudge Recipe
Alright, let’s get right to mixing because this is where the magic of our *No Oven Desserts* really happens! We’re moving fast here, but don’t worry, rushing is easy because there’s no complicated cooking involved in this oreo fudge—just careful assembly.
You want to start by prepping your 8×8 inch pan. I always cut my parchment paper a bit long so I have handles sticking up over the sides. This overhang is your best friend later when you need to yank that beautiful block of fudge out for slicing!
Next, put that sweetened condensed milk into a small saucepan. You need to heat it gently over medium heat until you see just the slightest simmer bubbling up around the edge. Seriously, do not let it boil hard; we just want it hot enough to melt the chocolate fast. Once it’s hot, pour it immediately over your white chocolate chips sitting in a separate bowl. Now, here is my crucial tip: walk away! Set a timer for five minutes and let that hot milk do its job melting those chips quietly. This resting time is a game-changer!
Preparing the Pan and Melting the Base for Oreo Fudge
After those five minutes are up, add a tiny splash of vanilla extract—it brightens everything up. Then, start whisking slowly from the center outwards until everything looks perfectly smooth, like satiny silk. If you still see any little chocolate lumps, zap it in the microwave for 10 seconds, then whisk again. We need total smoothness for that perfect melt-in-your-mouth feeling in this *White Chocolate Oreo Fudge*.
Folding in Oreos and Setting the Cookies and Cream Fudge
Now for the texture! Gently fold in your crushed Oreos. I mean gently! You don’t want to crush those delicious chunks down into dust; we want bits and pieces of cookie throughout. Pour the whole shebang into your prepared pan and spread it flat. Then, we chill! At least two hours in the fridge is my absolute minimum for this oreo fudge to set firm enough to slice neatly around the edges.
If you need to run off and check out other amazing speedy recipes while this chills, my guide to making No-Bake Peanut Butter Bars is another must-try guaranteed to impress!
Tips for Success Making the Best Oreo Fudge
You’ve assembled your simple ingredients and followed the heating instructions, but now you want to make absolutely sure this turns out to be the Best Oreo Fudge imaginable, right? Achieving that professional look is easier than you think. My number one tip for a flawless slab of candy is letting that fudge rest after you pour it into the pan. Don’t be tempted to poke it after 30 minutes!
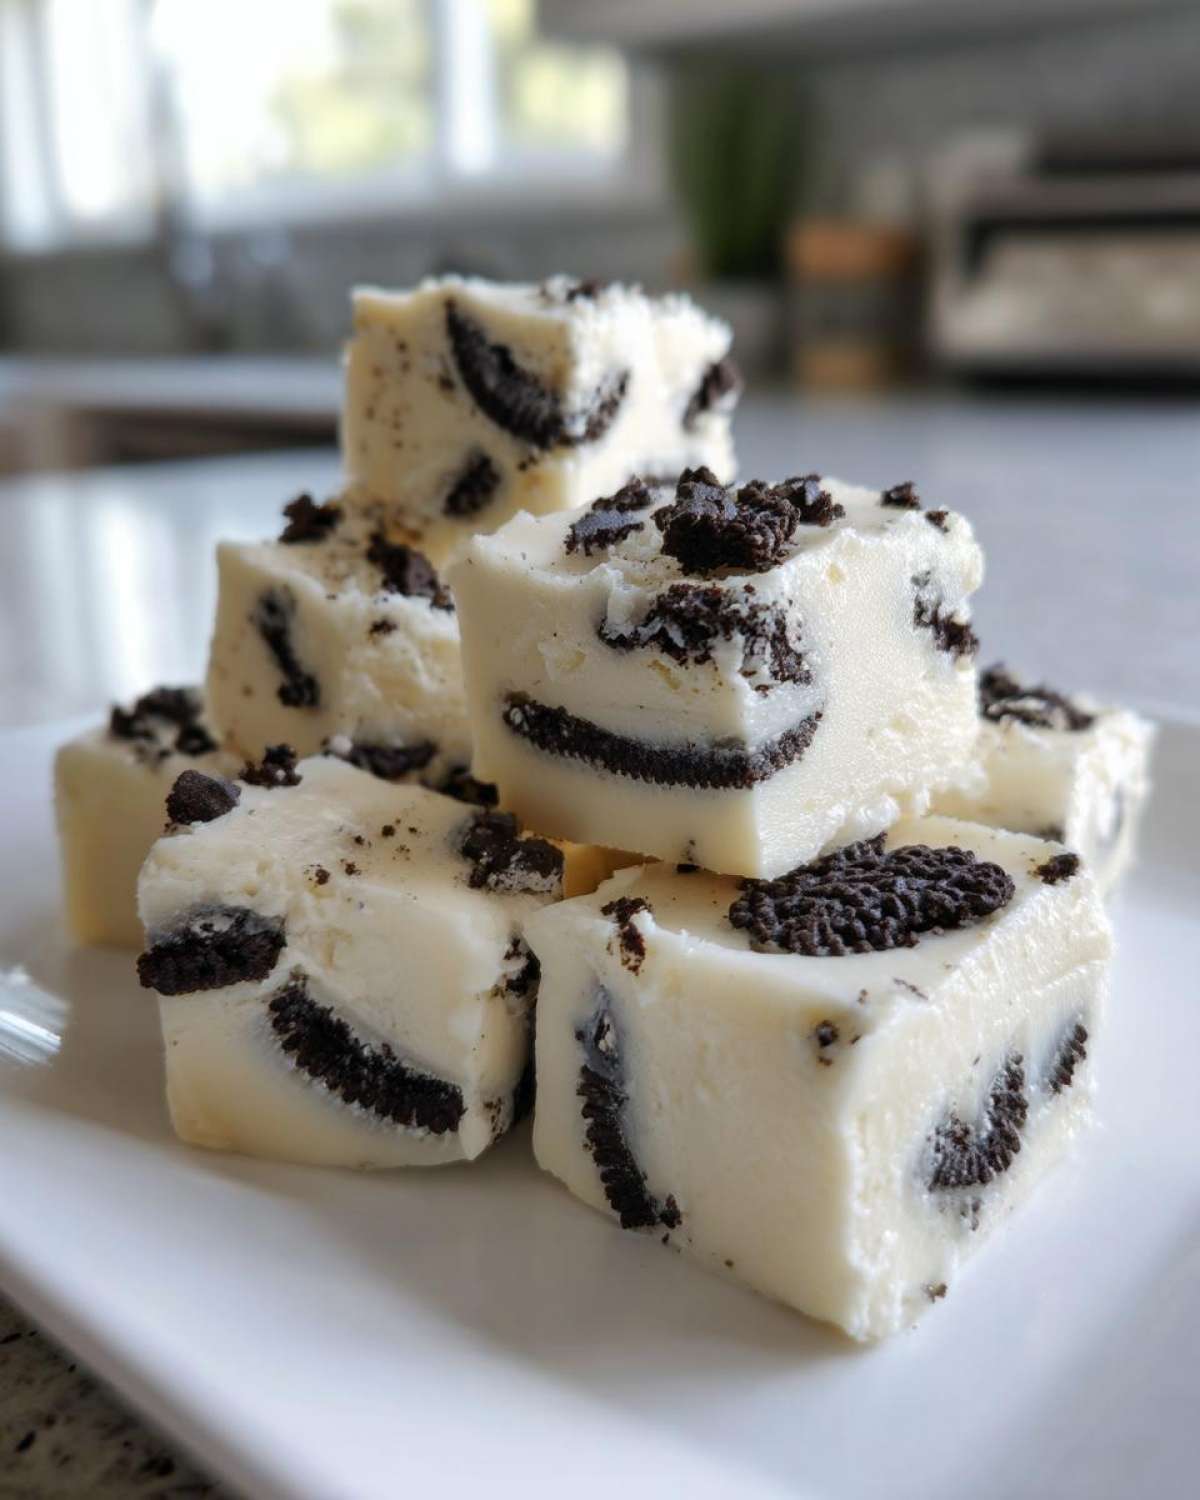
When it’s time to cut, use a large knife that you heated up under hot water and then wiped completely dry. That warm edge glides right through the chilled fudge without smearing the white chocolate layer or breaking up your beautiful cookie chunks. This little trick prevents any messiness when serving.
Also, if you are concerned about the fudge graining up later, make sure you are whisking vigorously but gently *only* after the five-minute rest period for the chocolate. Over-whisking can sometimes incorporate too much air or break down the structure prematurely. For more foolproof baking tips, you might enjoy checking out how I make my maple pecan pie bars—they require a bit more finesse but the payoff is worth it!
Making Oreo Fudge for Holiday Fudge Recipes and Gifting
Once your oreo fudge is perfectly chilled and firm, that’s when the real fun begins—packaging it up! This simple candy recipe is absolutely perfect for using in your *Holiday Fudge Recipes* spread, or just tucking into goodie bags for neighbors or teachers. It looks way more professional than the amount of effort you actually put in, which is the best kind of kitchen magic.
When I gift this, I usually cut the 8×8 slab into smaller, bite-sized squares—maybe 49 pieces instead of just 36. They look totally adorable when stacked in small clear cellophane bags. You can tie the bag shut with some festive red or green ribbon. It’s super cute and people never believe how quickly it came together!
I remember last year, my kid’s class had a sudden potluck for a movie day, and I had forgotten to sign up for anything. Panic! But I remembered I had a spare batch of this *White Chocolate Oreo Fudge* chilling in the fridge. I sliced it up, wrapped the squares individually, and they were gone before intermission ended! It’s honestly my secret weapon for *Easy Party Treats*.
If you are looking for other great no-bake snacks specifically for the holidays that come together just as easily, you have to check out my recipe for Reindeer Chow Mix. It travels well and is always a massive hit!
Storage and Reheating Instructions for Creamy Homemade Fudge
Okay, so you’ve managed not to eat the entire batch in one sitting—congratulations! Now we need to talk about saving some of this heavenly *Creamy Homemade Fudge* for later. The good news about this specific recipe is that because it’s so rich and high in sugar, it keeps extremely well, especially since we used the heat method on the condensed milk which helps stabilize everything.
You should store your cut pieces in a completely airtight container. I prefer glass containers layered with a sheet of wax paper between layers of fudge—that prevents them from sticking together if they get too cozy in there. Kept sealed up tight in the refrigerator, this oreo fudge stays fresh and perfectly delicious for up to a week. Honestly, it rarely lasts that long in my house, but it’s good to know we have the option!
Now, here’s a little nuance about serving temperature. While chilling makes it firm enough to slice, eating it straight out of the fridge means the texture is a little too solid. For that absolute best, velvety bite, I recommend pulling the fudge squares out onto the counter about 10 to 15 minutes before you plan on serving them. They just soften up slightly enough to feel perfectly decadent again.
If you’re looking for another simple recipe that stores well and is perfect for snacking throughout the week, you absolutely have to try my recipe for caramel corn. It’s addictive!
Frequently Asked Questions About This Simple Candy Recipe
I totally get it! When you find a *Simple Candy Recipe* that looks this easy, you start wondering about all the little ways things could go wrong or how you can customize it. I’ve fielded a ton of questions about this *Chocolate Cookie Fudge* over the years, so I rounded up the most common ones right here for you!
Can I make this Oreo Fudge without Sweetened Condensed Milk?
That’s the first question I always hear! Honestly, for this specific recipe, no, you really can’t swap out the sweetened condensed milk. This magical ingredient is doing a huge amount of work here; it provides the sugar, the moisture, and the necessary stabilization agent that allows the white chocolate to set up firmly without turning into a hard block.
If you try to use evaporated milk or regular milk, your mixture won’t set properly—it’ll end up runny or greasy because the sugar content isn’t high enough. This is definitely a *Sweetened Condensed Milk Fudge* recipe through and through. If you absolutely, positively can’t use it, you’d need a completely different recipe built on butter and powdered sugar, which is way more work!
How do I get my Oreo Fudge to set faster?
I know waiting two hours feels like an eternity when you’re staring at delicious, soft fudge! While skipping the initial chilling is a recipe for major messiness, you can speed up the cooling process safely. After you’ve smoothed the fudge in the pan, place it in the freezer for about 45 minutes.
This works great for getting it firm enough to slice if you’re in a real pinch for time. However, I still recommend letting it sit on the counter for about 15 minutes after it comes out of the freezer before you cut it. That ensures you still get that nice, soft, creamy pull rather than having to saw through a brittle slab. Remember, proper chilling is what develops that wonderful texture we’re bragging about!
If you’re looking for other quick, storable candies, my maple candied pecans are another fantastic option you can make ahead of time!
Estimated Nutritional Data for Oreo Dessert Recipes
Now, I always tell people that if you’re making something called oreo fudge, you probably aren’t reaching for it because you’re counting macros, right? Let’s be real! This is pure indulgence, a decadent treat designed for special moments or those intense sugar cravings, not an everyday snack.
But because I want you to have all the information you need—and because sometimes we need to fit treats into our overall plan—I calculated the estimated nutritional breakdown based on the ingredients listed and assuming you cut the batch into about 36 squares.
Remember, these numbers are completely estimates for the *Cookies and Cream Fudge* based on standard ingredient measurements. If you use gourmet Oreos or a different brand of white chocolate chips, the numbers will shift a little. This is just a good guideline for your *Easy Party Treats* planning!
Here is the rundown per square:
- Serving Size: 1 square
- Calories: 180
- Sugar: 20 grams
- Fat: 10 grams (with 6 grams saturated fat)
- Protein: 3 grams
- Carbohydrates: 22 grams
- Sodium: 85 mg
See? Even though it’s packed with goodness—mostly from the white chocolate and those sweet cookies—it’s a fantastic little burst of energy! If you’re looking for other fun, customizable snacks that you can easily track, you’ve got to try my pumpkin spice trail mix recipe. It lets you control the ratios of every ingredient!
Share Your Experience Making This Oreo Fudge
Well, that’s it! You’ve got the easiest, creamiest, absolute best oreo fudge recipe in your hands. Now, the really important part happens: I want to know how it turned out for YOU!
Did you manage to keep your hands off it until it was fully chilled? Did you try swapping the standard Oreos for the mint kind like I suggested? Don’t keep all that delicious evidence to yourself!
Please take a second to leave a star rating right down below if you enjoyed this *No Bake Fudge Recipe*. Even more excitingly, if you snap a picture of your perfectly cut squares or your festive gifting layout, please share it and tag me! I absolutely love seeing this fudge popping up in your kitchens.
If you have any lingering questions that I missed, drop those in the comments too—I always read and reply to every question about my favorite *Simple Candy Recipes*.
And hey, while you’re here browsing, if you want to learn a little more about who I am and why I love sharing these quick, reliable treats, you can check out my little slice of the internet right over here: About Us. Happy baking (or, uh, no-baking)!
PrintEasy No-Bake White Chocolate Oreo Fudge
Make this simple, creamy Oreo fudge using only a few ingredients. This no-bake recipe sets quickly and is perfect for quick treats or holiday gifts.
- Prep Time: 10 min
- Cook Time: 0 min
- Total Time: 2 hr 10 min
- Yield: About 36 pieces
- Category: Dessert
- Method: No-Bake
- Cuisine: American
- Diet: Vegetarian
Ingredients
- 14 ounces sweetened condensed milk
- 12 ounces white chocolate chips
- 1 teaspoon vanilla extract
- 2 cups crushed Oreo cookies (about 24 cookies)
Instructions
- Line an 8×8 inch baking pan with parchment paper, leaving an overhang on the sides for easy removal.
- Place the white chocolate chips in a medium, microwave-safe bowl.
- Heat the sweetened condensed milk in a small saucepan over medium heat until it just begins to simmer around the edges. Do not boil.
- Pour the hot condensed milk over the white chocolate chips. Let it sit undisturbed for 5 minutes to melt the chocolate.
- Add the vanilla extract. Whisk the mixture slowly until it is completely smooth and combined.
- Gently fold in the crushed Oreo cookies until they are evenly distributed throughout the fudge base.
- Pour the fudge mixture into the prepared pan and spread it evenly.
- Refrigerate for at least 2 hours, or until firm enough to cut.
- Use the parchment paper overhang to lift the fudge from the pan. Cut into 1-inch squares before serving.
Notes
- For a cleaner cut, chill the fudge for 30 minutes before slicing, then let it return to room temperature for 10 minutes before serving.
- You can use any flavor of Oreo cookie you prefer, such as mint or golden Oreos.
- Store leftovers in an airtight container in the refrigerator for up to one week.
Nutrition
- Serving Size: 1 square
- Calories: 180
- Sugar: 20
- Sodium: 85
- Fat: 10
- Saturated Fat: 6
- Unsaturated Fat: 4
- Trans Fat: 0
- Carbohydrates: 22
- Fiber: 0
- Protein: 3
- Cholesterol: 15