

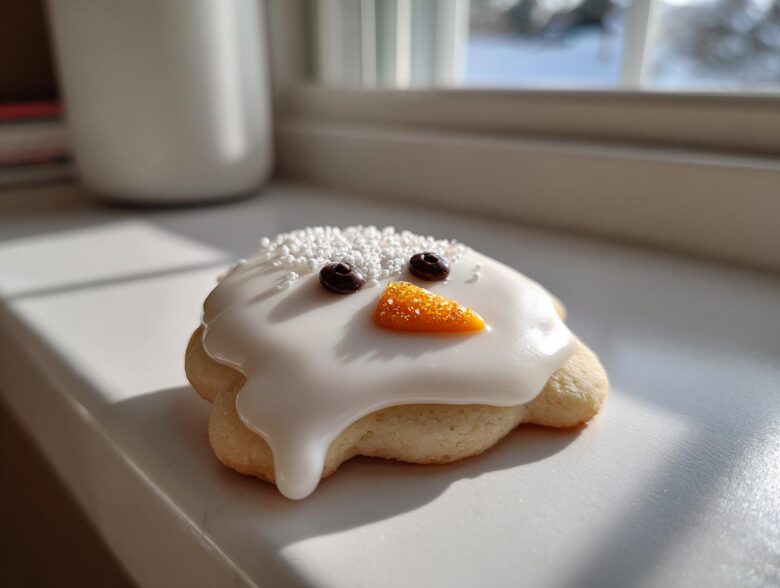
Oh my goodness, you have to try this recipe! When the holidays roll around, the kitchen gets slammed, right? But we need those fun, memorable moments that don’t involve spending three hours wrestling with complicated icing. That’s why I’m obsessed with these adorable **melted snowman cookies**! They are genuinely the easiest Christmas cookie recipe I’ve found for getting that big ‘wow’ factor with minimal fuss. They look like a little snowman took a tumble in the sun, and trust me, kids absolutely adore not just eating them, but making them, too. This method keeps the decorating super simple which makes it a winner for any family baking day.
We use my go-to sugar cookie base here, but the magic happens when we assemble the pieces instead of just icing flat circles. If you want to see how I put this whole fun concept together, you can check out a little bit about why I love simple baking right here.
Why You Will Love These Melted Snowman Cookies
Honestly, these cookies are the reason I love holiday baking so much! They’re such a blast to put together, and they scream cute without demanding professional piping skills. This is the recipe I grab when I need a guaranteed smile on everyone’s face. Trust me, you’re going to adore them because:
- They are seriously simple! If you’re looking for **Easy Kid Friendly Cookies**, this is it. The assembly is more like crafting than precise decorating.
- The look! Every single cookie looks unique because they’re ‘melting’ at different rates, which takes all the pressure off perfection. They truly stand out as **Fun Winter Treats**.
- We use a super reliable sugar cookie base that doesn’t spread much, meaning your snowman shapes hold up beautifully when baked. No sad, flat snowmen here!
- You can actually make the dough ahead of time and chill it—or, heck, use store-bought dough to save even more time on busy **Holiday Baking Ideas**.
- They are fantastic for cookie exchanges! Everyone smiles when they see a fresh batch of these **Cute Snowman Desserts** on the platter.
- The total time (if you skip the chill step) is ridiculously fast, making them perfect for a last-minute classroom treat or party favor.
If you want to compare this to some of my other favorite no-fuss holiday bakes, you can check out my take on Pumpkin Snickerdoodles!
Essential Ingredients for Perfect Melted Snowman Cookies
Okay, listen up, because the difference between a cute cookie and one that just gives up halfway through baking comes down to what you put in the bowl! Paying attention to ingredient specifics here—like making sure your butter is actually soft and not melted—really pays off when you want that high-quality look, even with such a simple treat. Don’t worry too much, though; this isn’t fussy baking, but these details help us achieve the best aesthetic for these **melted snowman cookies**.
Everything you need falls into two simple camps: what makes the cookie base delicious, and what brings our little melting guy to life!
Cookie Dough Components
This is the sturdy foundation! We need solid shapes that hold up to the marshmallow topping and the icing flow. If you look at my ingredient list, you’ll see we keep the leavening agents balanced so they puff up just right.
- 2 1/4 cups all-purpose flour
- 1 teaspoon baking soda
- 1/2 teaspoon baking powder
- 1 cup unsalted butter, softened (and trust me, ‘softened’ means you can gently press a finger into it, not shiny and melted!)
- 1 1/2 cups granulated sugar
- 1 large egg
- 1 teaspoon vanilla extract
- 1/4 teaspoon salt
Decorating Supplies for Melted Snowman Cookies
This is where the fun really starts! The right icing is key here. I highly recommend royal icing if you can manage it because it sets up firmer, which helps define the features before the cookie fully melts. But if you’re in a rush, any good quality white icing that dries hard works!
- 1 batch royal icing or store-bought white icing (This big white pool is what makes them look delightfully melted!)
- Small round chocolate candies (These are perfect for eyes and buttons—easy peasy.)
- Orange sprinkles or small candy pieces (A tiny sliver of an orange sprinkle makes the cutest carrot nose!)
- Pretzel pieces or thin licorice (These will be our arms, sticking out from the sides.)
- Mini marshmallows (These sit right on top of where the head would be, ready to look like they are getting soft under the heat!)
Step-by-Step Instructions for Easy Melted Snowman Cookies
This recipe is definitely user-friendly, but the trick to keeping our snowmen looking like they are actually melting—and not just spreading into blobs—is watching the dough temperature. If you skip chilling, you risk sad, wide cookies, so don’t skip that step if you can help it! I break down the process into three main parts: making the dough sturdy, careful shaping, and then the fun decorating bit.
If you’re looking to master the dough foundation first, check out my general guide on perfecting sugar cookie dough.
Preparing the Dough Base
We start just like any good sugar cookie recipe. First, grab one bowl and whisk together your dry items: the flour, baking soda, and baking powder. Set that aside for a minute!
In a bigger bowl, this is where the muscle comes in—cream that softened butter with the granulated sugar until it looks pale and fluffy. That creaming action traps air, which is super important for texture! Then, beat in your egg and vanilla until everything’s nicely incorporated.
Now, add the dry ingredients gradually to that wet mixture. Mix it slowly until it just comes together. Seriously, stop mixing the second you don’t see any more white streaks! If your dough feels sticky or soft at this point, wrap it up and tuck it into the fridge for at least 30 minutes. Chilling is your best defense against spread, which keeps our snowman shapes defined before the heat gets them!
Shaping and Baking Your Melted Snowman Cookies
Once chilled, you can get sculpting! Preheat your oven to 375°F (190°C) and get those baking sheets lined with parchment paper—this prevents sticking guaranteed. Roll your dough out to about a quarter-inch thick.
We need two shapes: a bigger circle for the body and a slightly smaller circle for the head. Here’s the essential part for the melted look: place the head circle so it’s slightly overlapping the top edge of the body circle. It should look like the head is slumped down onto the body.
Pop a mini marshmallow right on top of that head cookie—that’s the part that’s going to “melt” under the heat! Bake these babies for about 8 to 10 minutes until the edges look just barely golden. They need to cool completely on the tray before you even think about moving them!
Simple Cookie Decorating for Melted Snowman Cookies
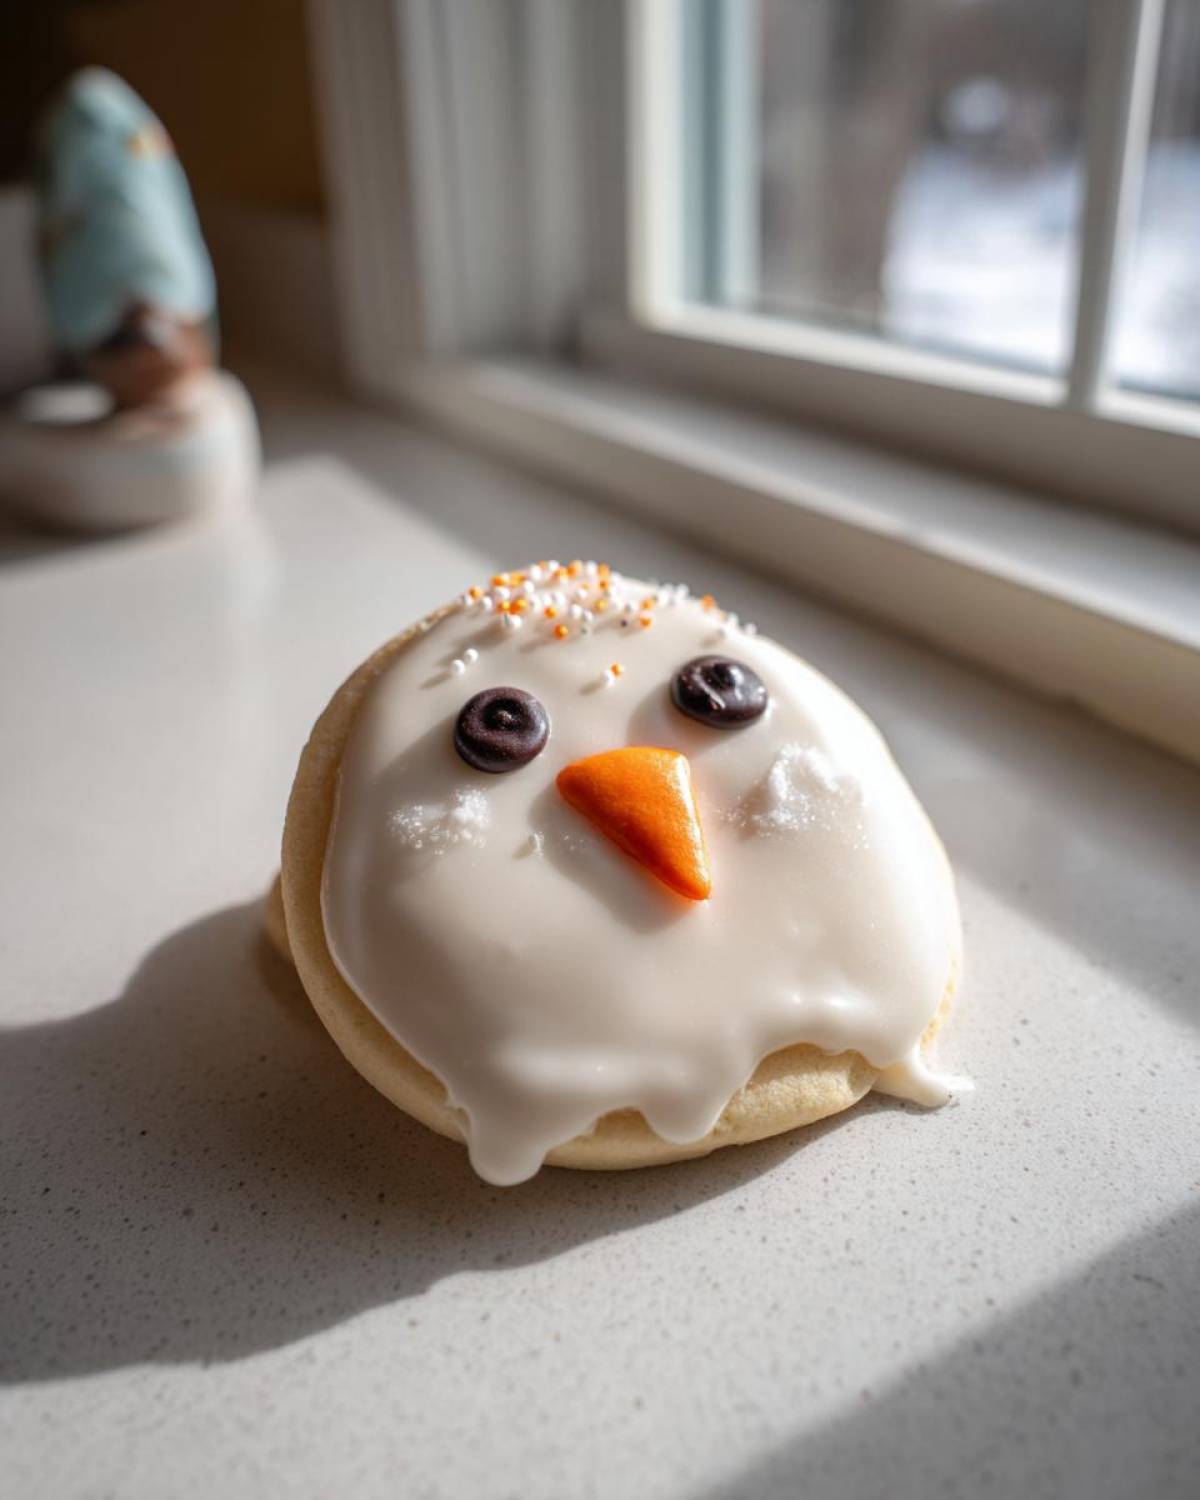
Once they are stone cold, it’s decoration time! Slather that white icing over the whole cookie base. Don’t try to make your icing smooth or perfect; let it droop a little over the edges—that enhances the ‘melted’ effect dramatically. This is where you can really play around!
Before that icing sets hard, quickly place your small chocolate candies for the eyes and buttons. Then, tuck that orange sprinkle in for the nose. For the arms, gently slide two small pretzel pieces or licorice strips into the sides of the body cookie. If you want a super fluid look, take a toothpick and gently drag some of the wet icing outwards from the center mass. This small move really sells the idea that poor little guy is dripping away!
Tips for Perfect Melted Snowman Cookies Every Time
Look, I totally get it—sometimes life is crazy, and you just need a festive treat fast! That’s why I always stress that these are flexible. The goal here is fun and cute, not winning a professional baking competition. Whether you’re relying on my favorite tried-and-true sugar cookie dough or taking a shortcut, these little tips will make sure your final batch of **melted snowman cookies** looks exactly like you planned.
Getting the assembly right is key to the look, and I’ve got a couple of insider tricks gleaned from years of baking and experimenting with my messy little helpers! Speaking of sweet treats, if you ever need a donut fix, you might enjoy my recipe for Cinnamon Sugar Donut Holes.
Quick Fixes and Dough Variations
If you woke up late and suddenly decided you *must* have these cookies for an afternoon party, don’t panic! You can absolutely use store-bought sugar cookie dough straight from the tube. It usually spreads a tiny bit more than my from-scratch version, so make sure those cutouts are chilled on the pan for about 15 minutes before baking. That extra chill time buys you precious shape integrity!
Now, what if someone in your house absolutely insists on peanut butter? Yes, you can swing it! If you want to play with a peanut butter version, swap out about half a cup of the plain flour with a packet of peanut butter cookie mix, or just use your favorite reliable peanut butter cookie recipe as the base dough. The decoration still works perfectly—the peanut butter cookie just adds a nice salty-sweet depth!
Achieving the Best ‘Melt’ Look
This is all about the white icing, my friends. You want that visual drama! When you’re applying the white icing, don’t smother the cookie perfectly. Think of it like the snowman is dripping down onto the warm ground. A thin layer that flows naturally over the edges of the cookie section works wonders.
When you start adding the features, placement matters hugely for maximizing that cute, melting vibe. If you’re doing **Simple Cookie Decorating** and find the icing flowing too fast, grab a toothpick. I use mine to gently guide the icing just a little bit, encouraging it to pull outward a touch, especially around the edges of the head blob. Also, don’t push those pretzel arms in too deep! They should look like they are just lazily sticking out of the melting puddle. A little bit of droop on the chocolate eyes really completes the tired, melted look!
Storage and Keeping Your Melted Snowman Cookies Fresh
Once you’ve finished the fun part—the decorating—you want those guys to last, right? Since we’re using icing, keeping them fresh is pretty easy! Store your finished **melted snowman cookies** at room temperature. Don’t even think about the fridge; cold air just makes sugar cookies hard and the icing sweaty. Just pop them into a snug, airtight container.
I usually layer them between sheets of parchment paper so they don’t stick together in one big snowman pile! They honestly stay perfect for about four or five days this way, giving you plenty of time to enjoy them or bring them to a party. If you want to read about some other great make-ahead holiday treats, check out my Pumpkin Pie Overnight Oats recipe!
Serving Suggestions for These Cute Snowman Desserts
So, you’ve got your tray of adorable, partially melted snowmen, and now it’s time for the main event—serving them up! These cookies are just screaming for a cozy, festive spread. Because they look so wonderfully themed, they instantly become the centerpiece of any dessert table, making them wonderful **Themed Holiday Sweets**.
The best flavor pairing for these sweet sugar cookies, ironically, is something warm and a little spicy to contrast all that sugar! I always serve these with mugs of something steaming. They aren’t meant to be served warm, of course—we want that icing set! So, grab your hottest cozy drink!
For a great holiday spread or **Winter Party Food** table, try setting them up next to some chocolate truffles or clusters of cranberries. But really, you can’t beat pairing them with a great cup of hot cider. If you need a recipe for that, you simply have to try my Spiced Hot Apple Cider Recipe. The cinnamon and clove aroma just completes the whole winter vibe perfectly!
Frequently Asked Questions About Melted Snowman Cookies
I always get flooded with questions when this recipe goes live because who doesn’t want a cute, slightly silly cookie? Having tried just about every trick in the book, I’m happy to share my collected wisdom for these fun treats. Don’t worry if you’re worried about the details; these cookies are super forgiving for all levels of **Holiday Baking Ideas**!
Can I make these melted snowman cookies ahead of time?
Yes, you absolutely can, but here’s my tip: bake the cookies entirely during the week, but wait to decorate them until about a day before you plan to serve them! The bare sugar cookies will keep perfectly well in an airtight container. If you ice them too far in advance—say, more than 48 hours—the icing can sometimes get a little dull, or the marshmallow might start getting weird. Decorating them the day before or the morning of your event keeps everything looking sparkly and fresh!
What is the best icing for decorating Christmas cookies like these?
Hands down, royal icing is my favorite for this specific cookie. Why? Because you lose the definition between the head and the body if the icing is too runny! A good batch of royal icing (or a thick, store-bought piping icing designed for cookies) lets you control the ‘melt’ just right. It sets hard, so when you place those little eyes and that pretzel arm, they stick securely and don’t slide off. A thin glaze is too much like water here; we need something that sets with just a bit of body!
Are there good Christmas Cookie Recipes that skip chilling the dough?
Oh, the eternal dough dilemma! If you are in a massive rush and absolutely must skip the 30-minute chill time, you need to compensate because your cookies will spread right into little snow puddles. My main advice is to chill the cut-out shapes on the baking sheet in the freezer for a quick 10 or 15 minutes instead.
Alternatively, and this is my real secret if I’m short on time, just use high-quality store-bought sugar cookie dough! That pre-made dough is usually already formulated not to spread as much, which makes it a lifesaver for **Decorating Christmas Cookies** when time is of the essence. The flavor might be slightly different, but these cookies are more about the cute assembly than deep flavor complexity, so it’s a fantastic substitution for those busy days!
For more general baking advice from my kitchen, feel free to browse my main Baking Blog archive!
Estimated Nutritional Information for Melted Snowman Cookies
Now, let’s quickly talk numbers. I know we aren’t baking these **melted snowman cookies** for their health factor—they are pure holiday fun! But for those of you keeping track, I pulled the estimated info straight out of my standard ingredient calculations. Please remember that since we are decorating with candies and using varying sizes of pretzels, these numbers are definitely just friendly estimates for one cookie, based on the standard formulation for these **Christmas Cookie Recipes**.
If you use peanut butter cookie dough, or heavier icing, those figures will obviously change! We always try to be upfront about our estimates here; for full details on ingredient sourcing and liability, be sure to check out the site’s main disclaimer page.
- Serving Size: 1 cookie
- Calories: Around 180
- Fat: 9 grams (About 5 grams saturated)
- Carbohydrates: 24 grams
- Protein: 2 grams
- Sugar: 15 grams (Yes, it is a holiday treat!)
- Sodium: 110 mg
See? Not terrible for a festive cookie! They are relatively low in overall serving size, which means you can theoretically have a couple without feeling too guilty. Focus on the joy these **Fun Winter Treats** bring, not the macros!
Share Your Festive Cookie Creations
And there you have it! That’s my tried-and-true method for creating the cutest, most smile-inducing **melted snowman cookies** you’ll ever see without needing a culinary degree! Baking for the holidays is always better when we make something silly and fun that everyone can participate in, and these cookies are the perfect recipe for family laughter.
I truly, truly hope you have as much fun making these melting buddies as I do every single year. The way the kids look at the pretzel arms sticking out of the sweet, melting blob—it’s just pure holiday magic! Once you’ve finished batch number one and have a cooling rack full of adorable treats, please don’t be shy!
I absolutely live to see your successes! If you made these with your little helpers, or if you managed to pull off the pretzel arms perfectly, let me know! Leave a comment down below, give this recipe a rating—five stars if you loved them!—and tell me your favorite part of the decorating process. Did you use a fun colored candy for the eyes? Did the marshmallow melt just perfectly?
Send me your pictures or tag me on social media! I love seeing my recipes out in the real world, especially when they involve such great-looking **Themed Holiday Sweets**. If you have any lingering questions, or if you just want to say hi after baking, you can always reach out via my Contact Page. Happy baking, everyone, and enjoy watching those little snowmen take a delightful, sticky melt!
PrintEasy Melted Snowman Sugar Cookies

Make cute, seasonal cookies that look like snowmen melting in the sun. This recipe uses simple sugar cookies and easy decorating steps for family fun.
- Prep Time: 25 min
- Cook Time: 10 min
- Total Time: 35 min
- Yield: 2 dozen cookies
- Category: Dessert
- Method: Baking
- Cuisine: American
- Diet: Vegetarian
Ingredients
- 2 1/4 cups all-purpose flour
- 1 teaspoon baking soda
- 1/2 teaspoon baking powder
- 1 cup unsalted butter, softened
- 1 1/2 cups granulated sugar
- 1 large egg
- 1 teaspoon vanilla extract
- 1/4 teaspoon salt
- 1 batch royal icing or store-bought white icing
- Small round chocolate candies (for eyes/buttons)
- Orange sprinkles or small candy pieces (for nose)
- Pretzel pieces or thin licorice (for arms)
- Mini marshmallows (for melting effect)
Instructions
- Whisk together flour, baking soda, and baking powder in a bowl. Set aside.
- In a separate large bowl, cream together the softened butter and sugar until light and fluffy.
- Beat in the egg and vanilla extract until combined.
- Gradually add the dry ingredients to the wet ingredients, mixing until just combined. Do not overmix.
- Chill the dough for at least 30 minutes if it feels too soft.
- Preheat your oven to 375°F (190°C). Line baking sheets with parchment paper.
- Roll out the dough to about 1/4 inch thickness. Cut out large circles for the body and smaller circles for the head.
- Place the head slightly overlapping the body circle to suggest a melting effect. Place the mini marshmallow on top of the head circle.
- Bake for 8 to 10 minutes, or until the edges are lightly golden. Let cookies cool completely on the baking sheet before moving.
- Once cool, use the white icing to cover the cookie base, letting the icing flow slightly over the edges to enhance the melting look.
- Before the icing sets, place the chocolate candies for eyes and buttons. Place the orange piece for the nose.
- Insert two small pretzel pieces or licorice strips into the sides of the body for arms.
- Let the icing dry completely before serving or storing.
Notes
- For a quicker version, use store-bought sugar cookie dough and skip the chilling step.
- If you want a peanut butter version, substitute 1/2 cup of the flour with peanut butter cookie mix or use a standard peanut butter cookie recipe base.
- Use a toothpick to gently shape the icing for a more fluid, melting appearance.
Nutrition
- Serving Size: 1 cookie
- Calories: 180
- Sugar: 15
- Sodium: 110
- Fat: 9
- Saturated Fat: 5
- Unsaturated Fat: 4
- Trans Fat: 0
- Carbohydrates: 24
- Fiber: 1
- Protein: 2
- Cholesterol: 25