Day-by-Day Guide to Creating Your Sourdough Starter From Scratch
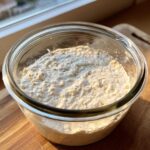
Follow this simple, step-by-step timeline to cultivate your own active sourdough starter using only flour and water.
- Prep Time: 5 min
- Cook Time: 0 min
- Total Time: 7 days (for initial activation)
- Yield: 1 active starter culture
- Category: Baking Basics
- Method: Wild Yeast Cultivation
- Cuisine: General
- Diet: Vegan
Ingredients
Scale
- 100g Whole Wheat Flour or Rye Flour
- 100g Unbleached All-Purpose Flour
- 100g Unchlorinated Water (room temperature)
Instructions
- Day 1: Mix 50g whole wheat/rye flour with 50g water in a clean jar. Cover loosely and let sit at room temperature (68-75°F) for 24 hours.
- Day 2: You may see little activity. Discard half the mixture. Feed the remaining starter with 50g all-purpose flour and 50g water. Mix well, cover loosely, and wait 24 hours.
- Day 3: You should see some bubbles. Discard half. Feed with 50g all-purpose flour and 50g water. Wait 24 hours.
- Day 4: Activity might slow down. Discard half. Feed with 50g all-purpose flour and 50g water. Wait 24 hours.
- Day 5: You should see more consistent bubbles. Discard half. Feed with 50g all-purpose flour and 50g water. Wait 12 hours.
- Day 6: Feed again 12 hours later using the same 1:1:1 ratio (discard half, feed 50g flour, 50g water). Look for doubling in size within 4-8 hours after feeding.
- Day 7+: Continue the 1:1:1 feeding schedule every 12 or 24 hours until the starter consistently doubles in volume a few hours after feeding. This means your wild yeast cultivation is active.
Notes
- Use a clear jar so you can track the rise and fall of the starter.
- If your kitchen is cold, place the jar in a slightly warmer spot, like inside an oven with only the light on.
- A mature, active starter should float when a small spoonful is dropped into a glass of water.
- Maintain your starter by feeding it daily when kept at room temperature.
Nutrition
- Serving Size: 100g culture
- Calories: 180
- Sugar: 0.5
- Sodium: 1
- Fat: 0.5
- Saturated Fat: 0.1
- Unsaturated Fat: 0.4
- Trans Fat: 0
- Carbohydrates: 37
- Fiber: 2
- Protein: 5
- Cholesterol: 0
Find it online: https://kitchnkudos.com/sourdough-starter-guide-day-by-day/