One-Pot Creamy Chicken and Broccoli Pasta
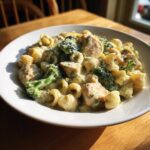
Make this simple, satisfying pasta dish featuring tender chicken, bright broccoli, and a rich garlic Parmesan cream sauce, all cooked in one pot for easy cleanup.
- Prep Time: 10 min
- Cook Time: 20 min
- Total Time: 30 min
- Yield: 4 servings
- Category: Dinner
- Method: Stovetop
- Cuisine: American
- Diet: Vegetarian
Ingredients
Scale
- 1 pound boneless, skinless chicken breasts, cut into 1-inch pieces
- 1 tablespoon olive oil
- 1 teaspoon salt, divided
- 1/2 teaspoon black pepper, divided
- 4 cups chicken broth
- 12 ounces dried pasta (penne or rotini work well)
- 2 cups fresh broccoli florets
- 3 cloves garlic, minced
- 1 cup heavy cream
- 1/2 cup grated Parmesan cheese, plus more for serving
- 1/4 teaspoon red pepper flakes (optional)
Instructions
- Season the chicken pieces with 1/2 teaspoon salt and 1/4 teaspoon pepper.
- Heat the olive oil in a large pot or Dutch oven over medium-high heat. Add the chicken and cook until browned on all sides and nearly cooked through, about 5 to 7 minutes. Remove the chicken and set it aside.
- Add the chicken broth, remaining 1/2 teaspoon salt, and remaining 1/4 teaspoon pepper to the pot. Bring the liquid to a boil.
- Add the dried pasta to the boiling broth. Cook according to package directions until al dente, stirring occasionally to prevent sticking.
- Stir in the broccoli florets and minced garlic during the last 3 minutes of the pasta cooking time.
- Reduce the heat to low. Stir in the heavy cream and grated Parmesan cheese until the sauce is smooth and heated through. Do not let the sauce boil after adding the cream.
- Return the cooked chicken to the pot. Stir in red pepper flakes if you are using them. Cook for 1 minute until the chicken is fully heated.
- Serve immediately with extra Parmesan cheese on top.
Notes
- To keep the sauce creamy, make sure the heat is low when you add the cream and cheese. Stir constantly until combined.
- You can steam the broccoli separately and add it in the last step if you prefer it softer or brighter green.
- Use rotisserie chicken if you want to skip cooking the raw chicken. Add it in Step 6.
Nutrition
- Serving Size: 1 serving
- Calories: 650
- Sugar: 5
- Sodium: 750
- Fat: 35
- Saturated Fat: 18
- Unsaturated Fat: 12
- Trans Fat: 1
- Carbohydrates: 45
- Fiber: 3
- Protein: 40
- Cholesterol: 140